PIA S5 Proxy, the world’s leading commercial Socks5 residential proxy service provider, offers a complete solution by seamlessly combining it with specially designed anti-detection fingerprint browsers such as ClonBrowser. This combination not only helps users hide their real IP addresses, but also effectively bypasses all kinds of network detection and anti-cheat mechanisms, allowing them to securely and anonymously conduct multi-account management and global business operations.
Product Features
Global Coverage of Residential IP: PIA S5 Proxy has more than 350 million residential IP resources from 200+ countries and regions around the world, and users can choose specific country or city IPs according to their needs.
Highly anonymous Socks5 protocol: PIA uses the Socks5 protocol, which is able to provide higher security and anonymity. By hiding the real IP address through a proxy, users can bypass all kinds of network monitoring and detection mechanisms, ensuring that their tasks will not be interfered with.
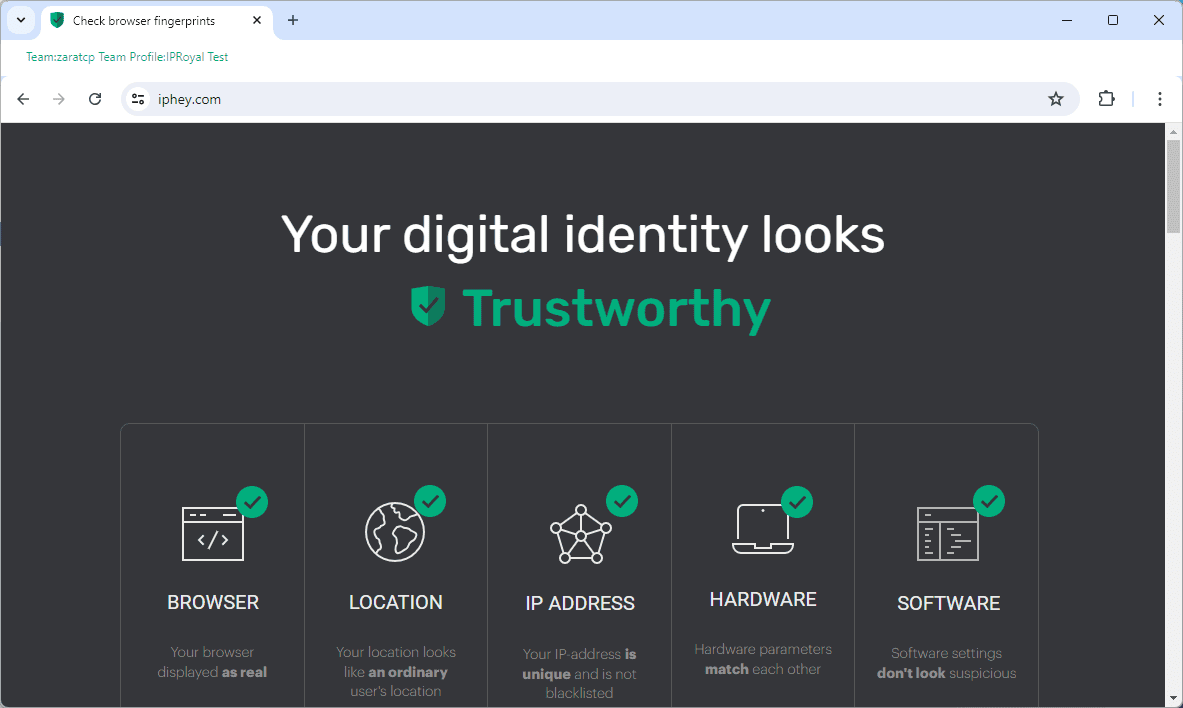
Anti-Detection and Security: PIA S5 Proxy not only supports basic anonymity, but also provides users with powerful anti-detection features, especially when used in conjunction with anti-detection fingerprinting browsers, such as ClonBrowser, to effectively deal with complex anti-cheat and anti-crawler mechanisms.
Package Type Introduction
1.Socks5 Proxy – Per IP Charging
– Up to 85% off!
– Get an additional 1,000 high-performance IPs!
– Only $0.045 per IP!
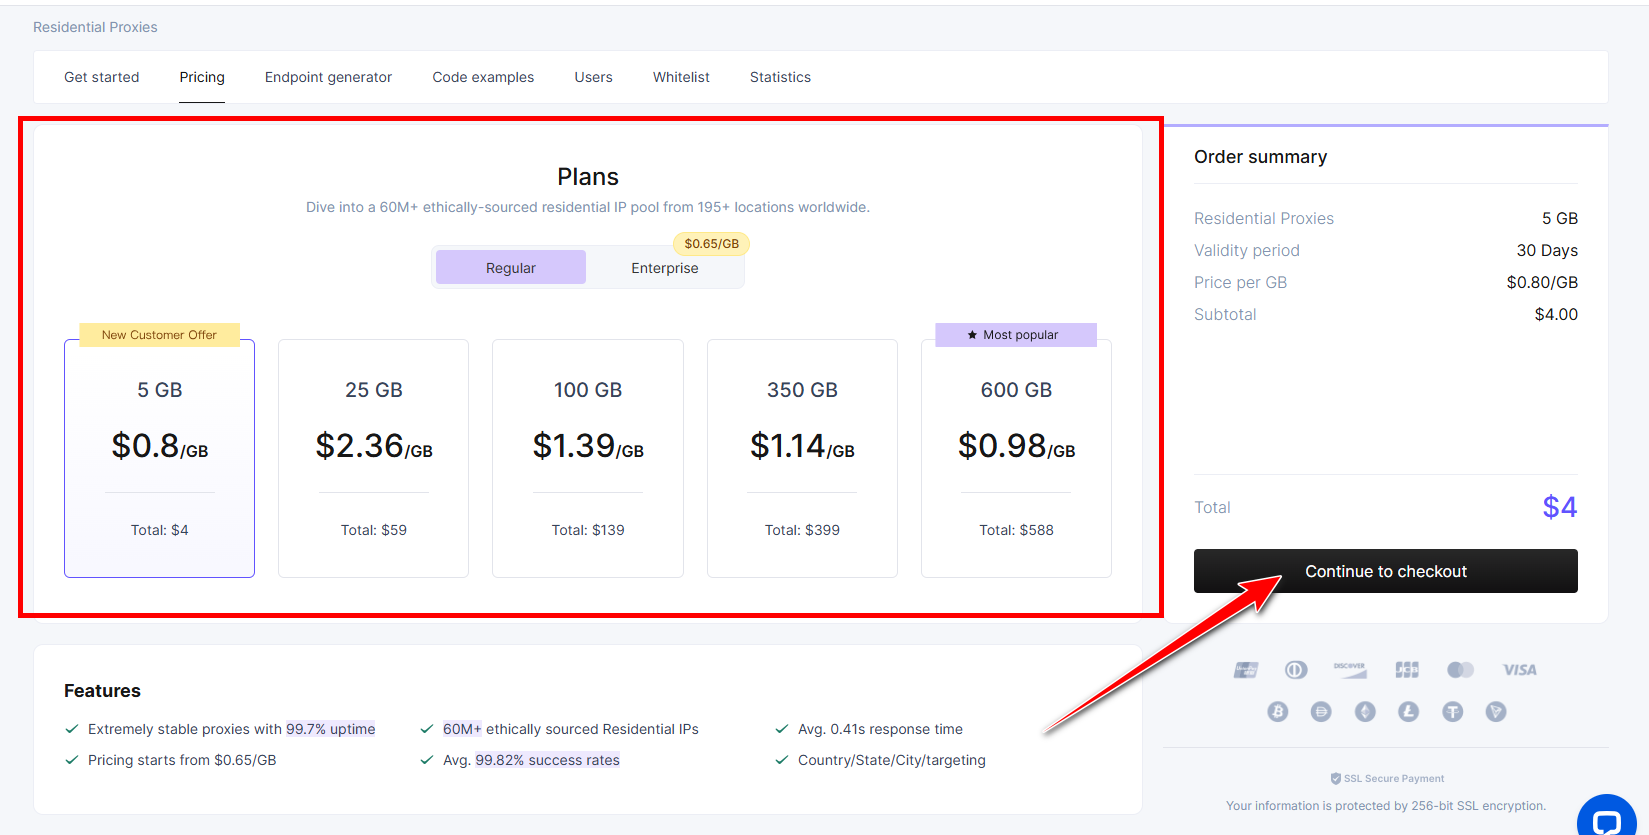
2.New Online Traffic Plan – Charge by GB
– 1000GB at $0.85/GB
– 3000GB Best Price $0.77/GB (limited time offer, grab it now!)
How to Use PIA S5 Proxy in ClonBrowser
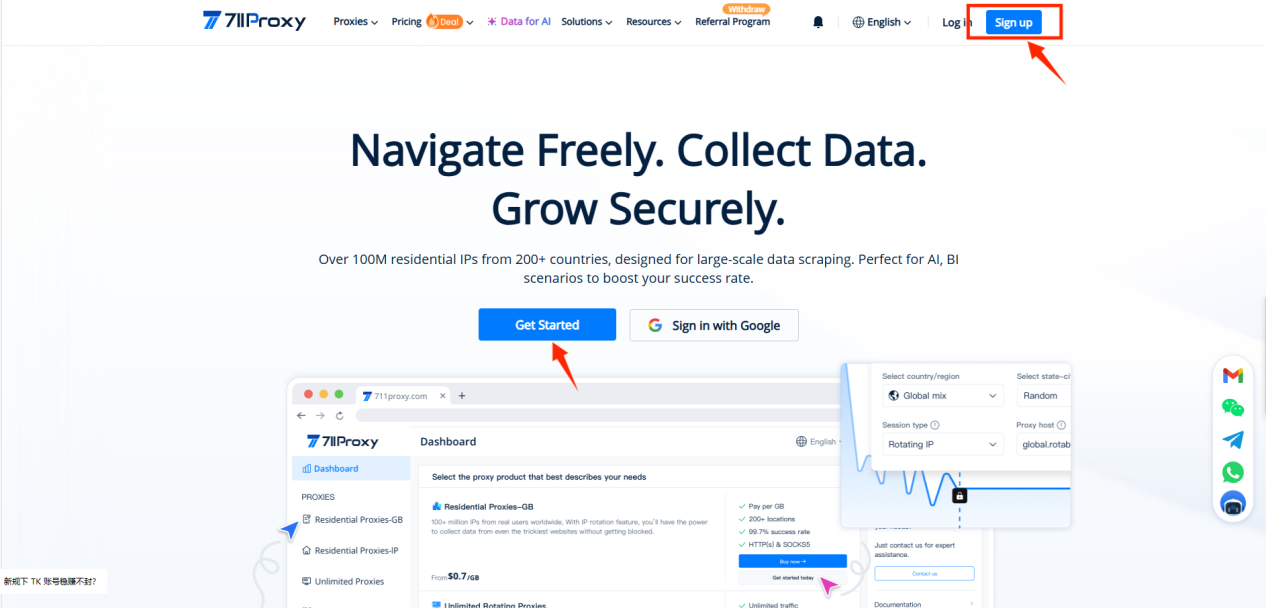
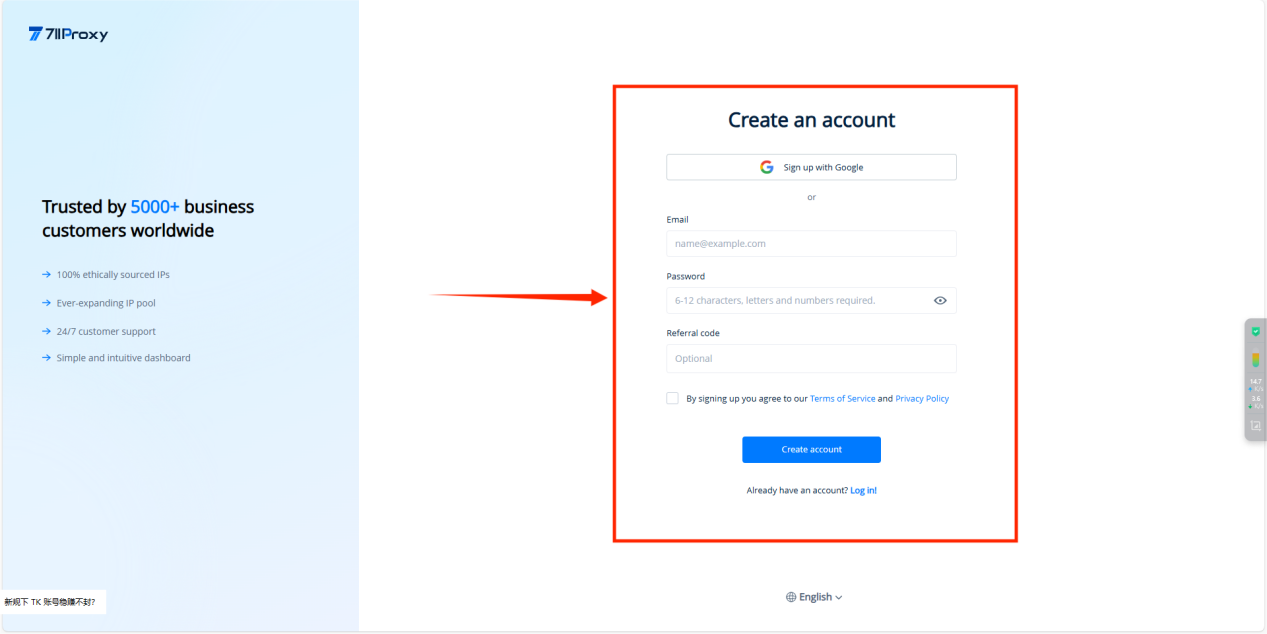
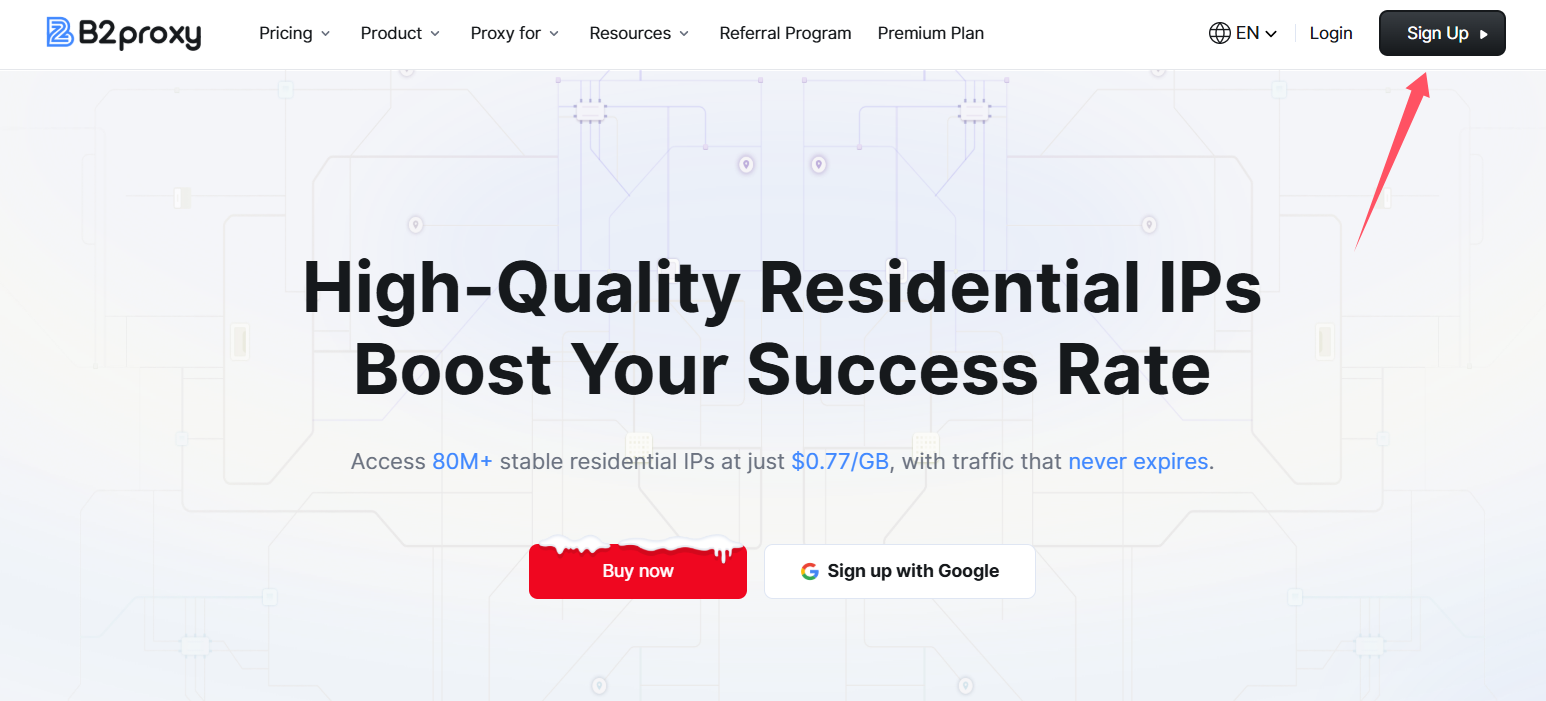
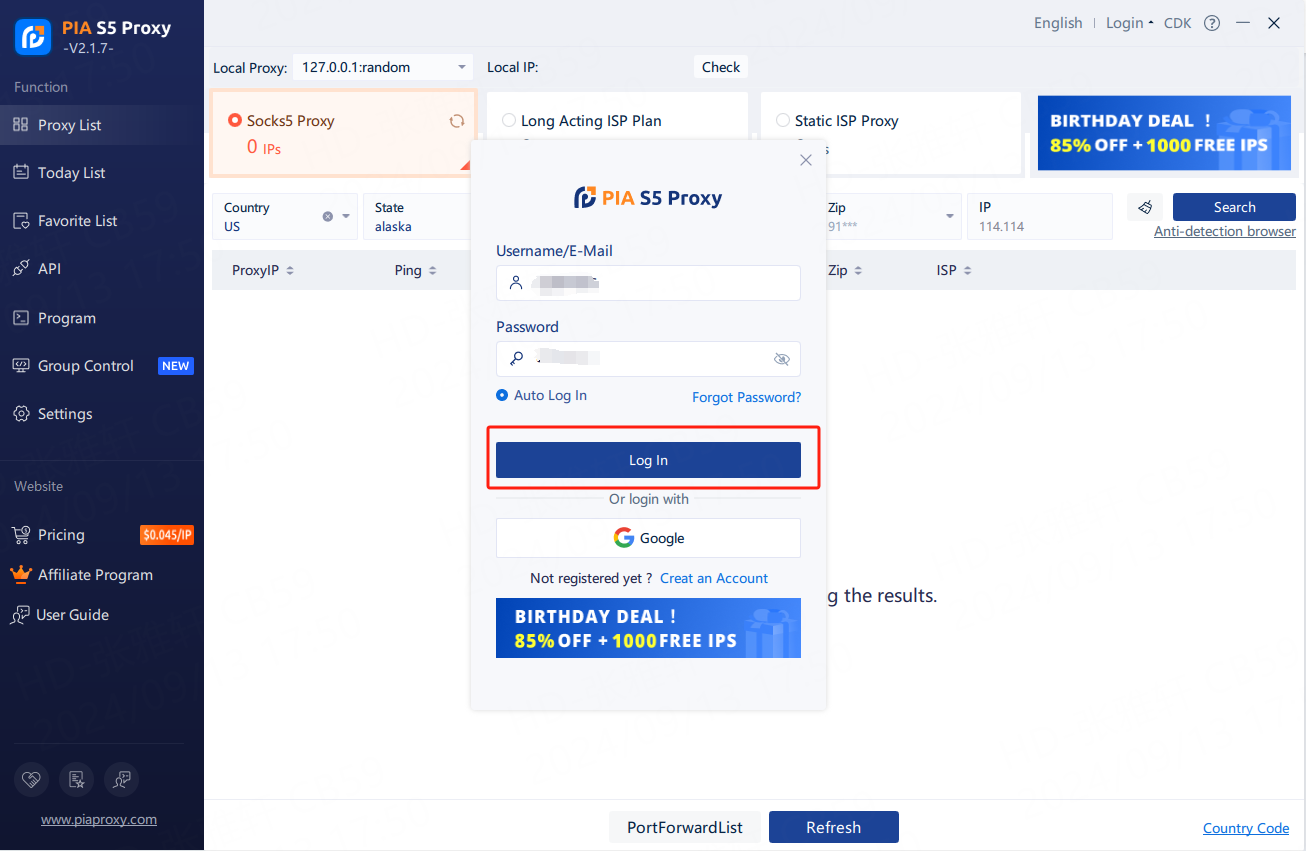
Step 1:Installation and Login
1.1 Download and install the client[http://www.piaproxy.com/?co=forum&ck=?13]

1.2 Successful installation and login [no special symbols in the password].
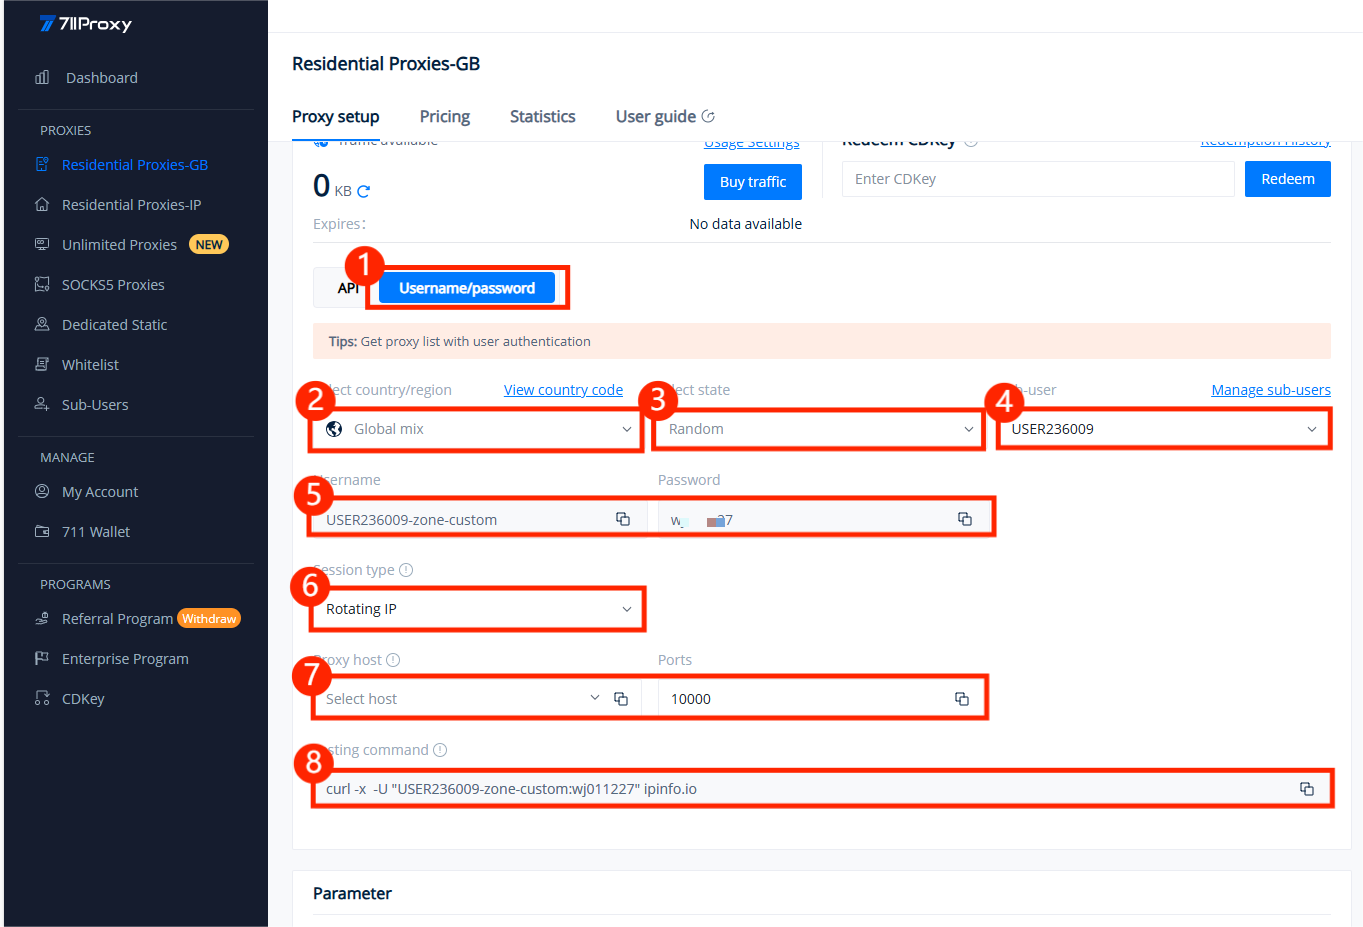
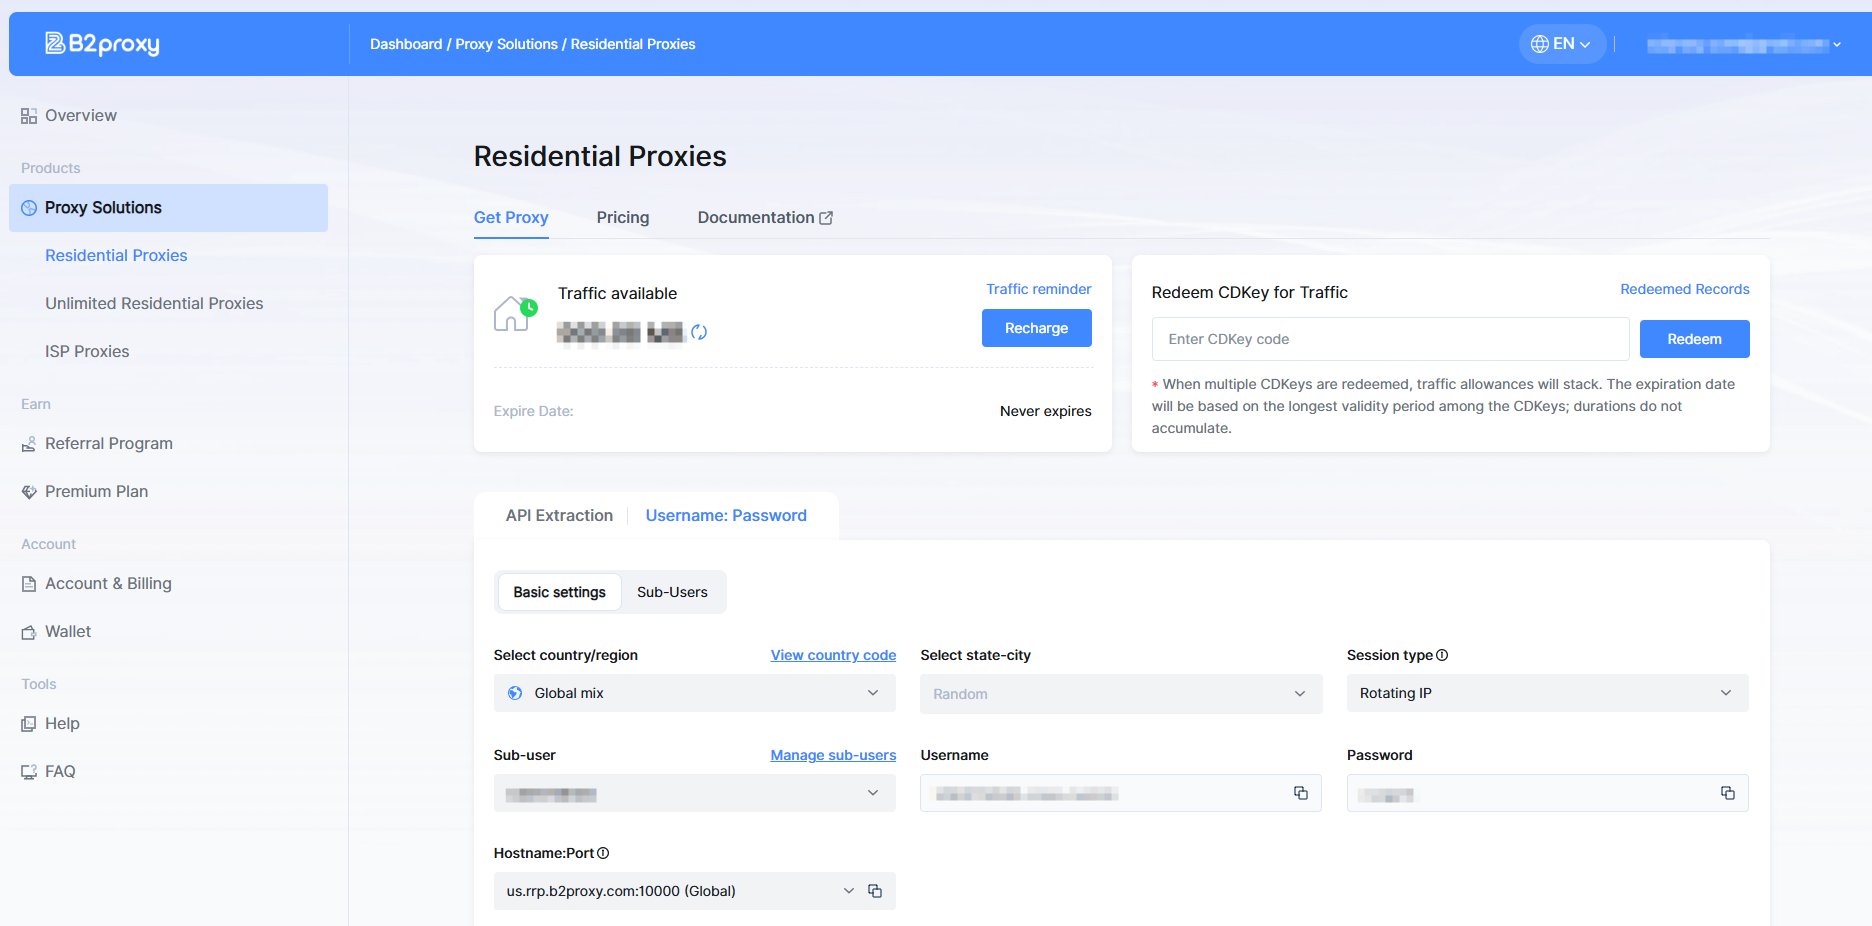
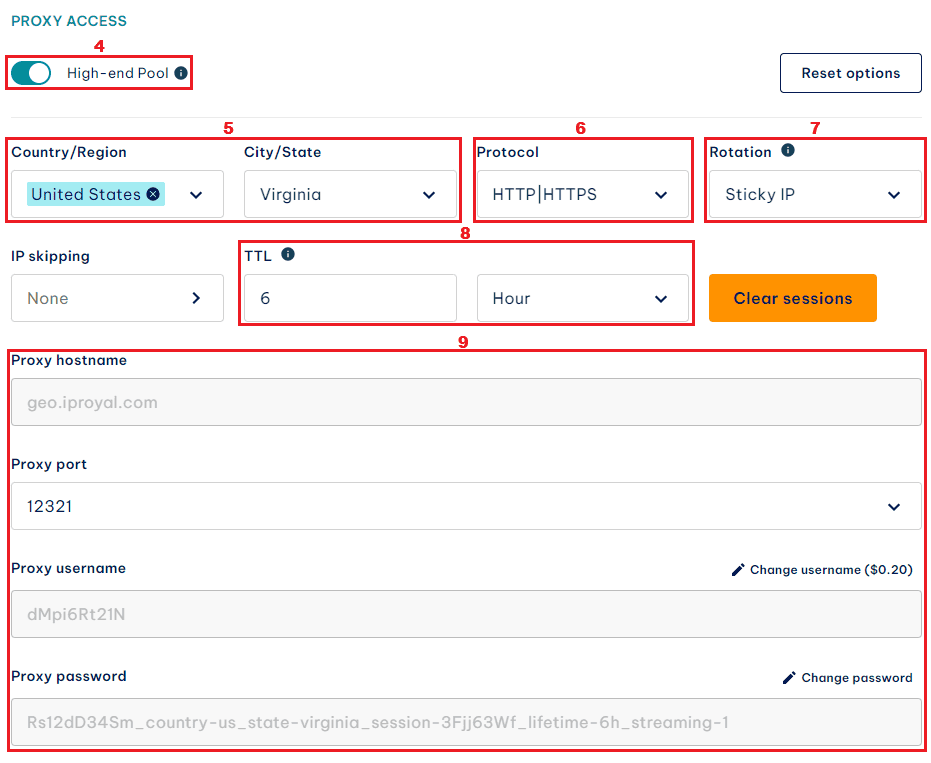
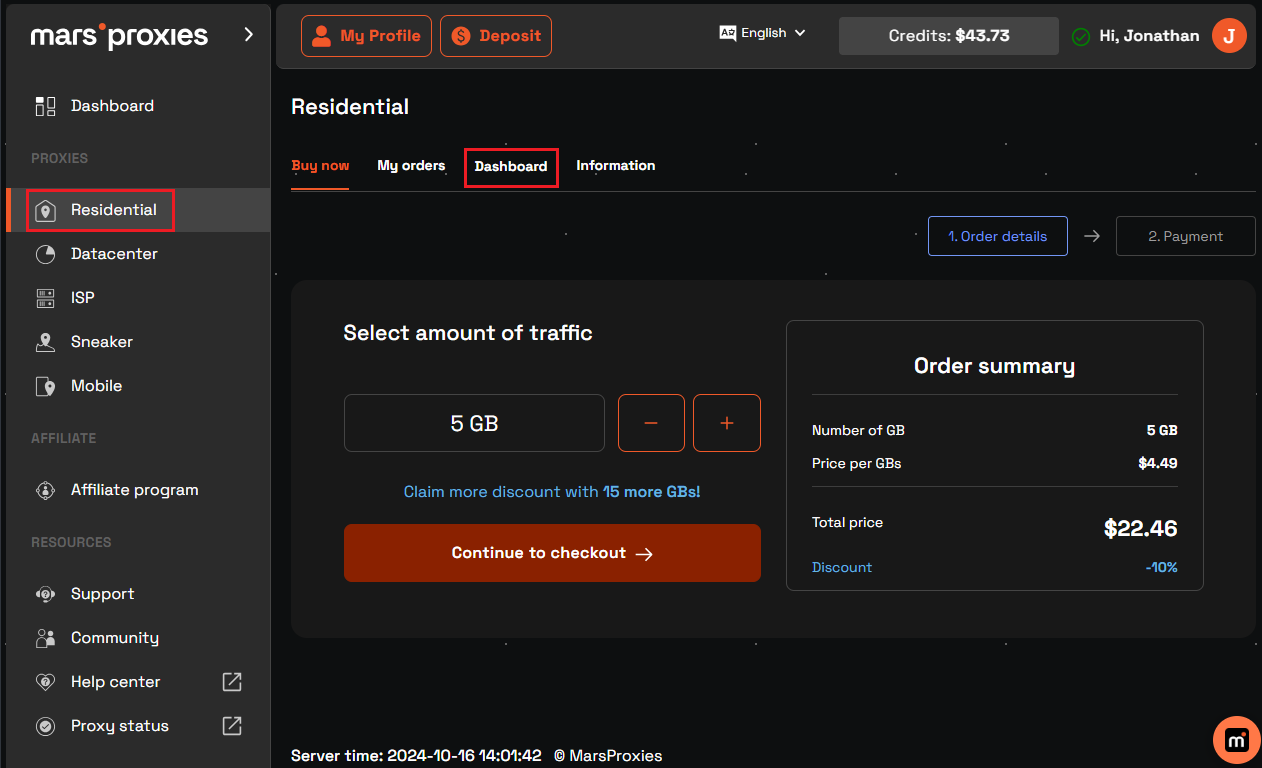
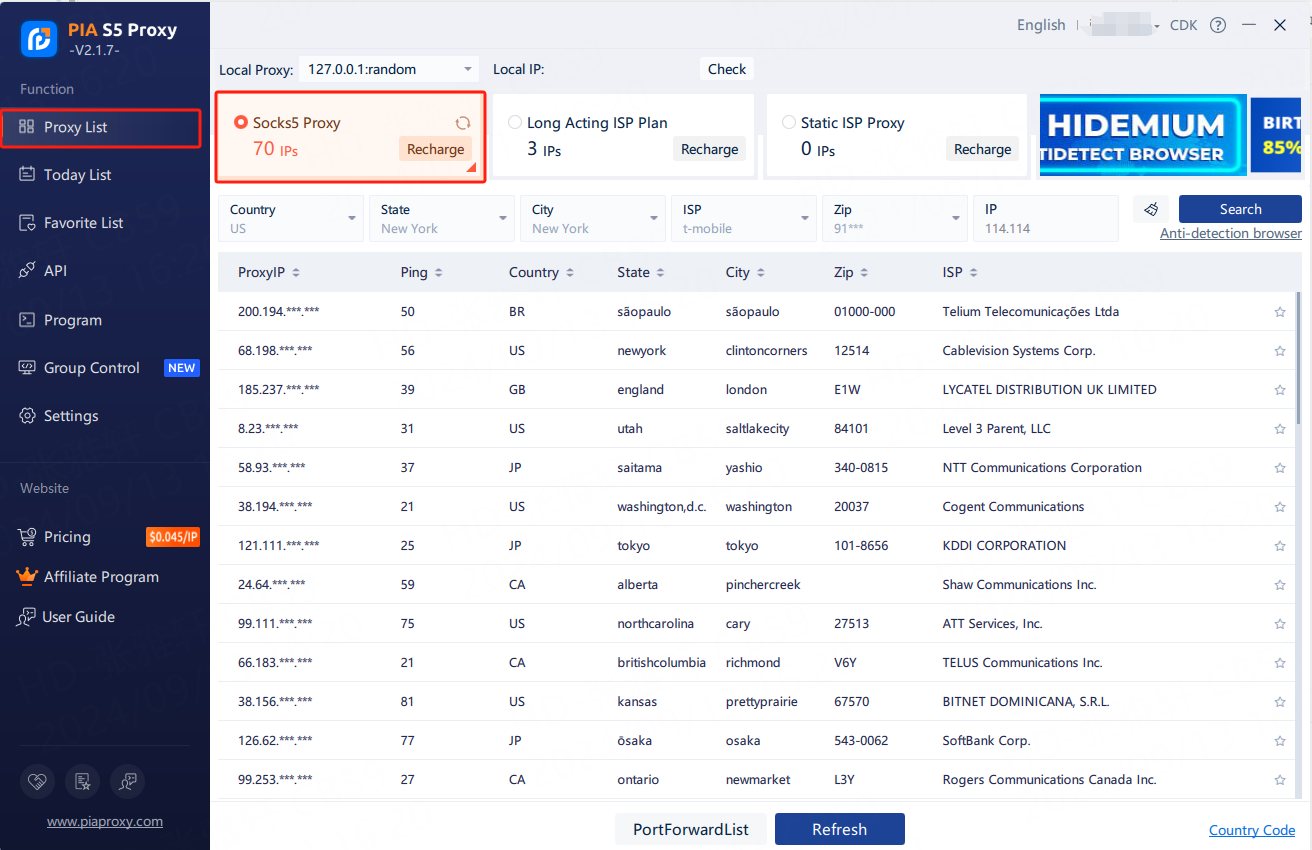
Step 2: Proxy extraction
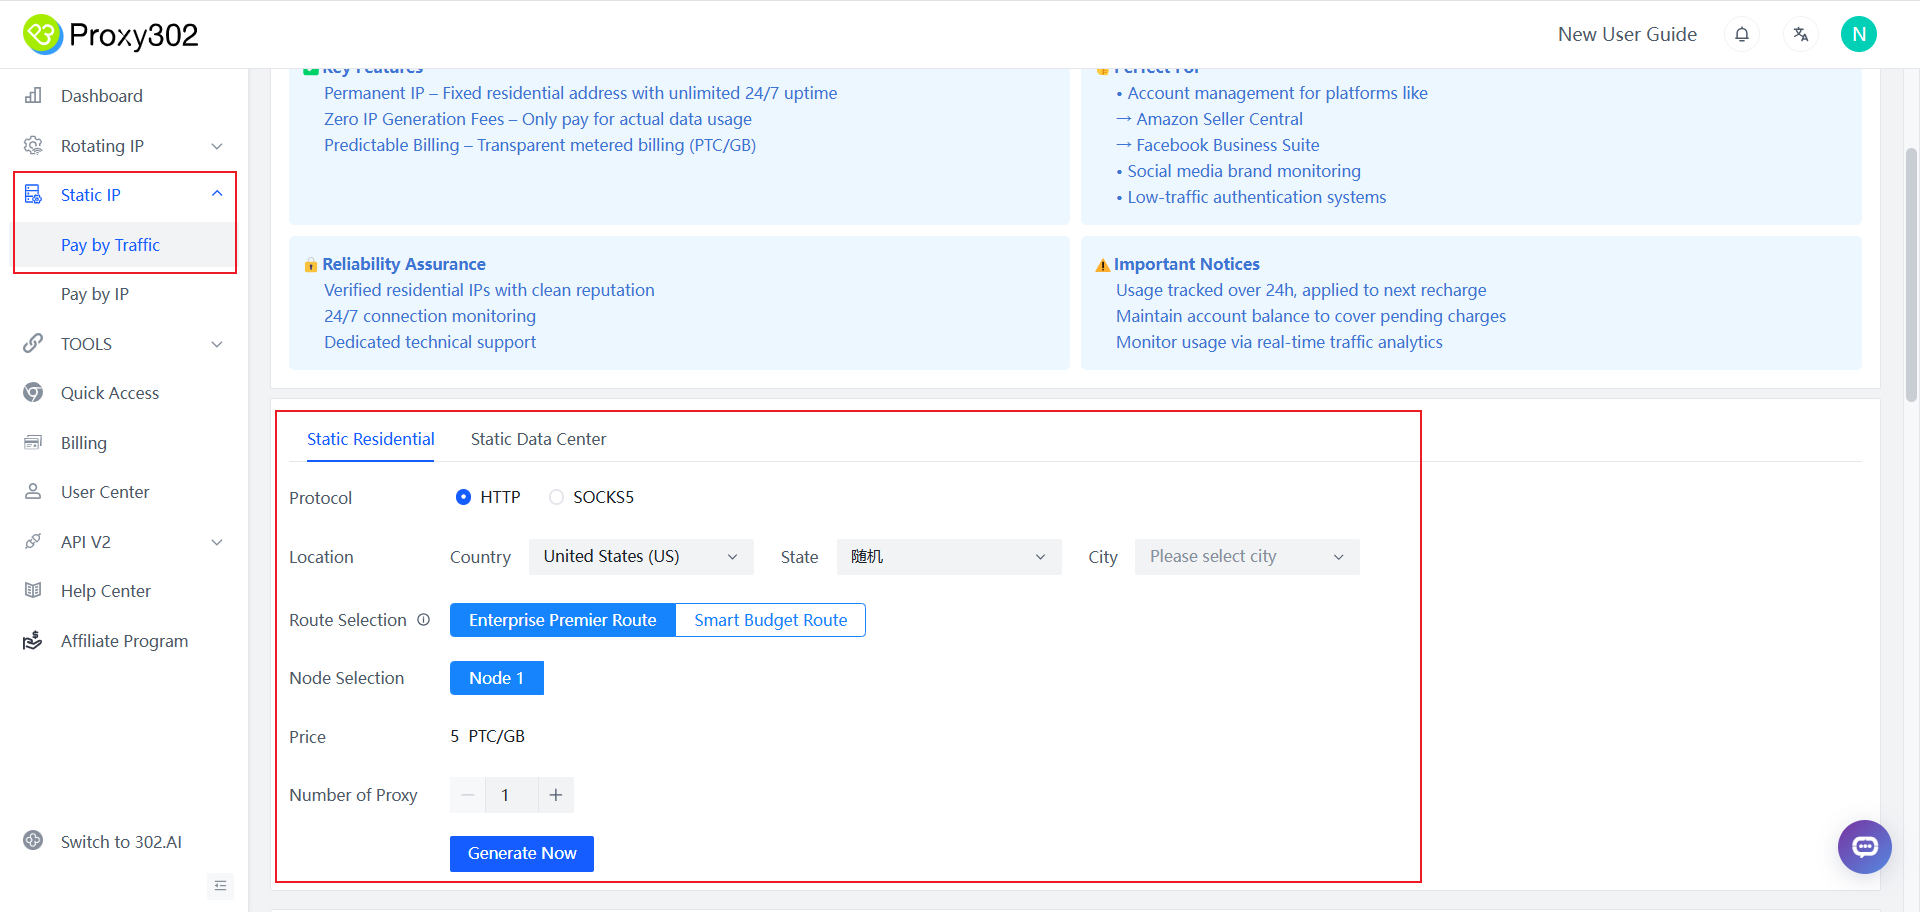
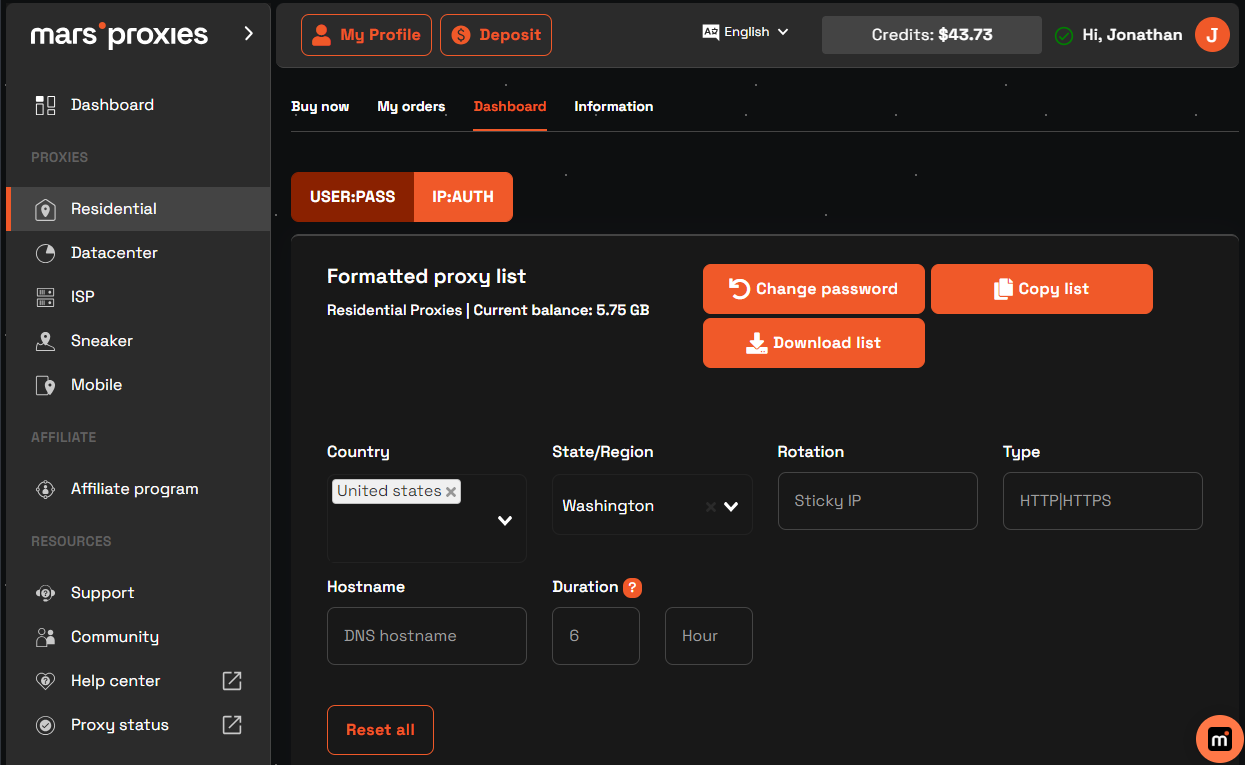
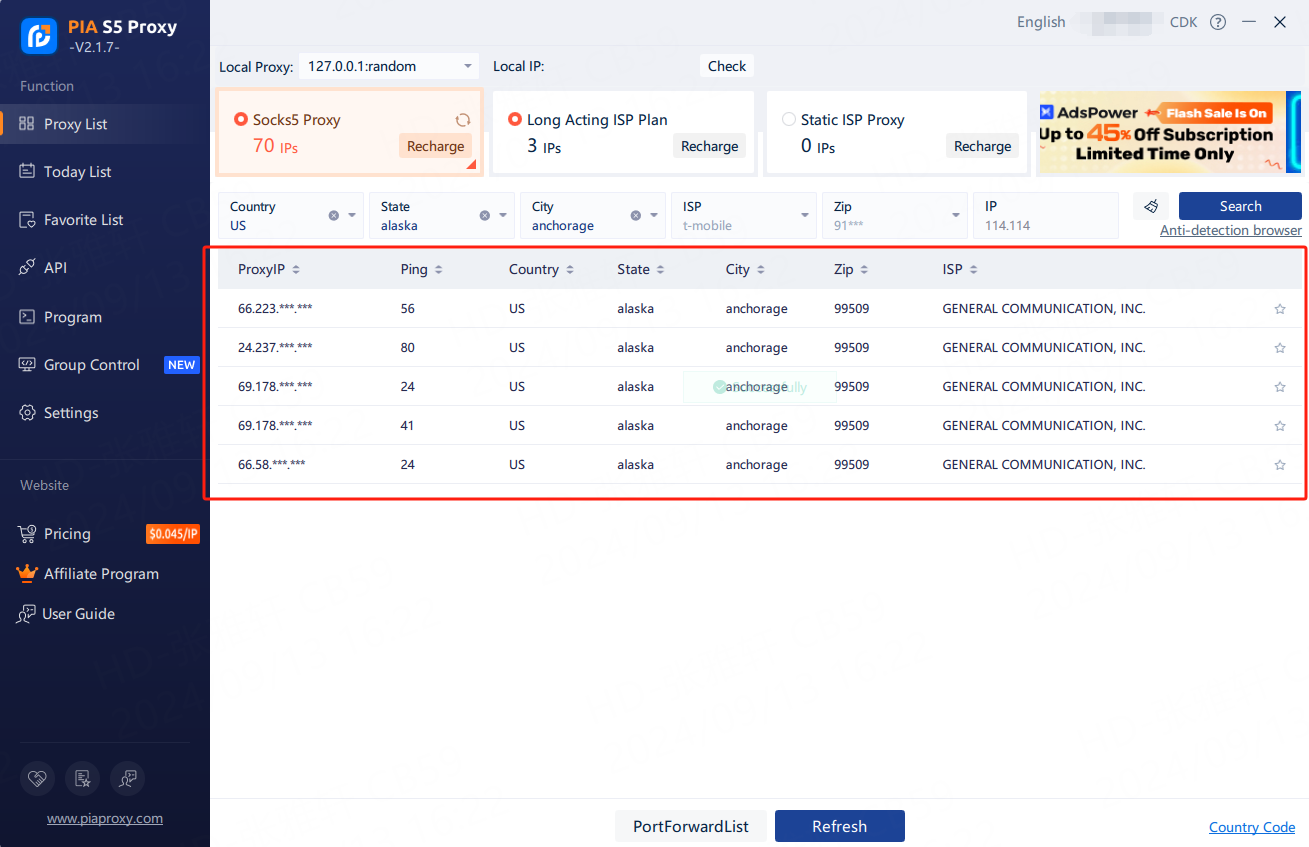
2.1 View Proxy List-Check Residential Proxy
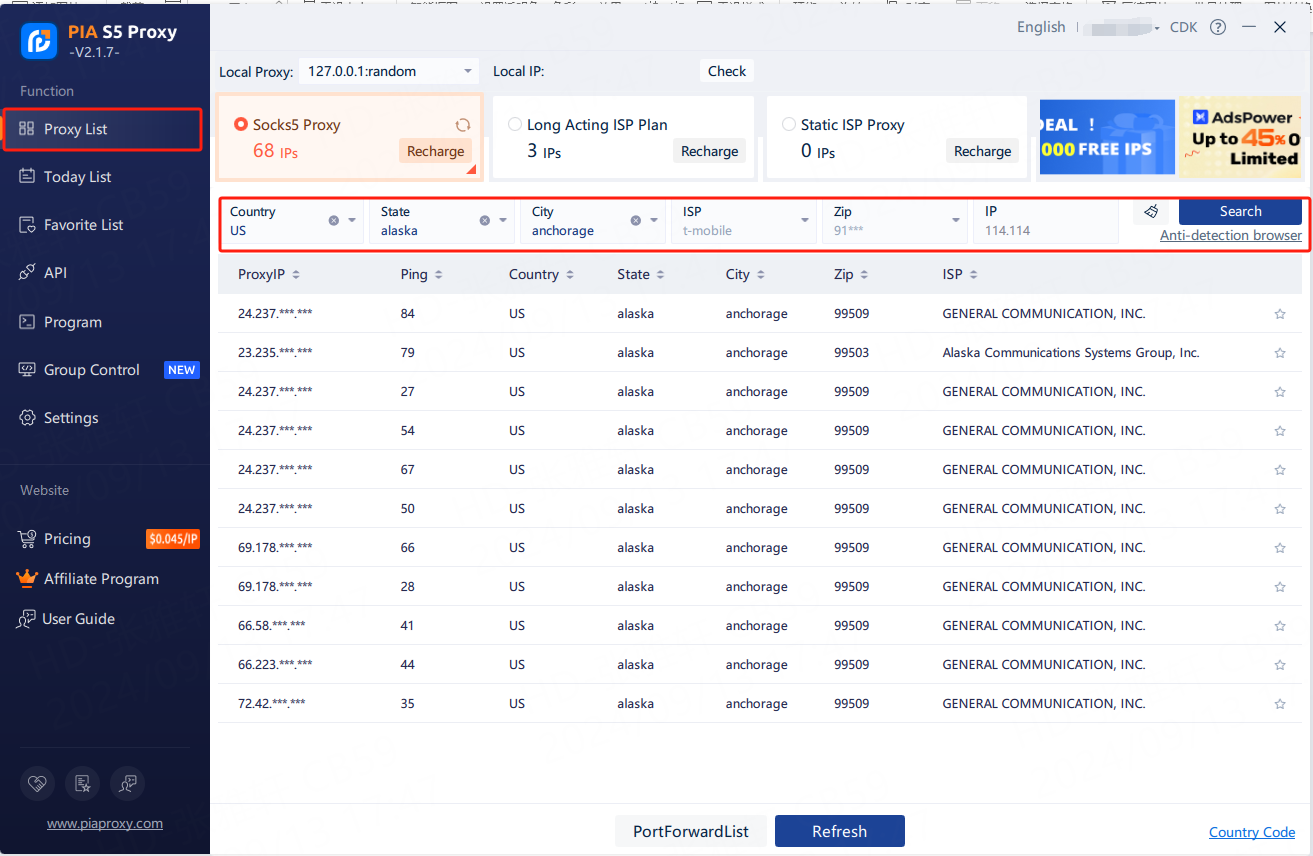
2.2 Fill in the “Country”,”City”,”Postal Code” fields and other information as needed. Click on “Search”【e.g. US,alaska,anchorage】
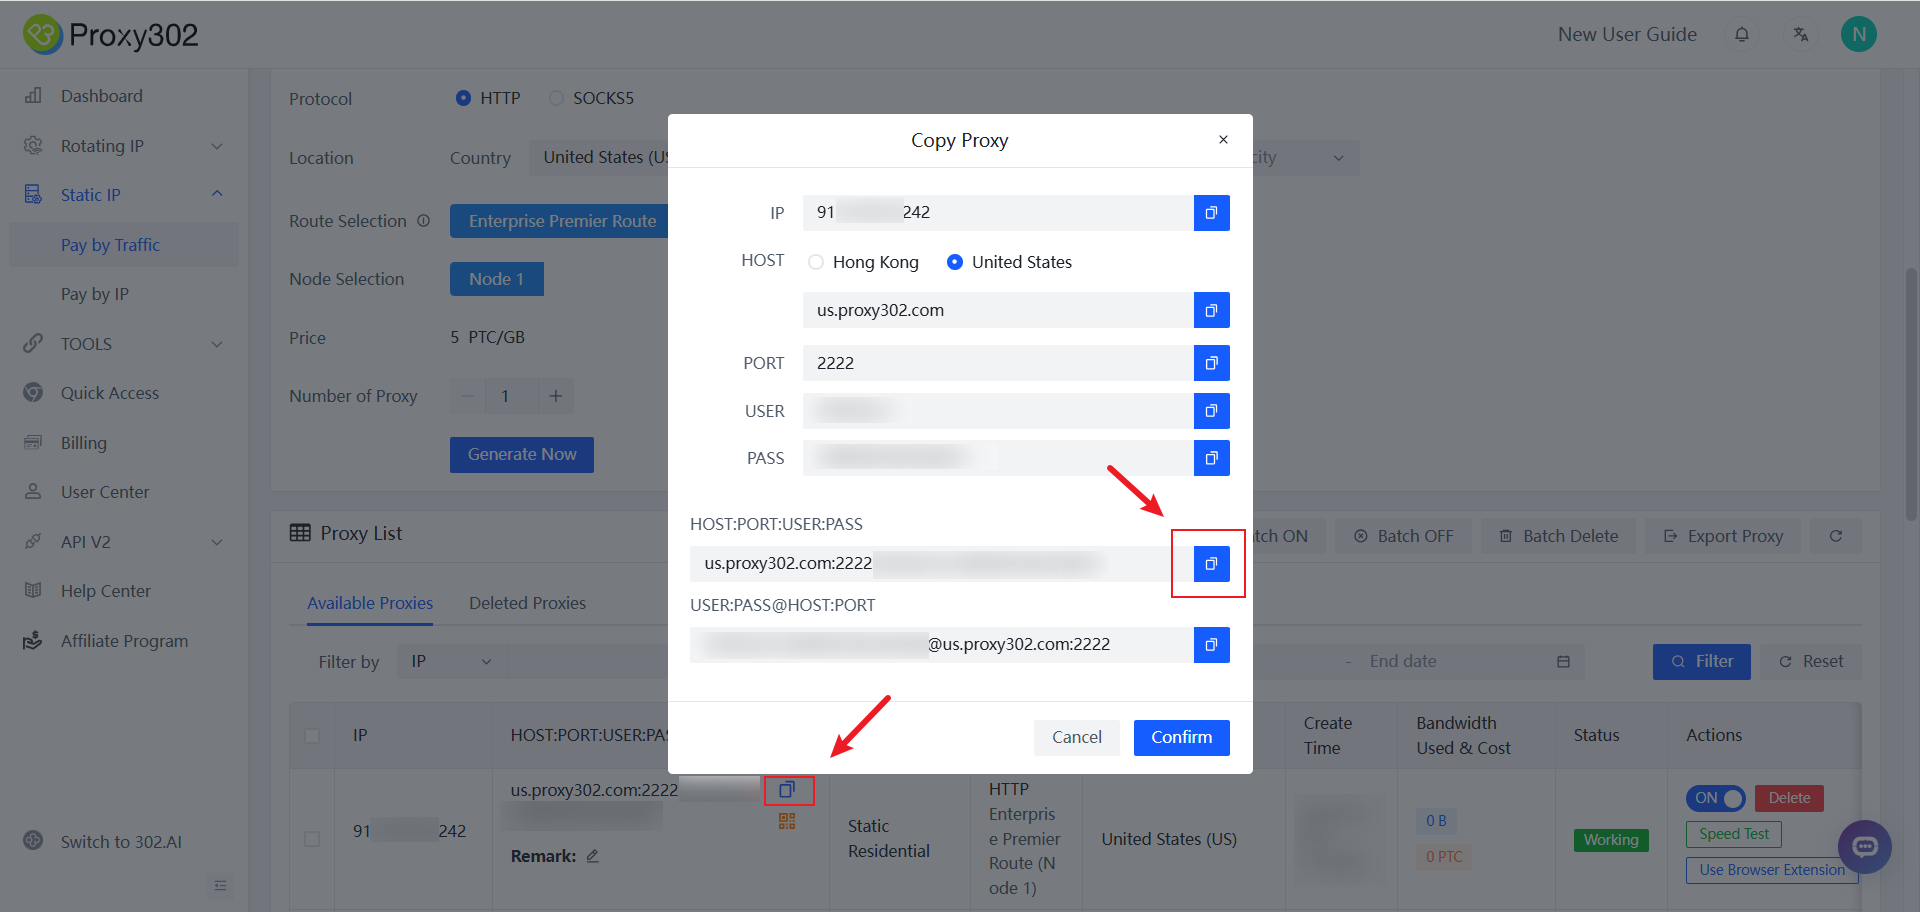
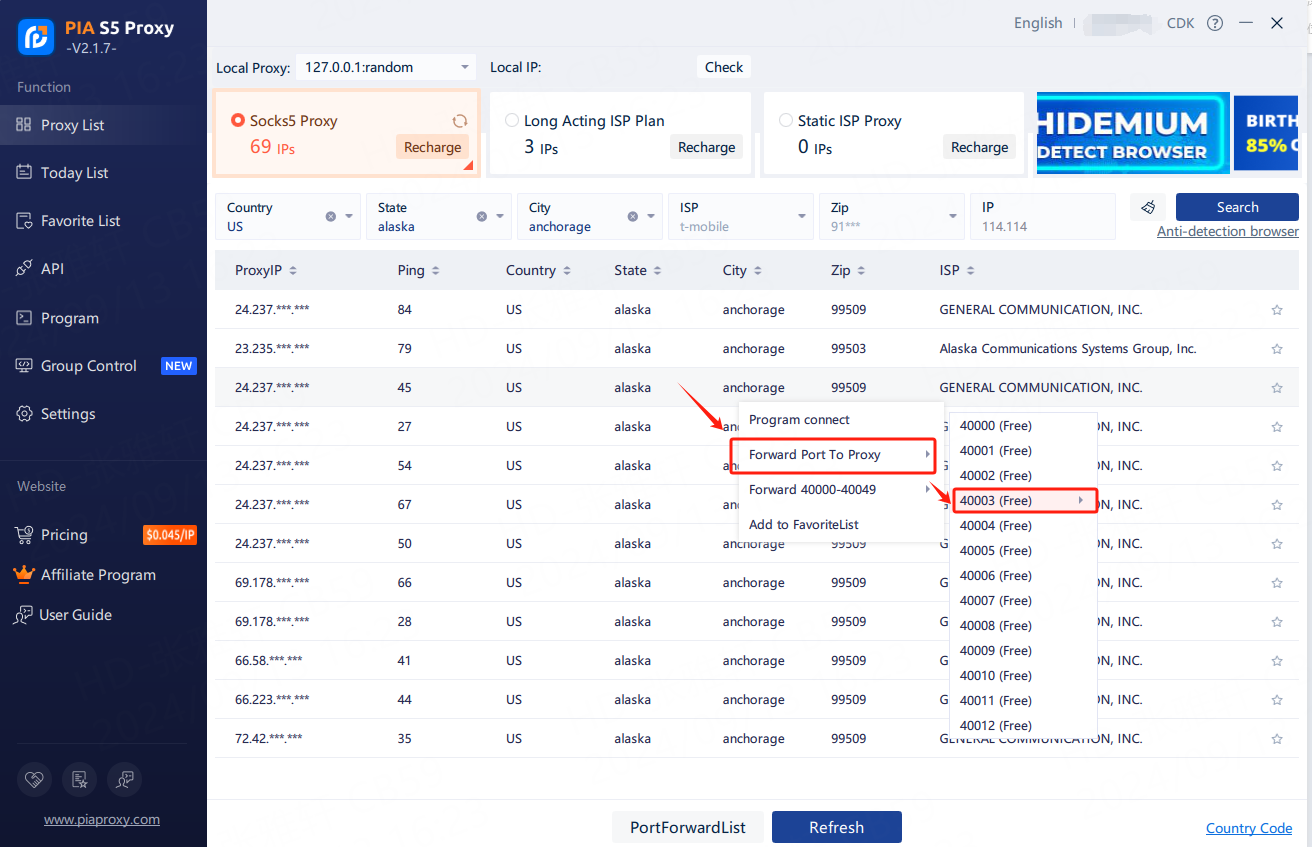
2.3 Right mouse click on the IP,select Forward Port to Proxy – check port [40003 for example]
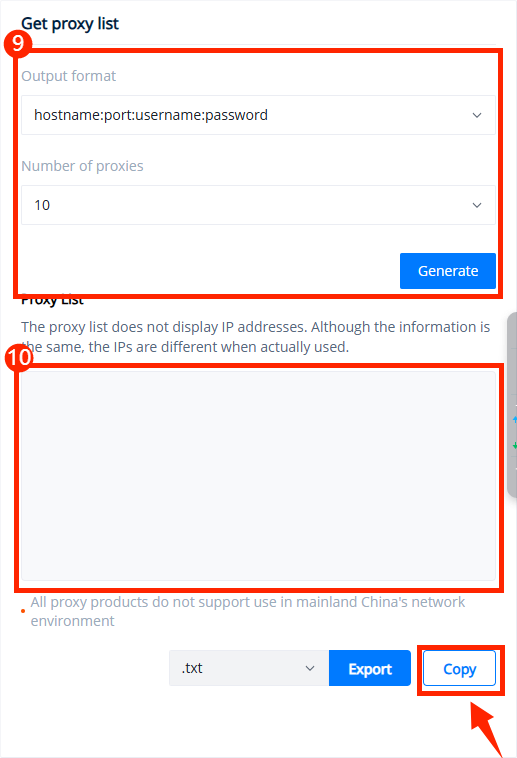
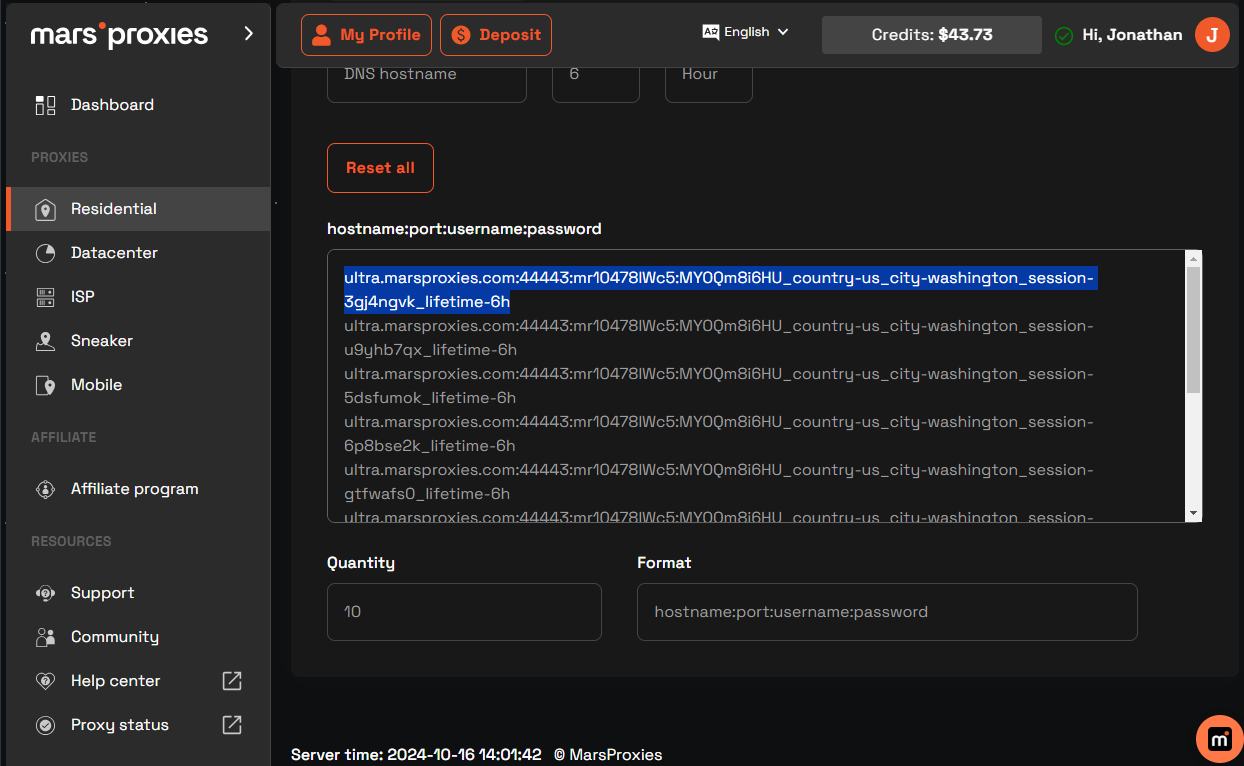
2.4 Click Port Forwarding List to view the extracted IP information
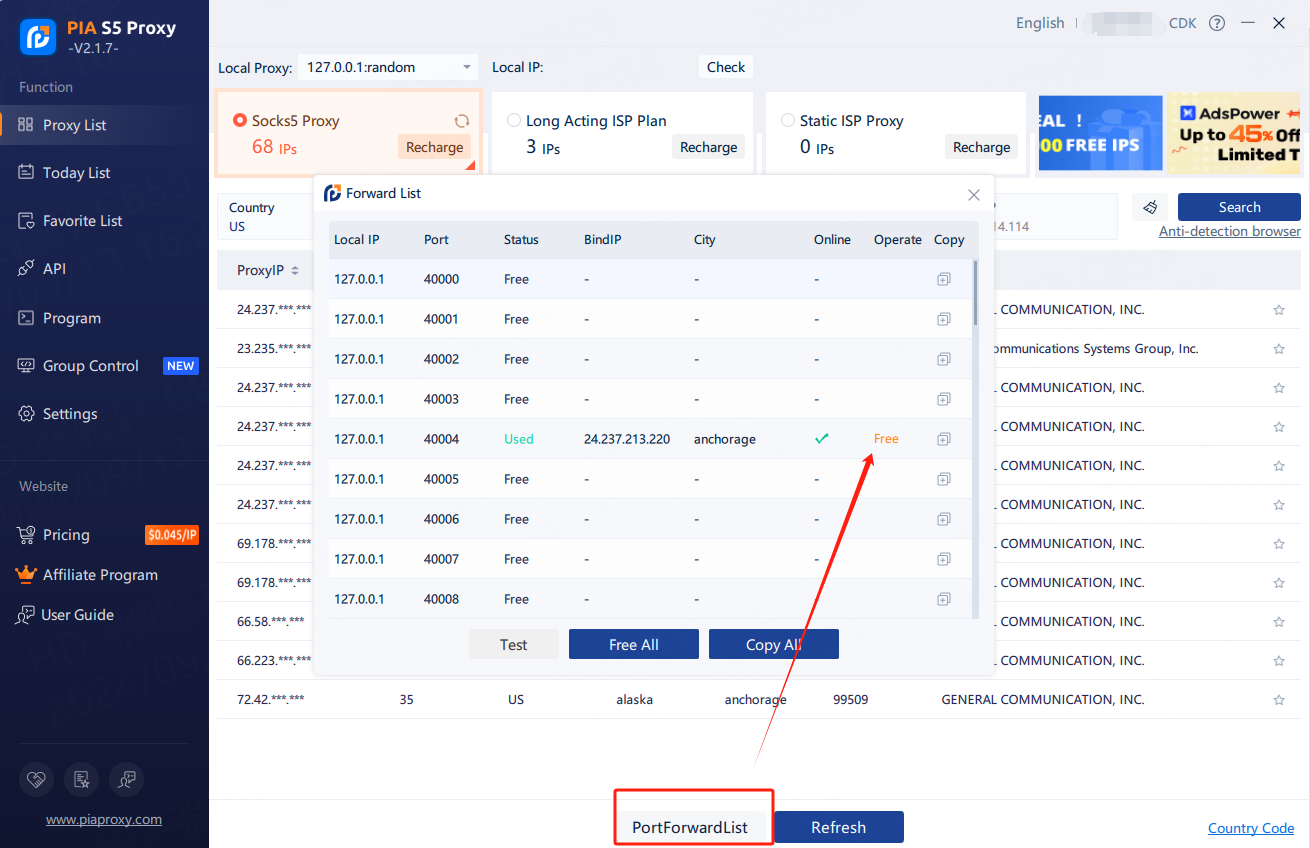
2.5 IP Extraction Successful
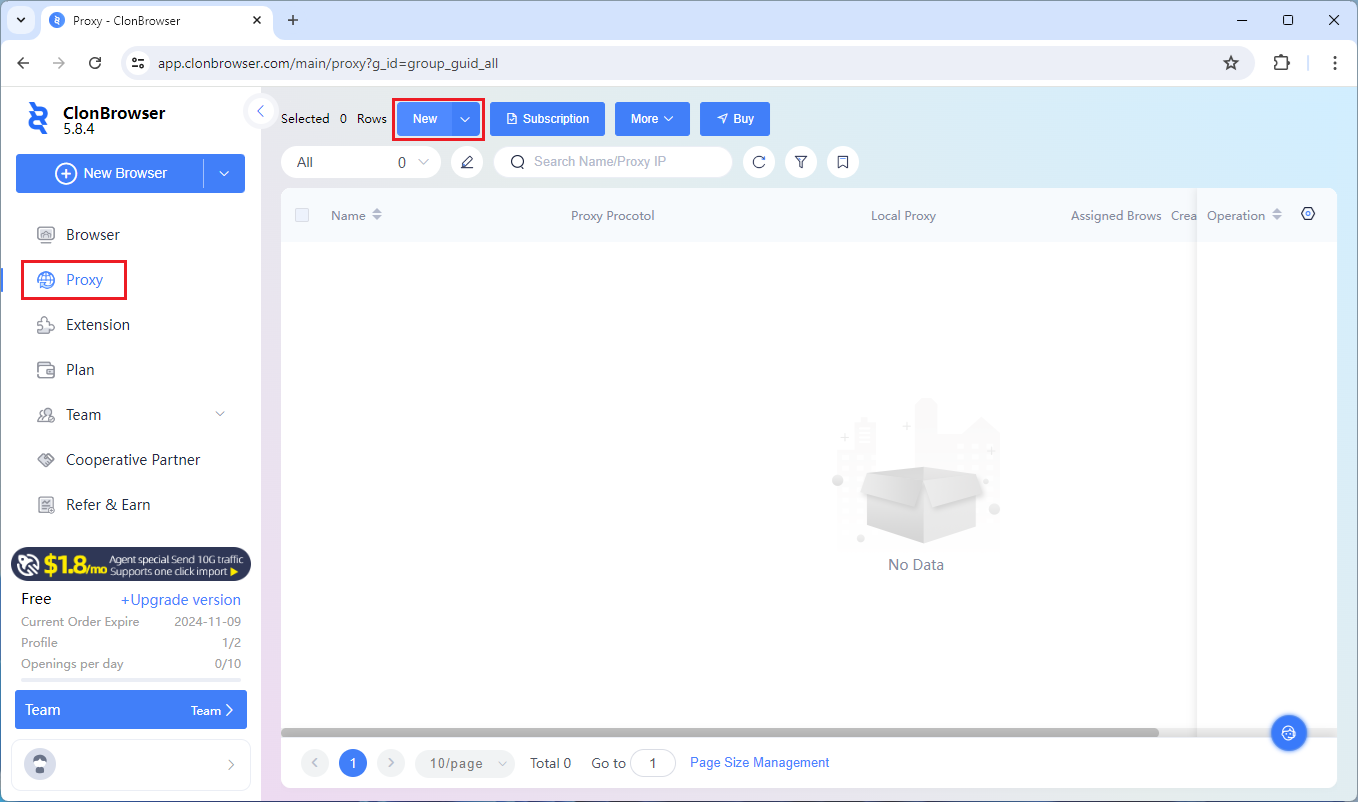
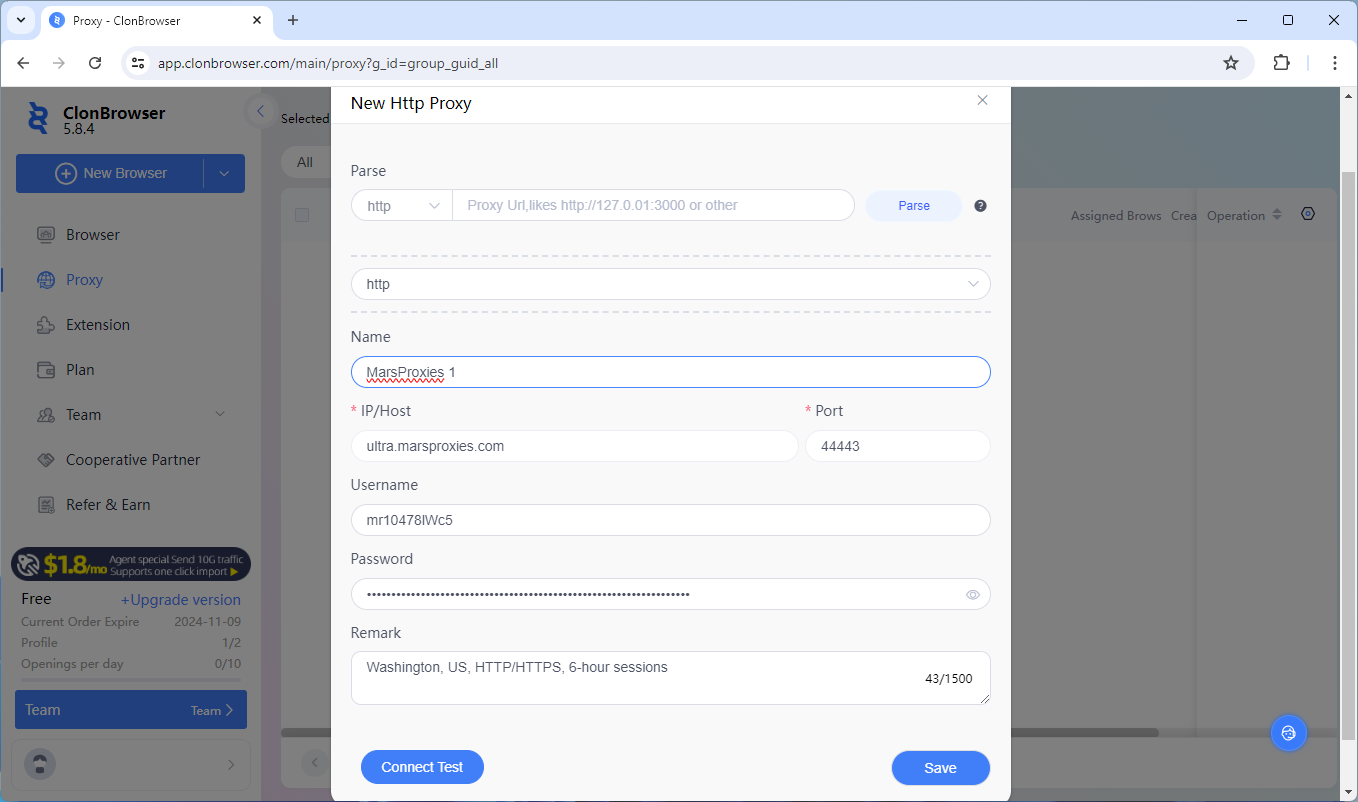
Step 3:Proxy Configuration
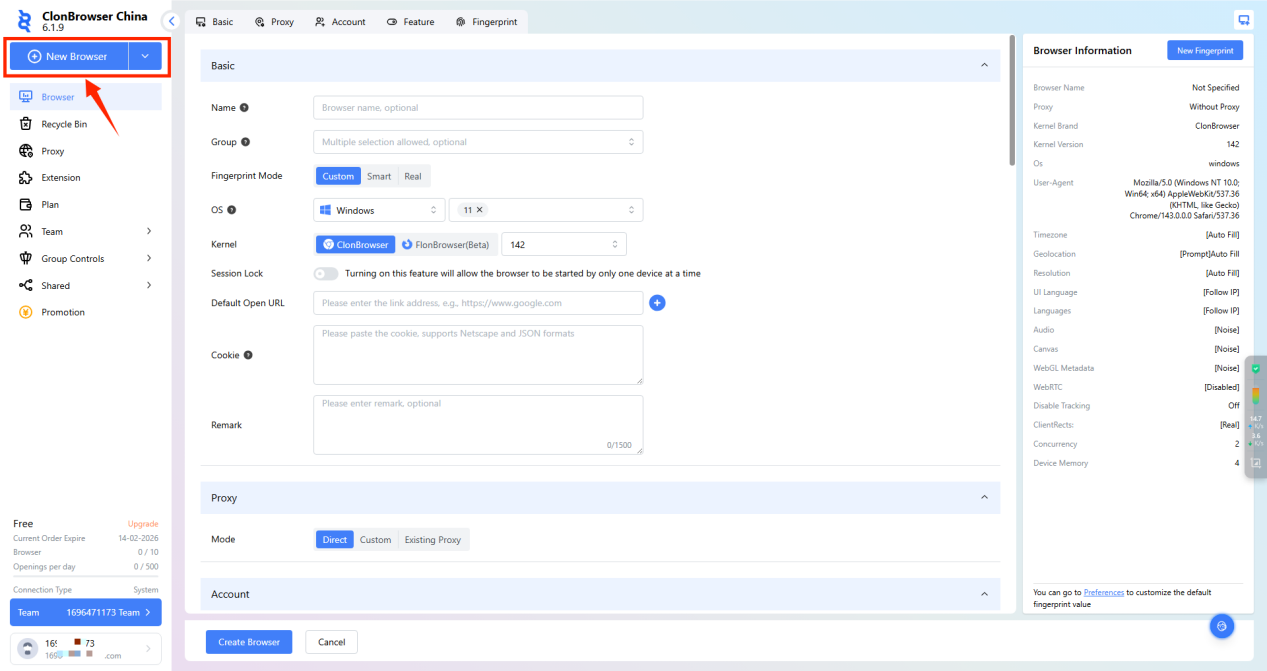
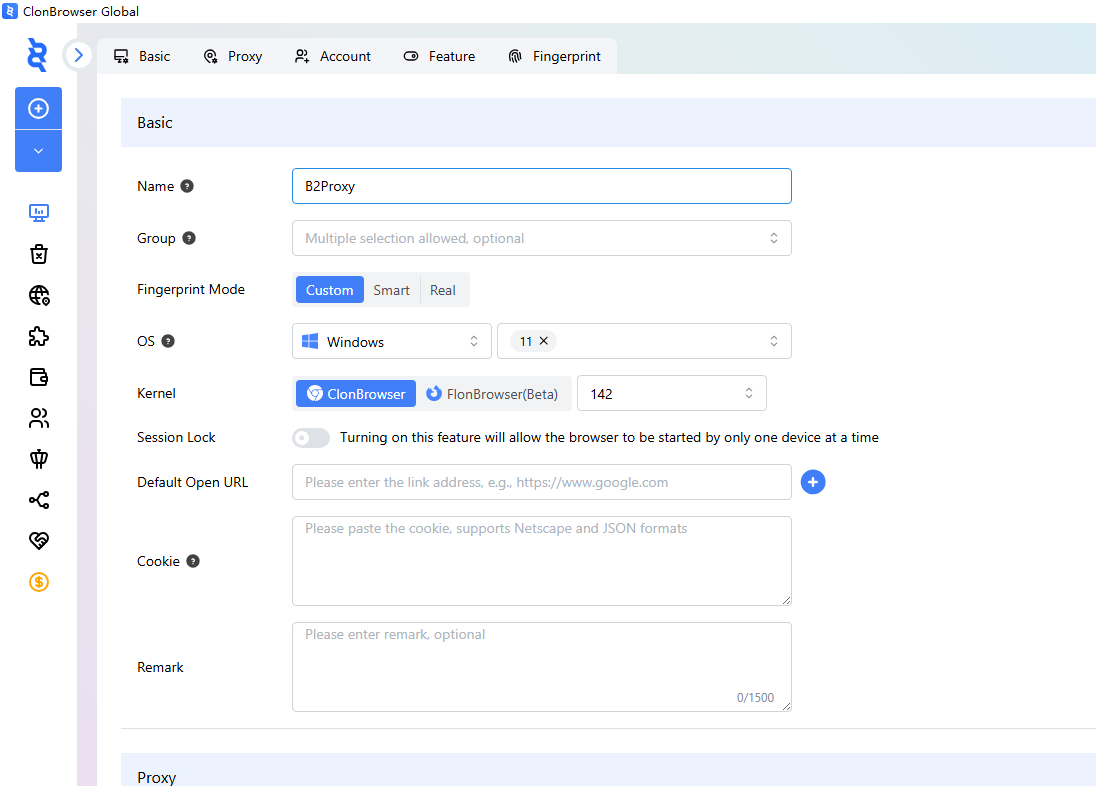
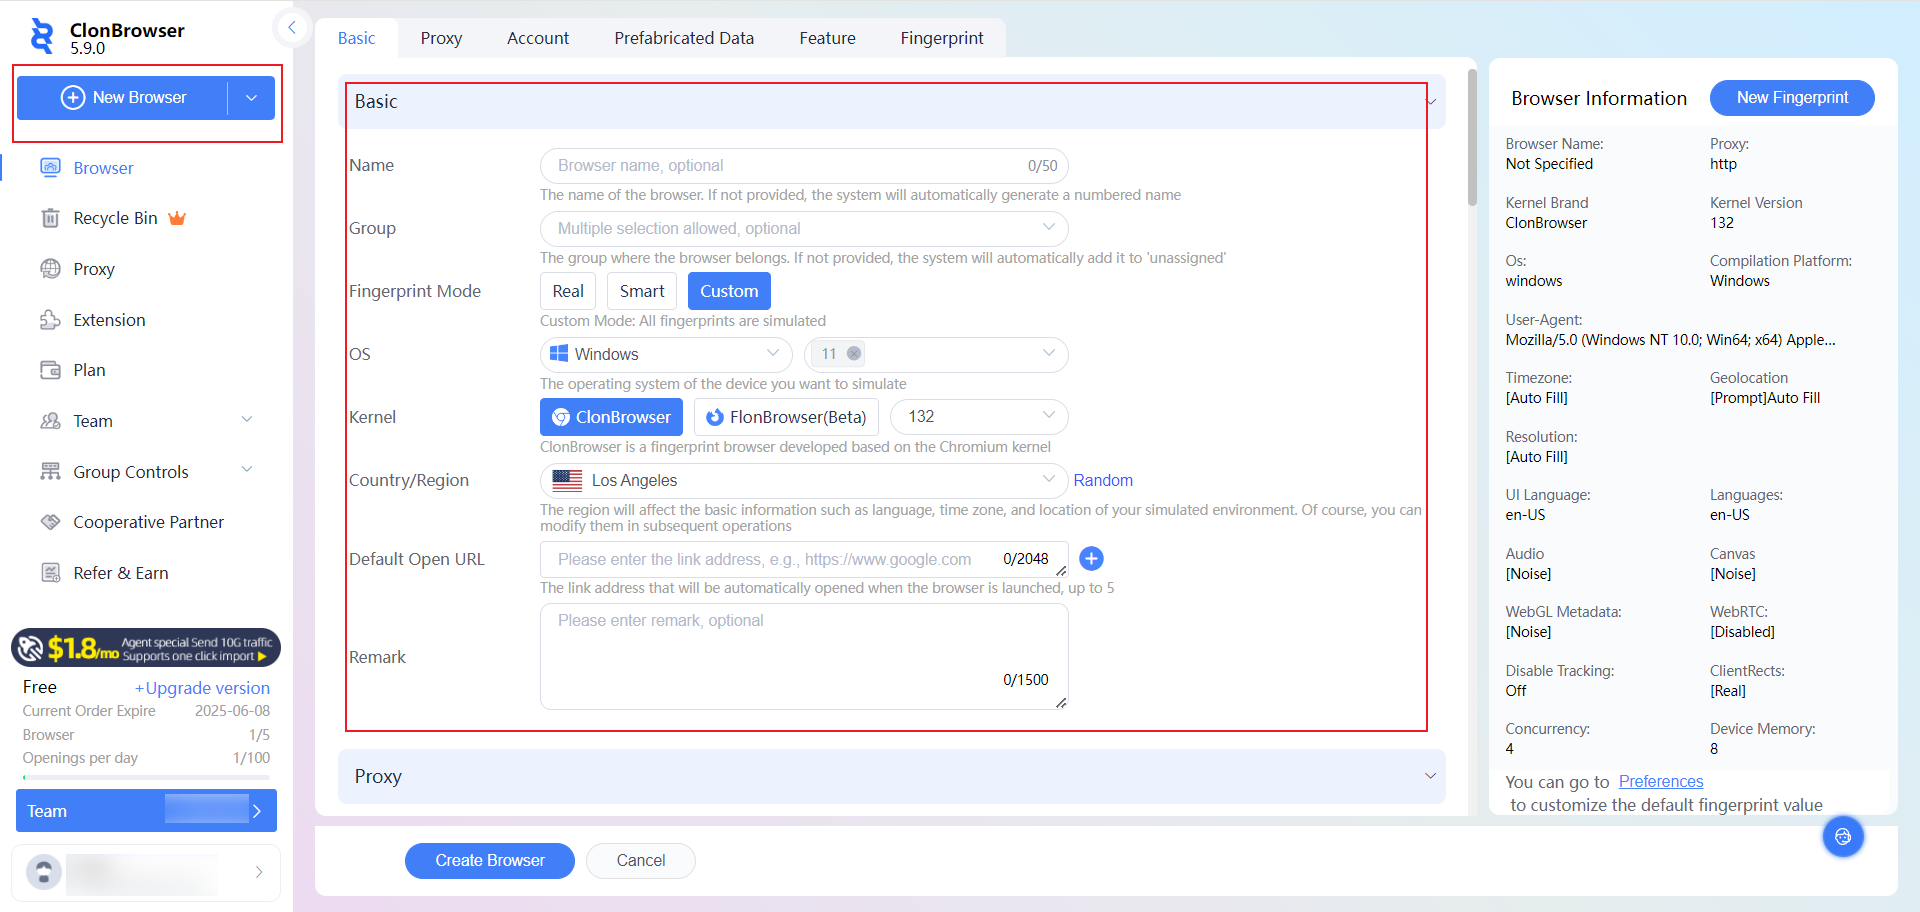
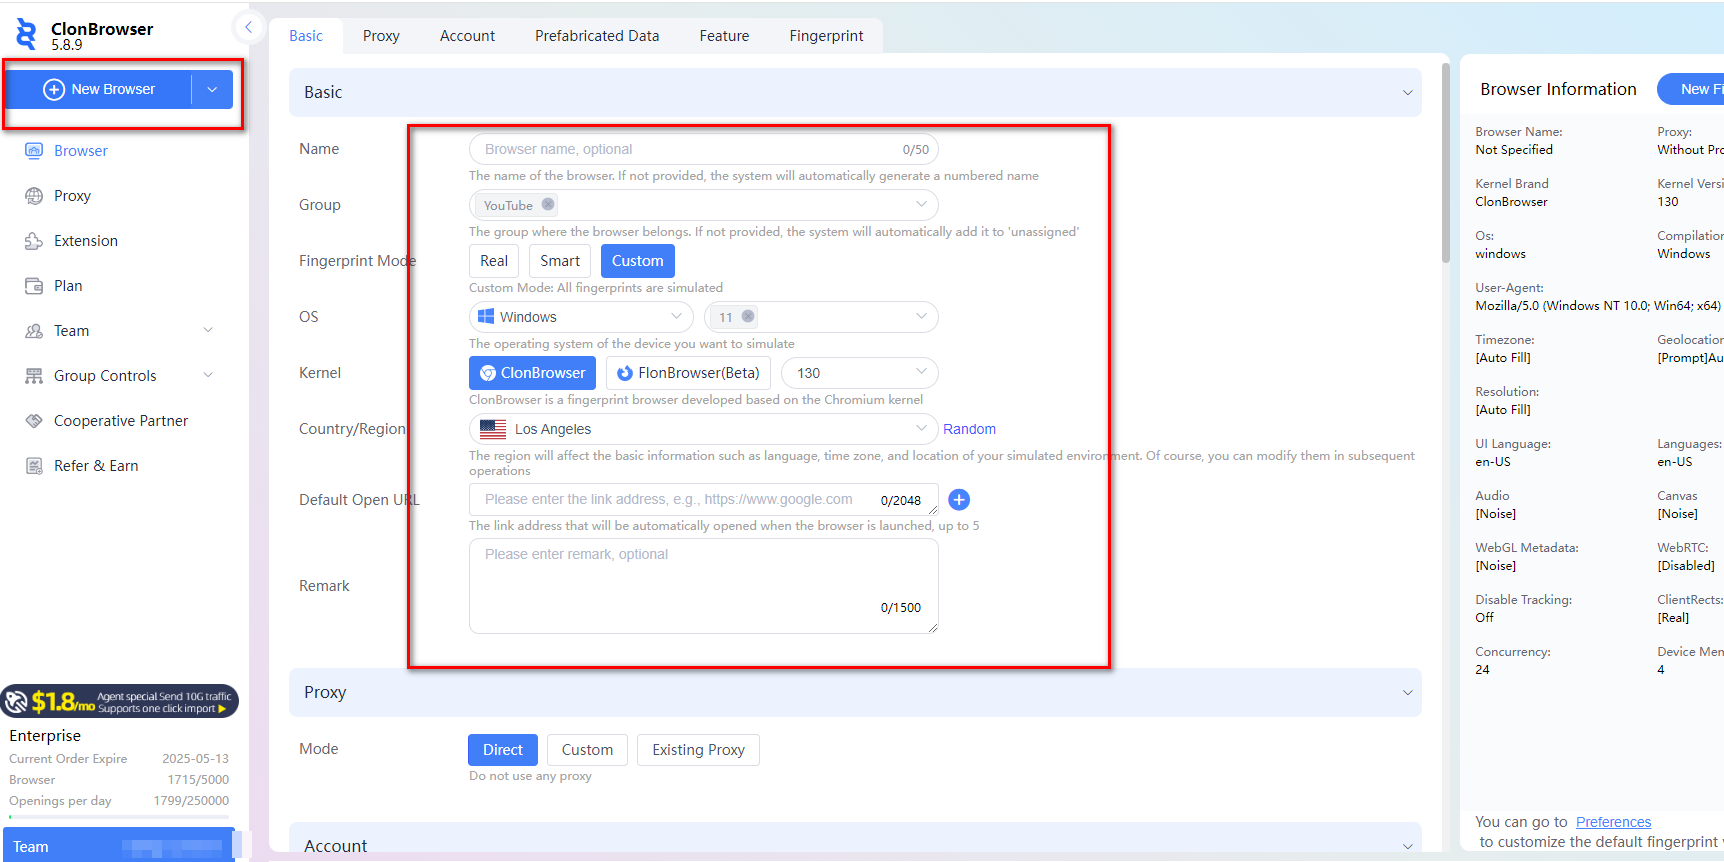
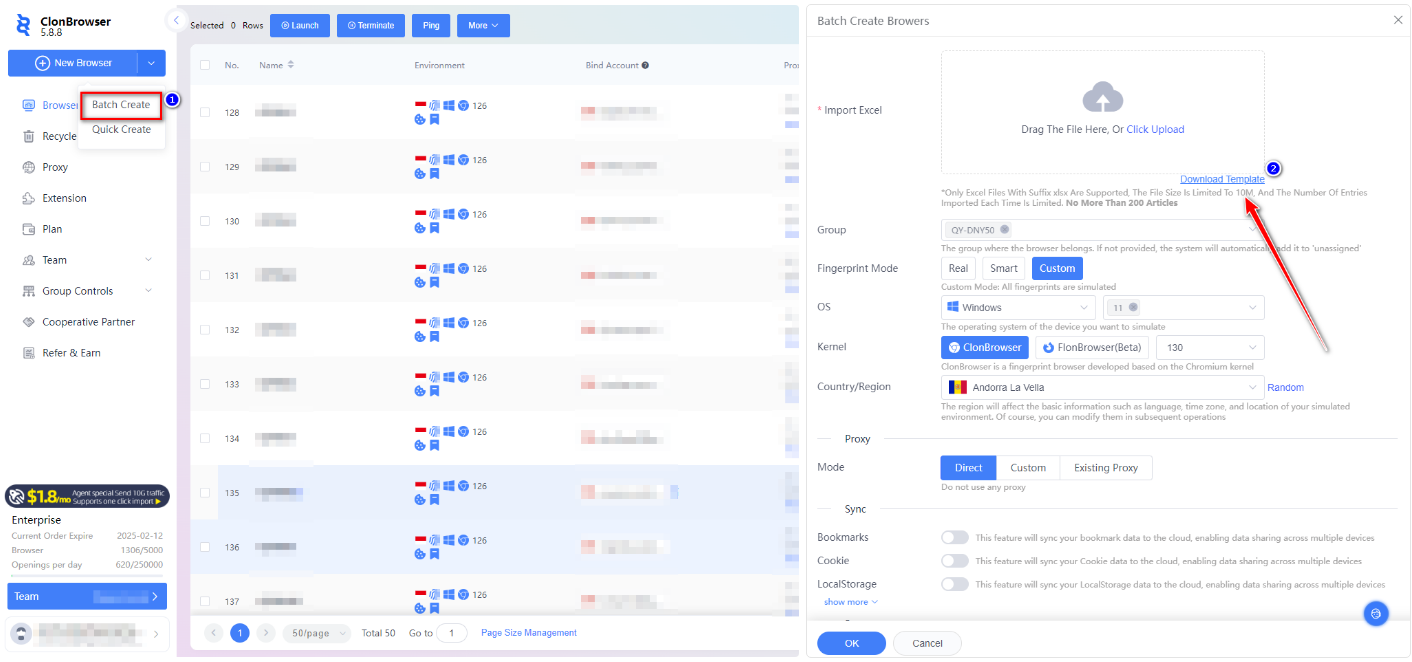
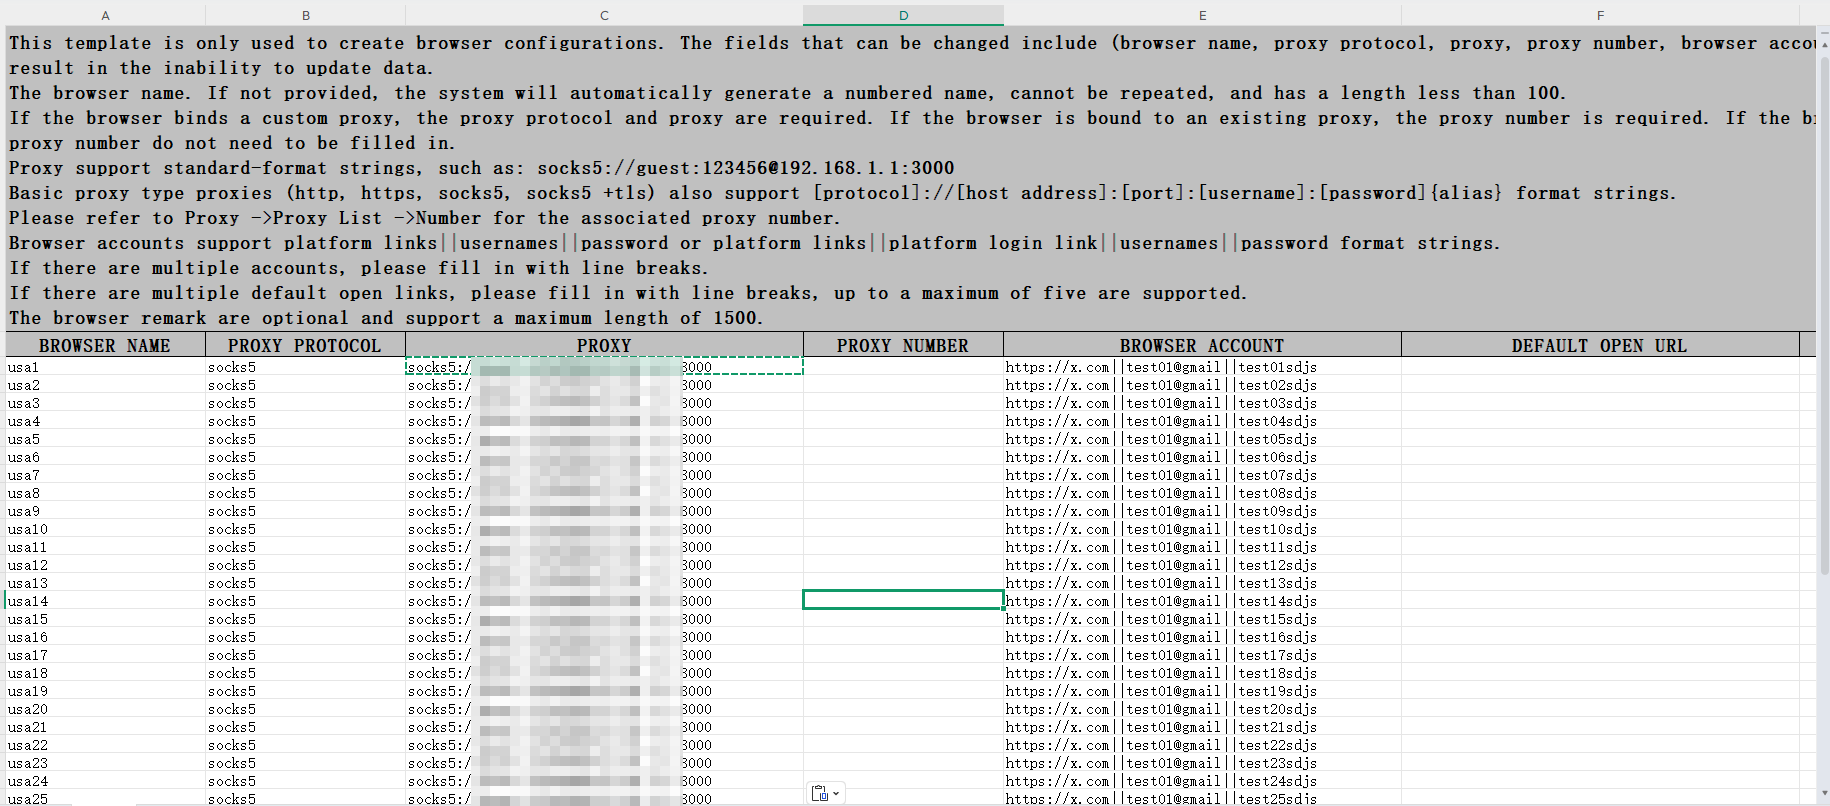
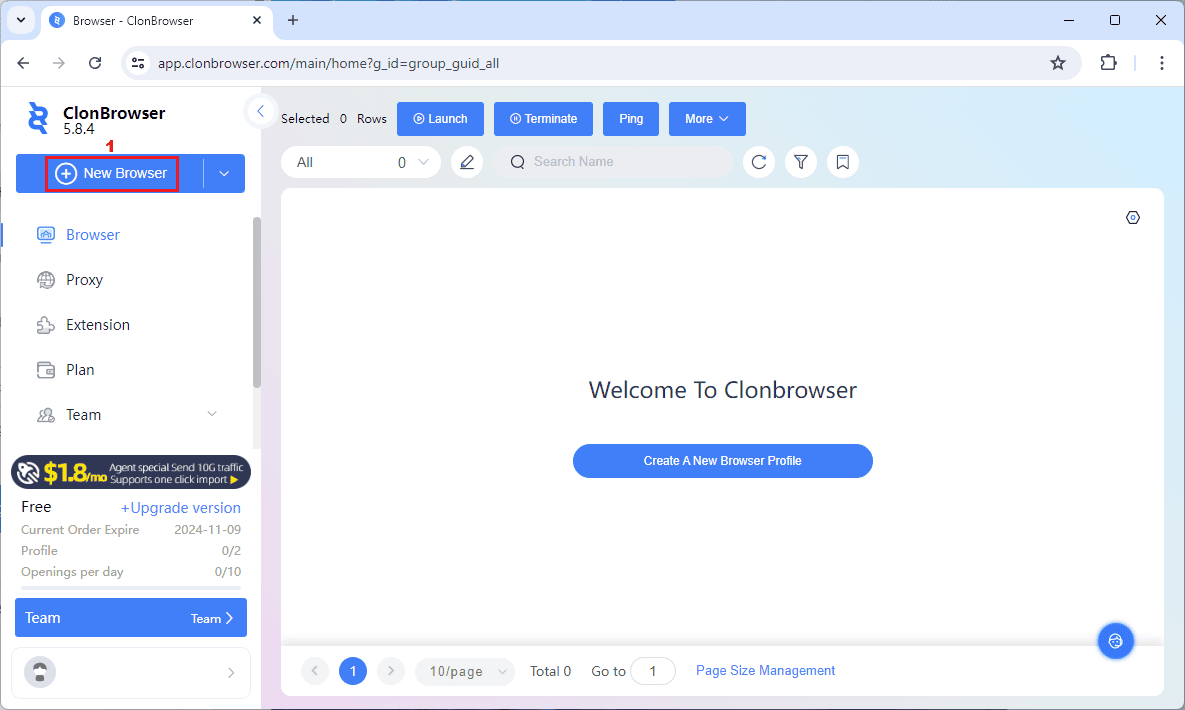
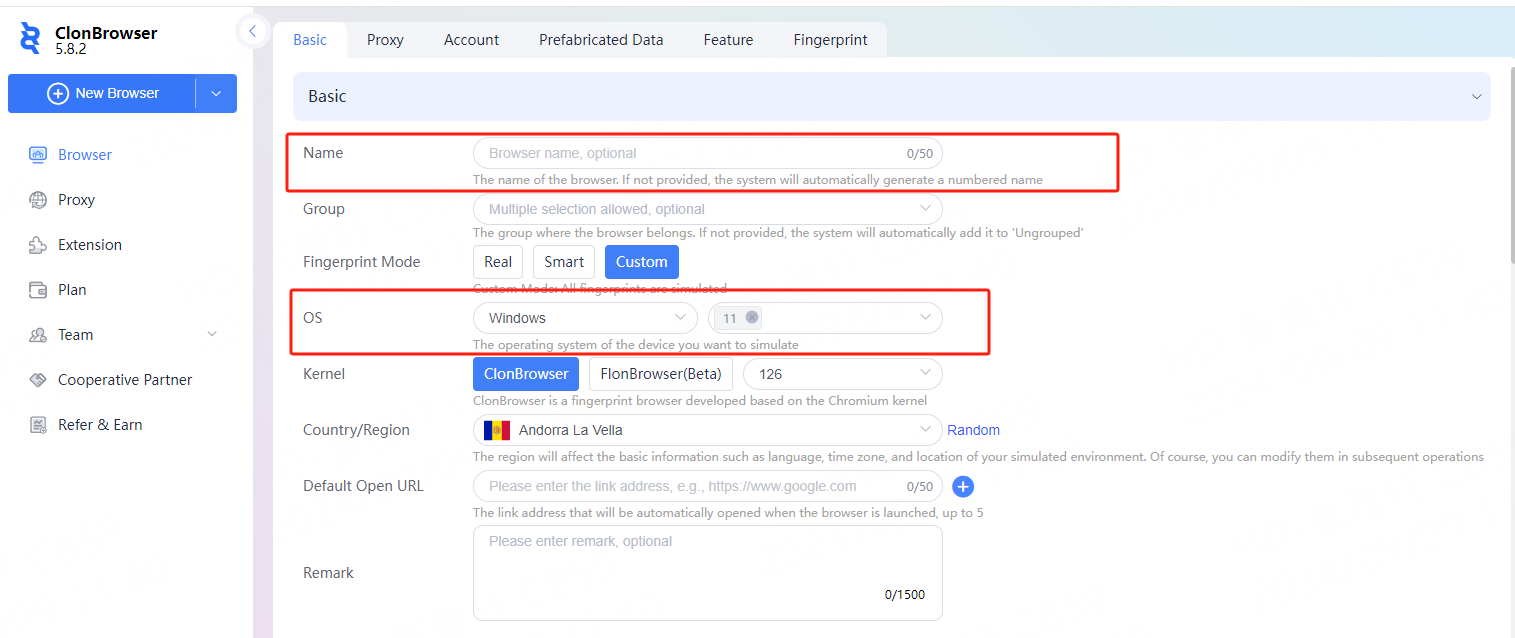
3.1 Open ClonBrowser, click New Browser
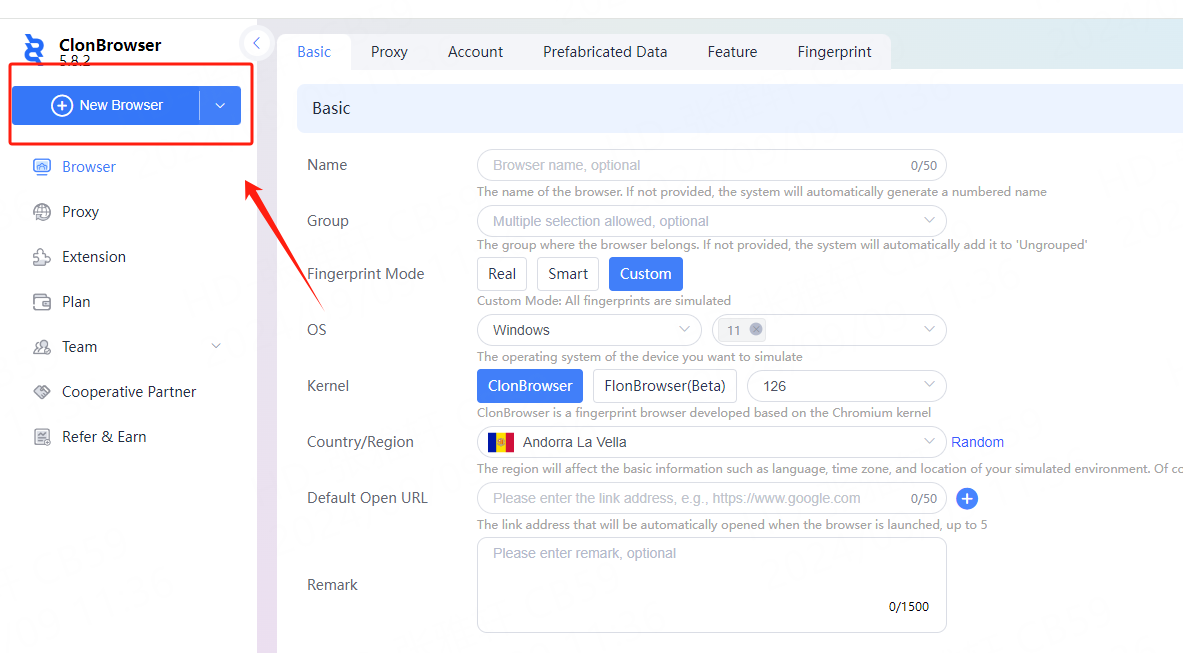
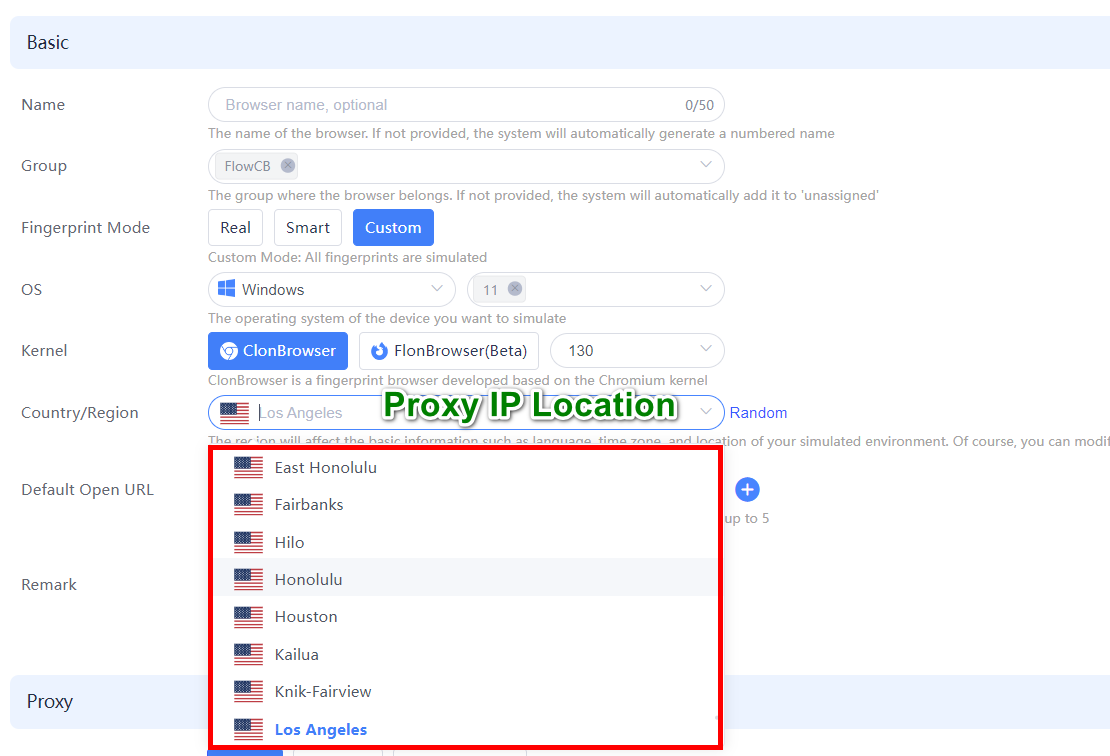
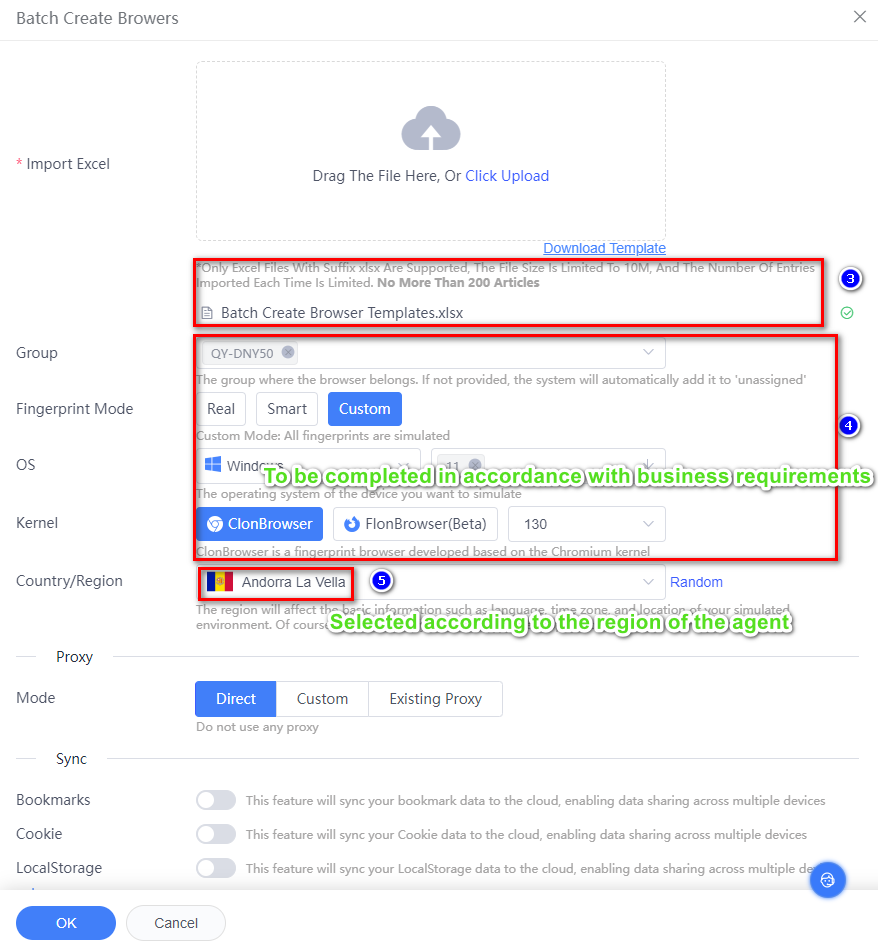
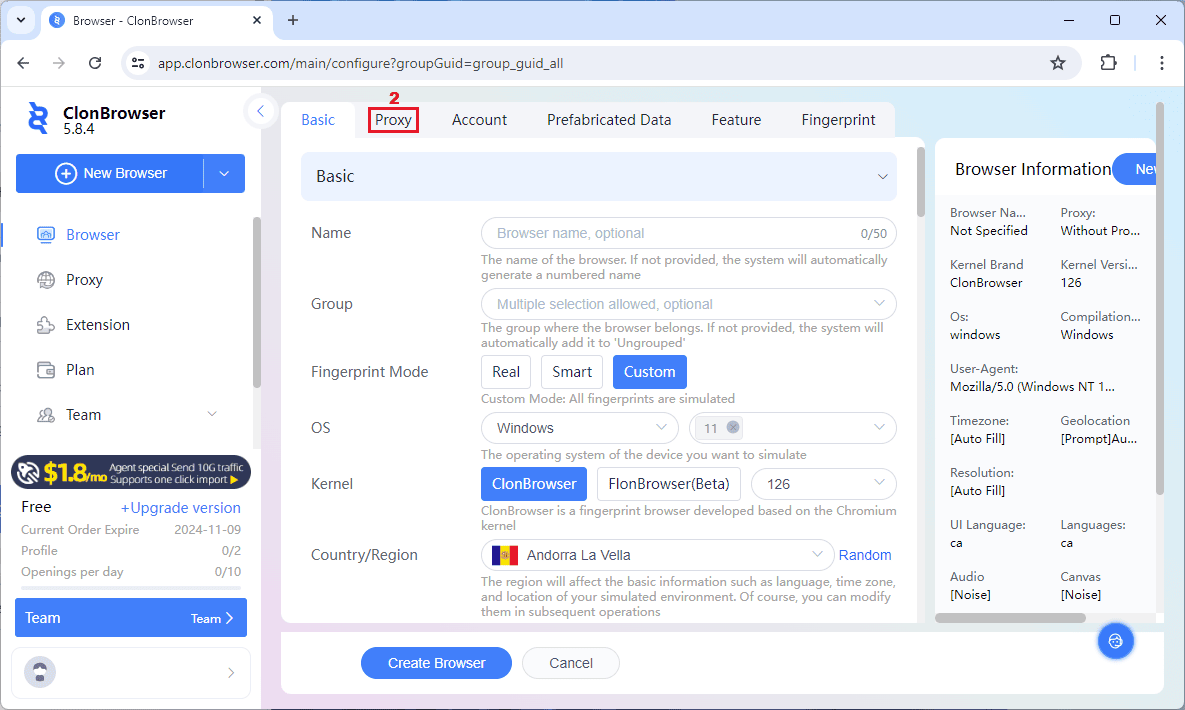
3.2 Then enter the name, multiple systems are supported, Windows 11 by default, Windows 10 is also available, choose the operating system according to your specific needs.
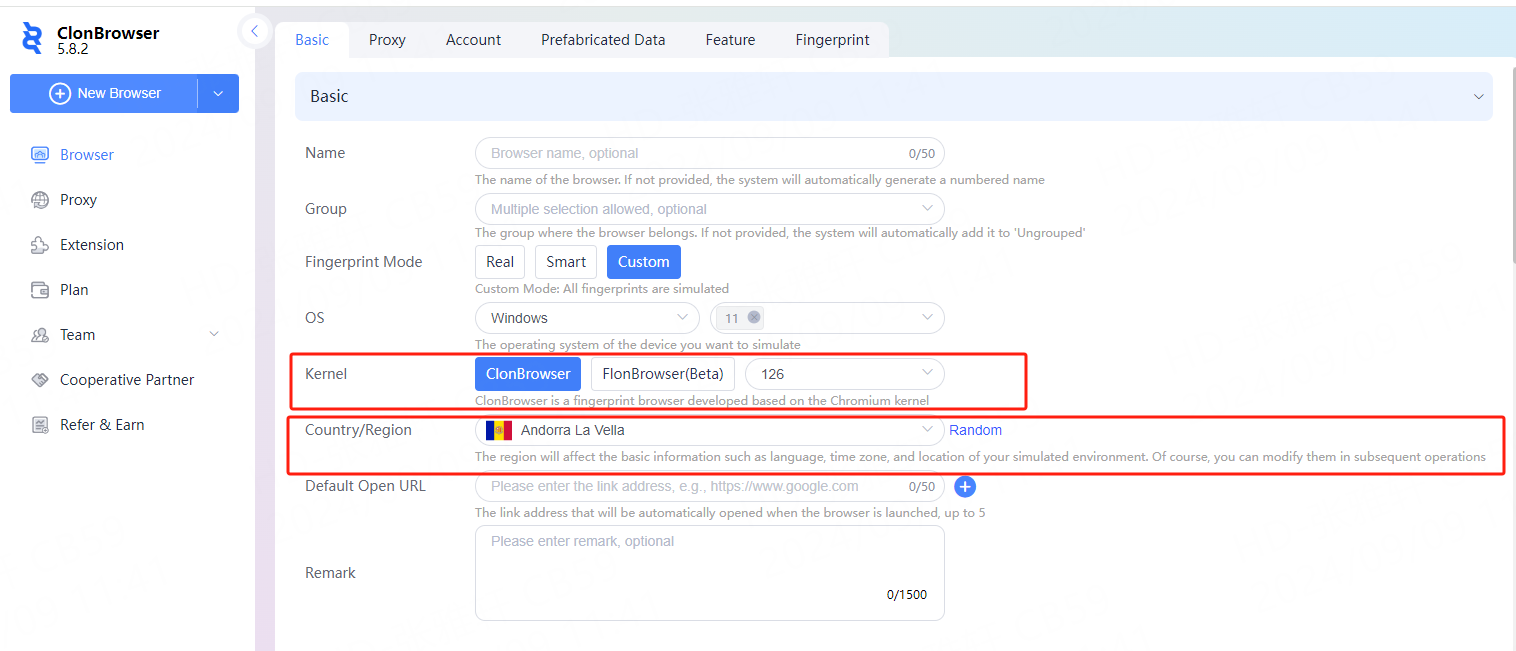
3.3 The kernel can be Chromium (ClonBrowser), Firefox (FlonBrowser) and kernel version, the default kernel version is 126. The country/region can be selected according to the country where your IP is located.
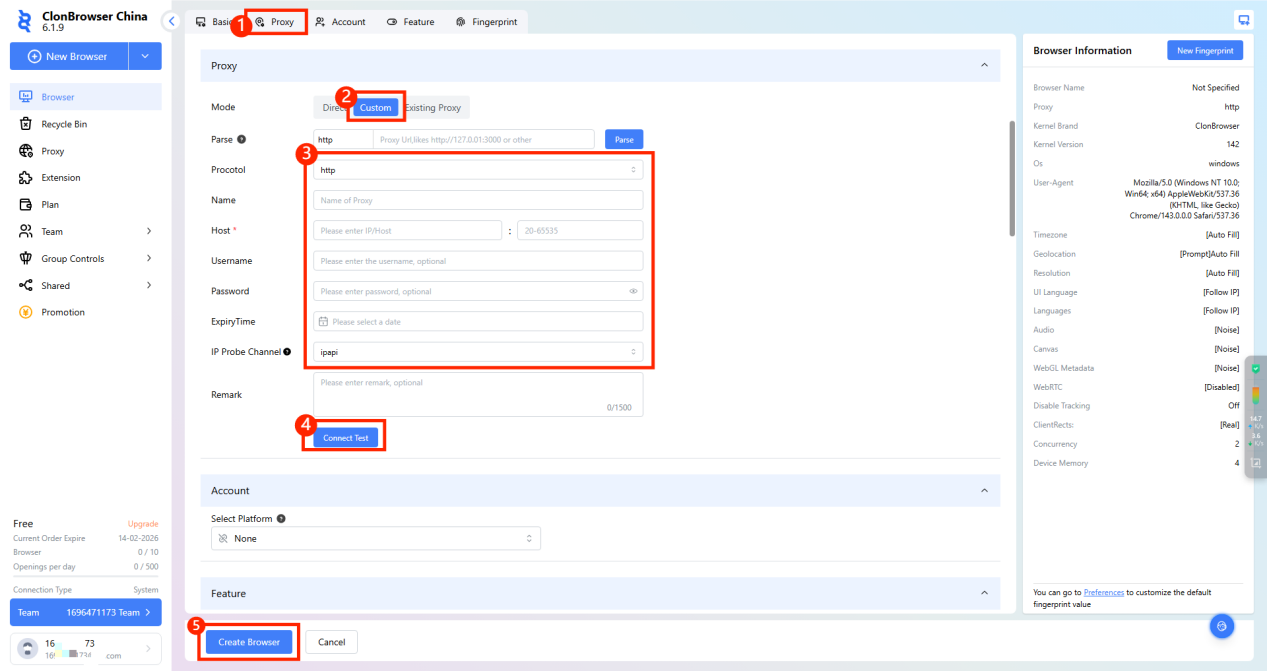
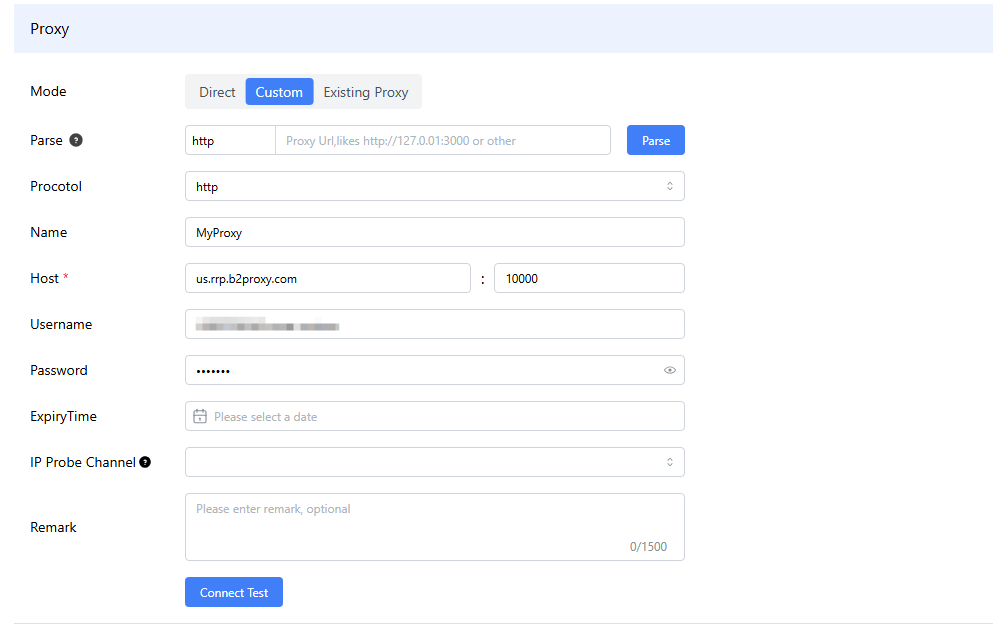
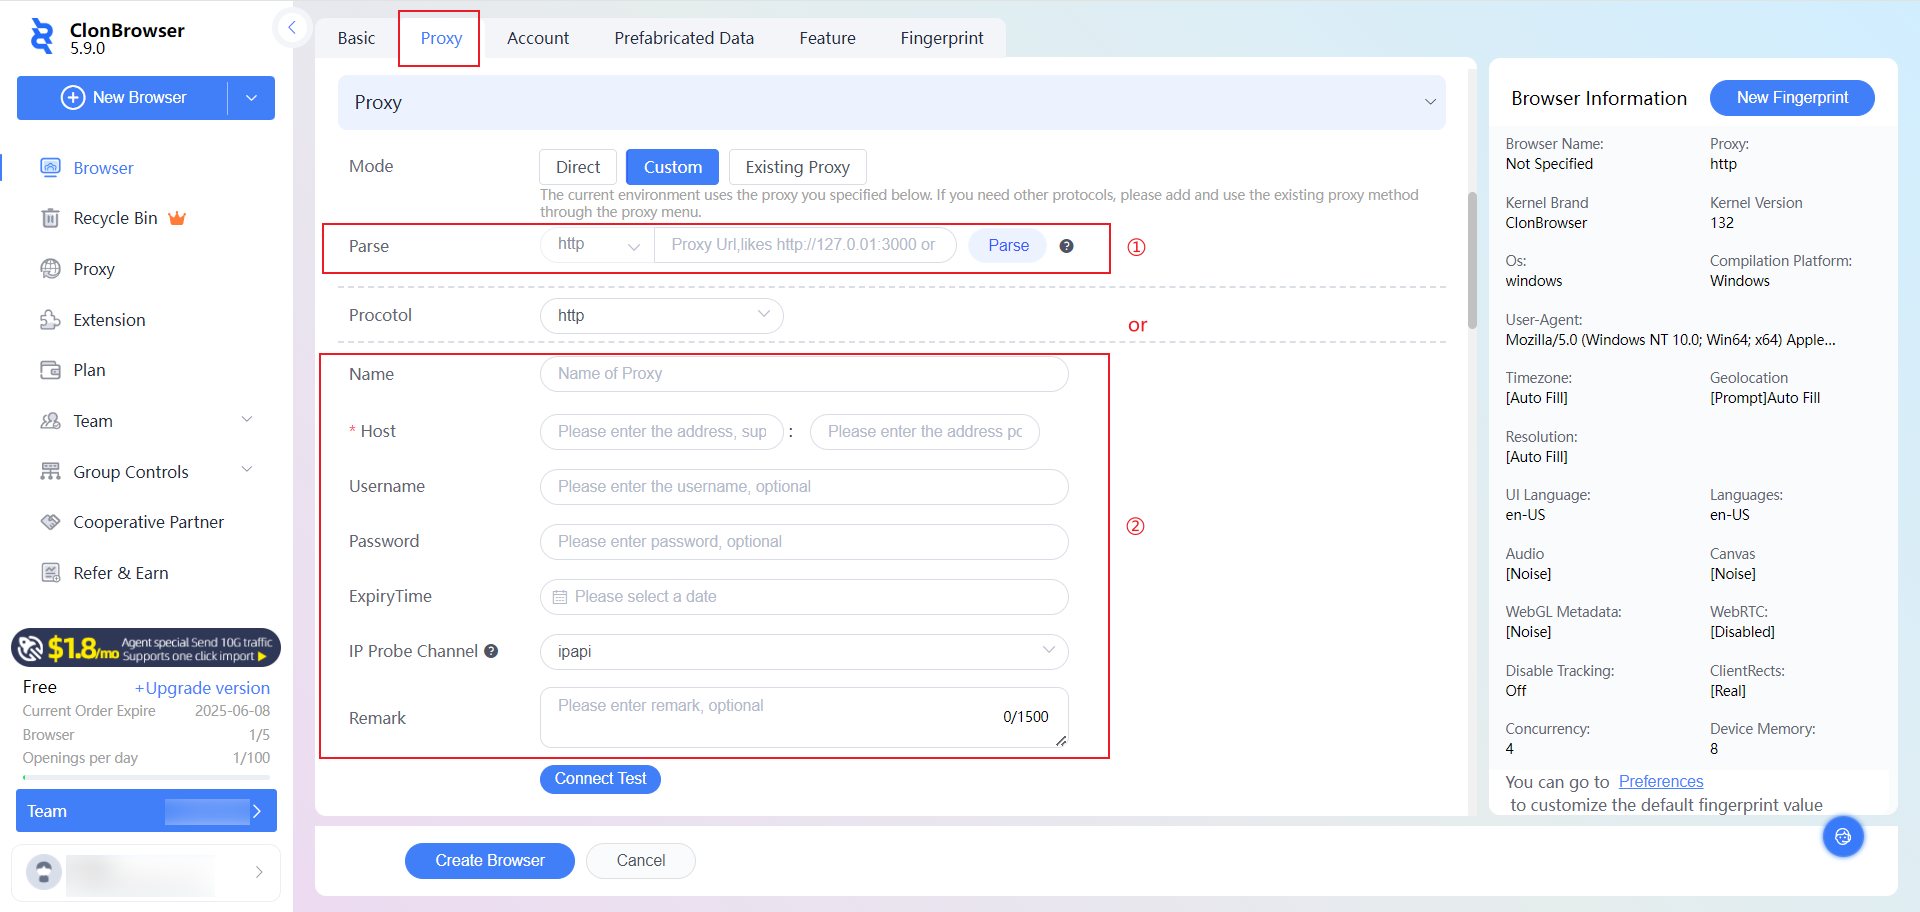
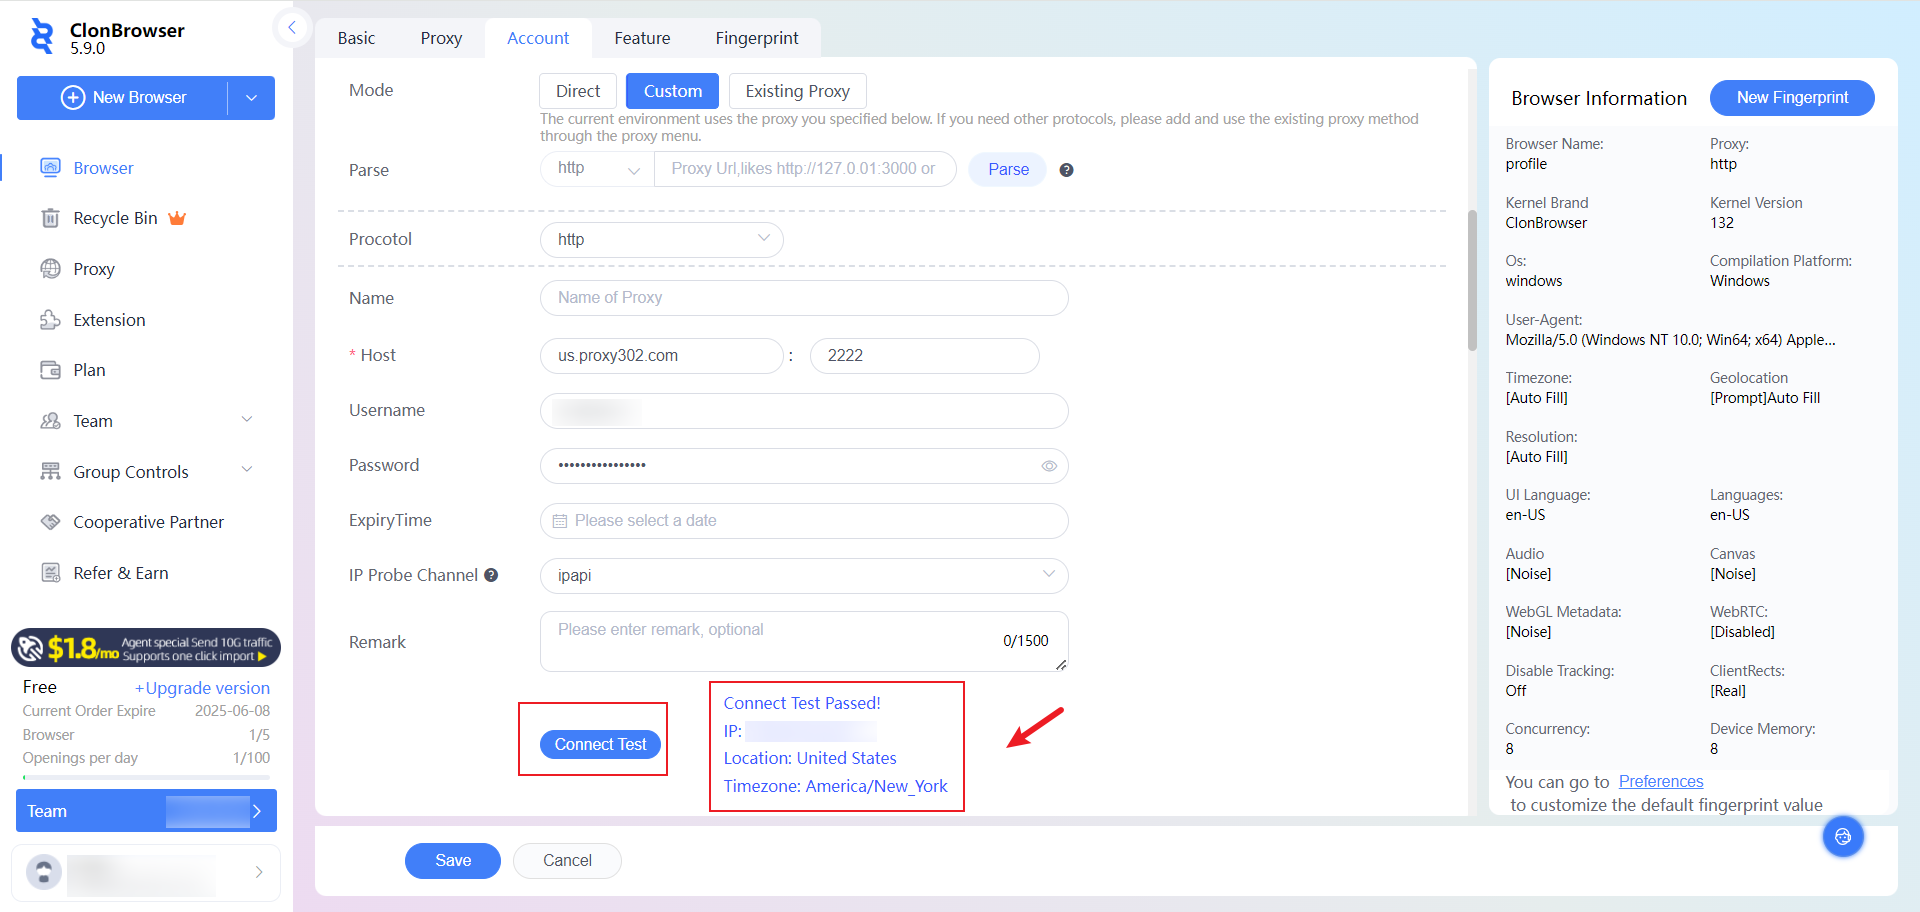
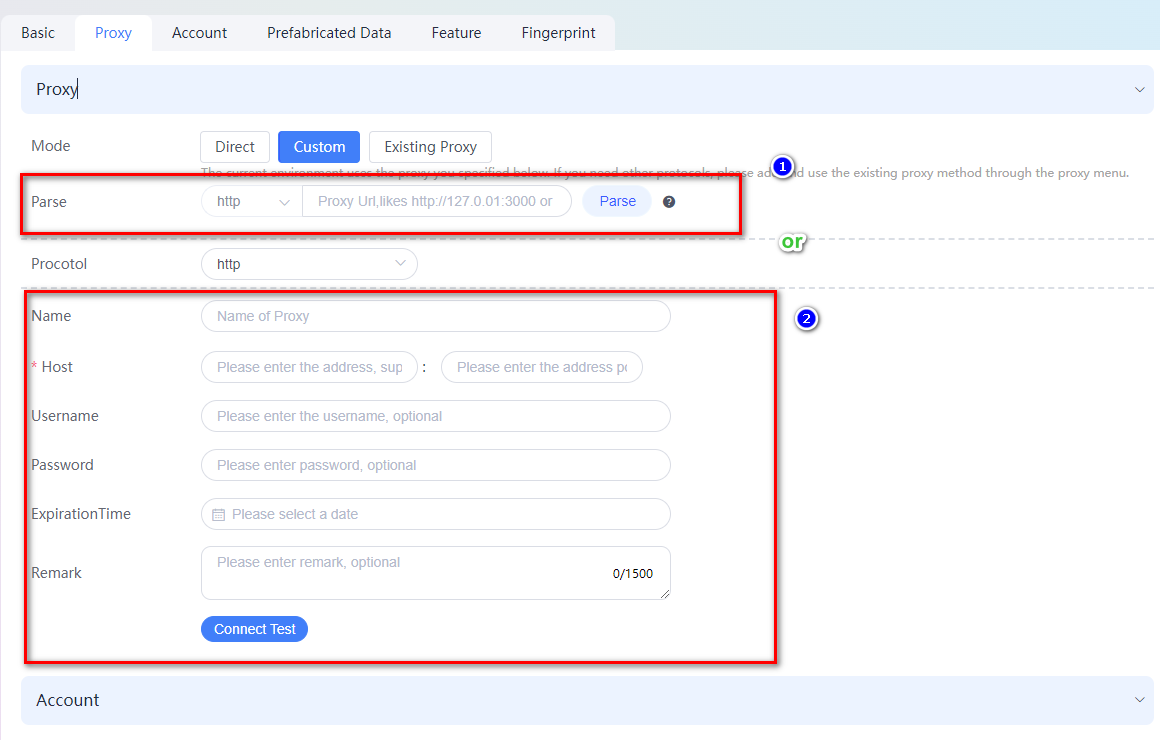
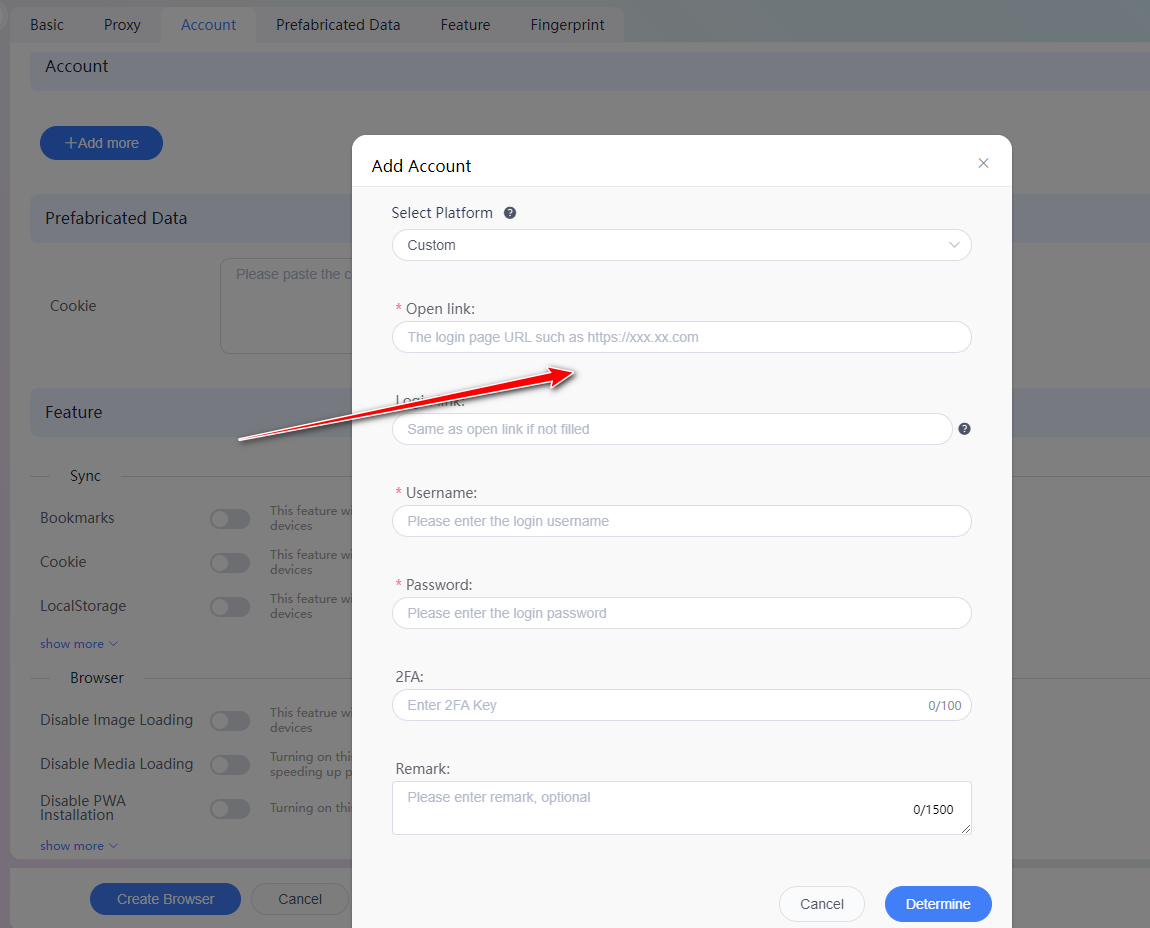
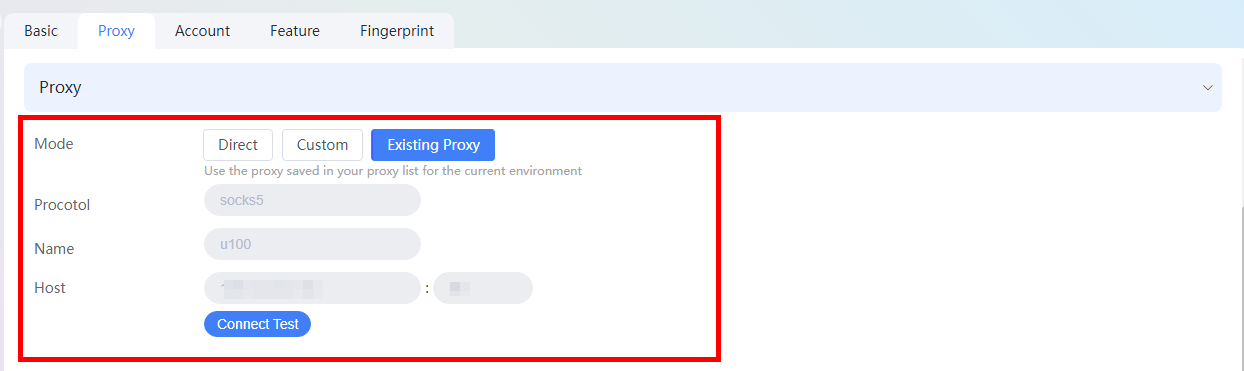
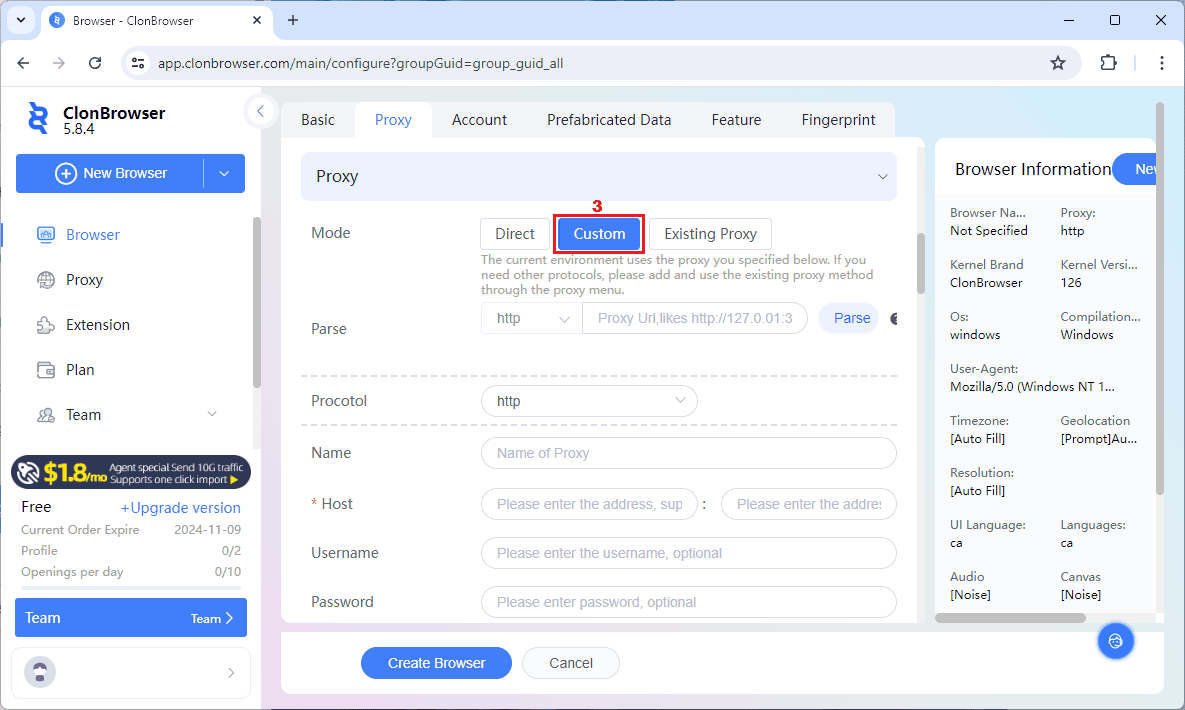
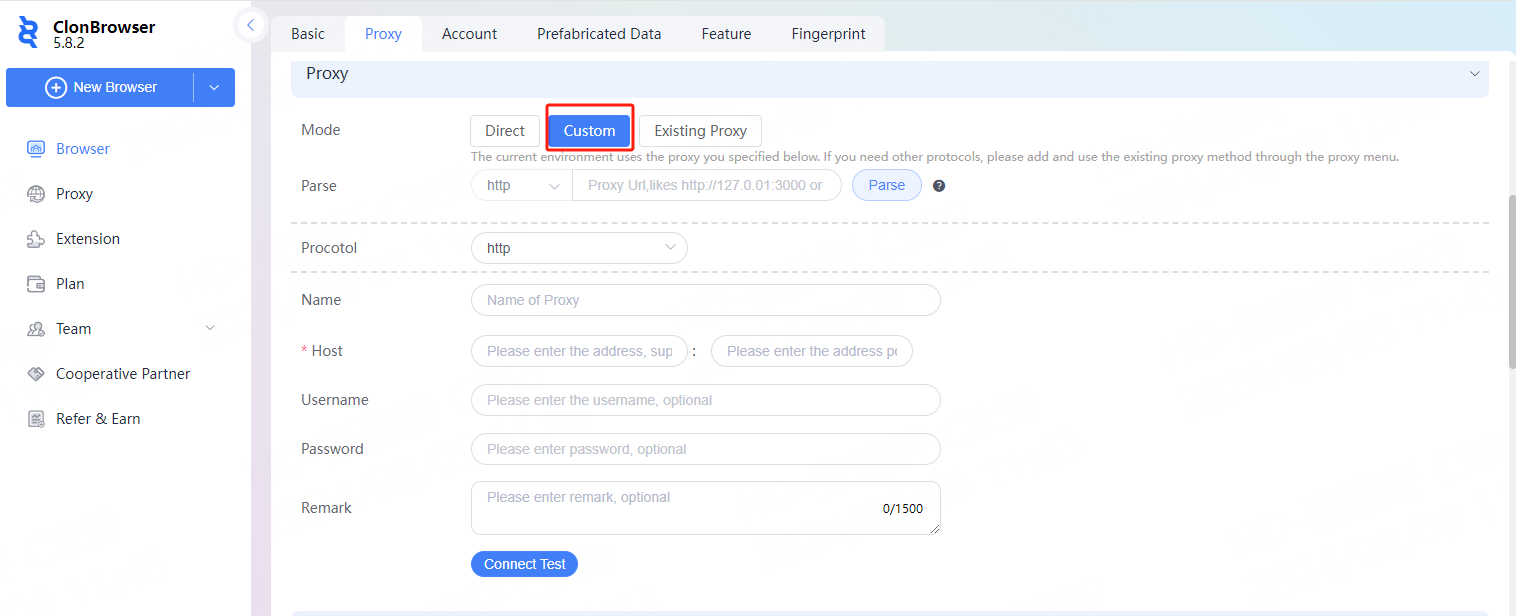
3.4 Then click Proxy and select Custom.
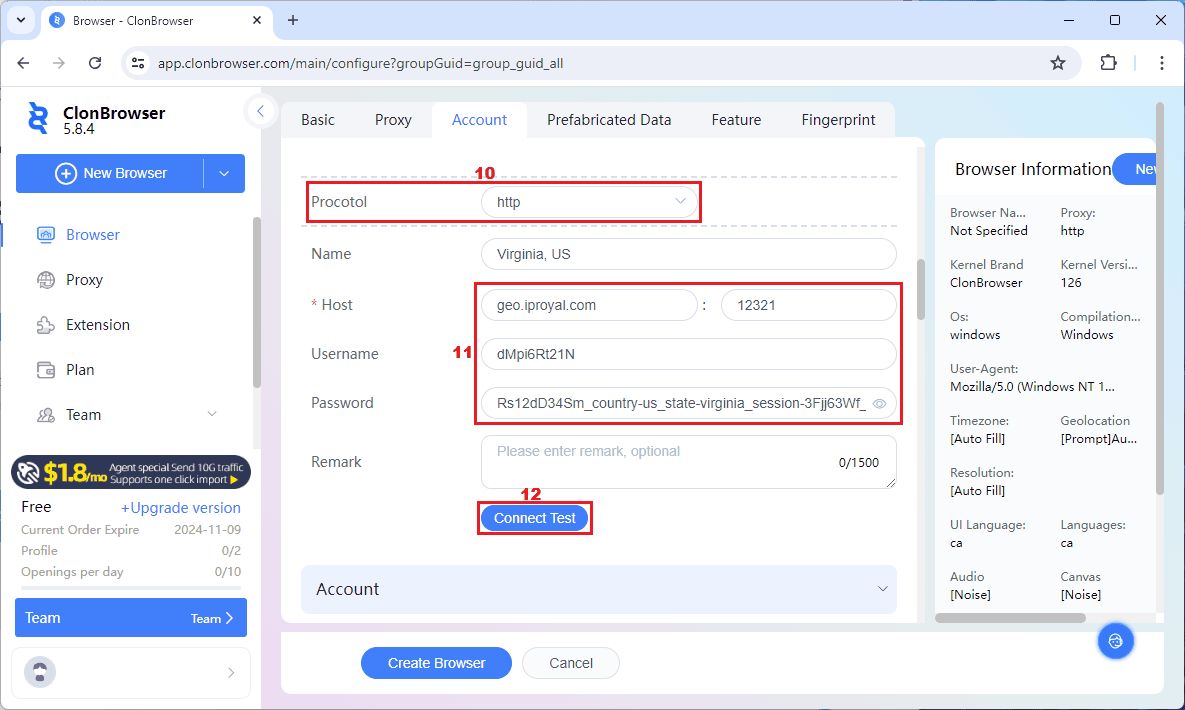
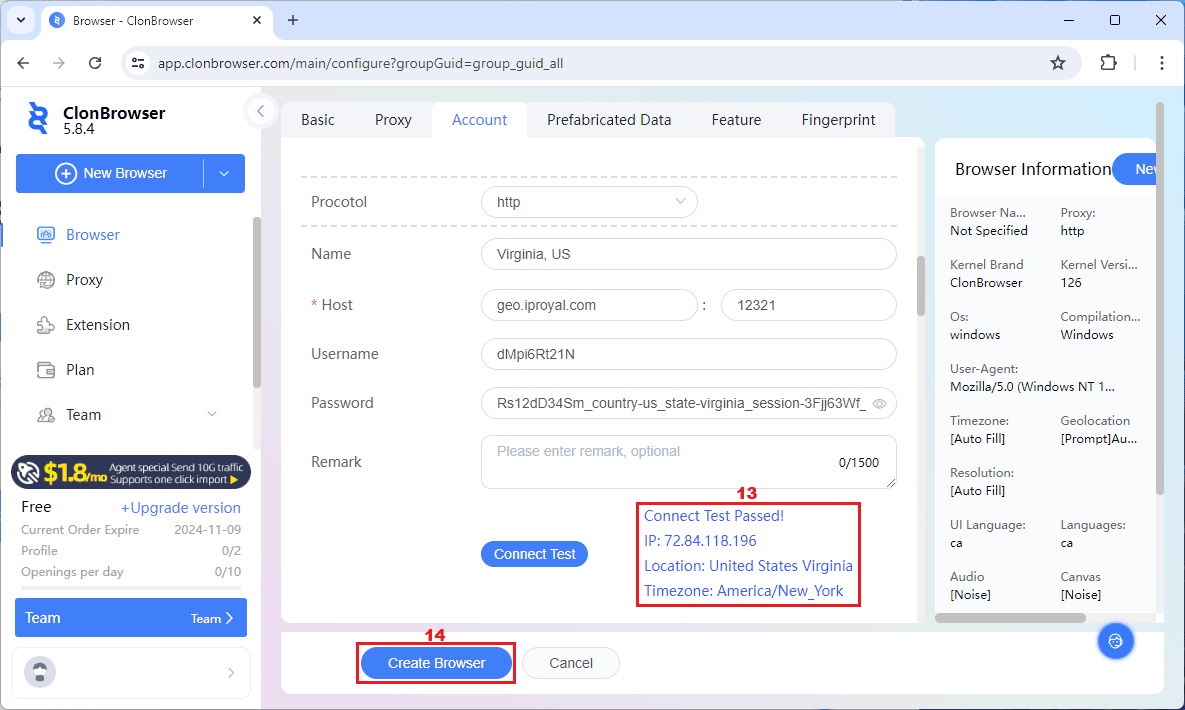
3.5 Then click Procotol, select the socks5 protocol, paste the proxy IP and port in, click Connect Test, and click Save when you’re done!
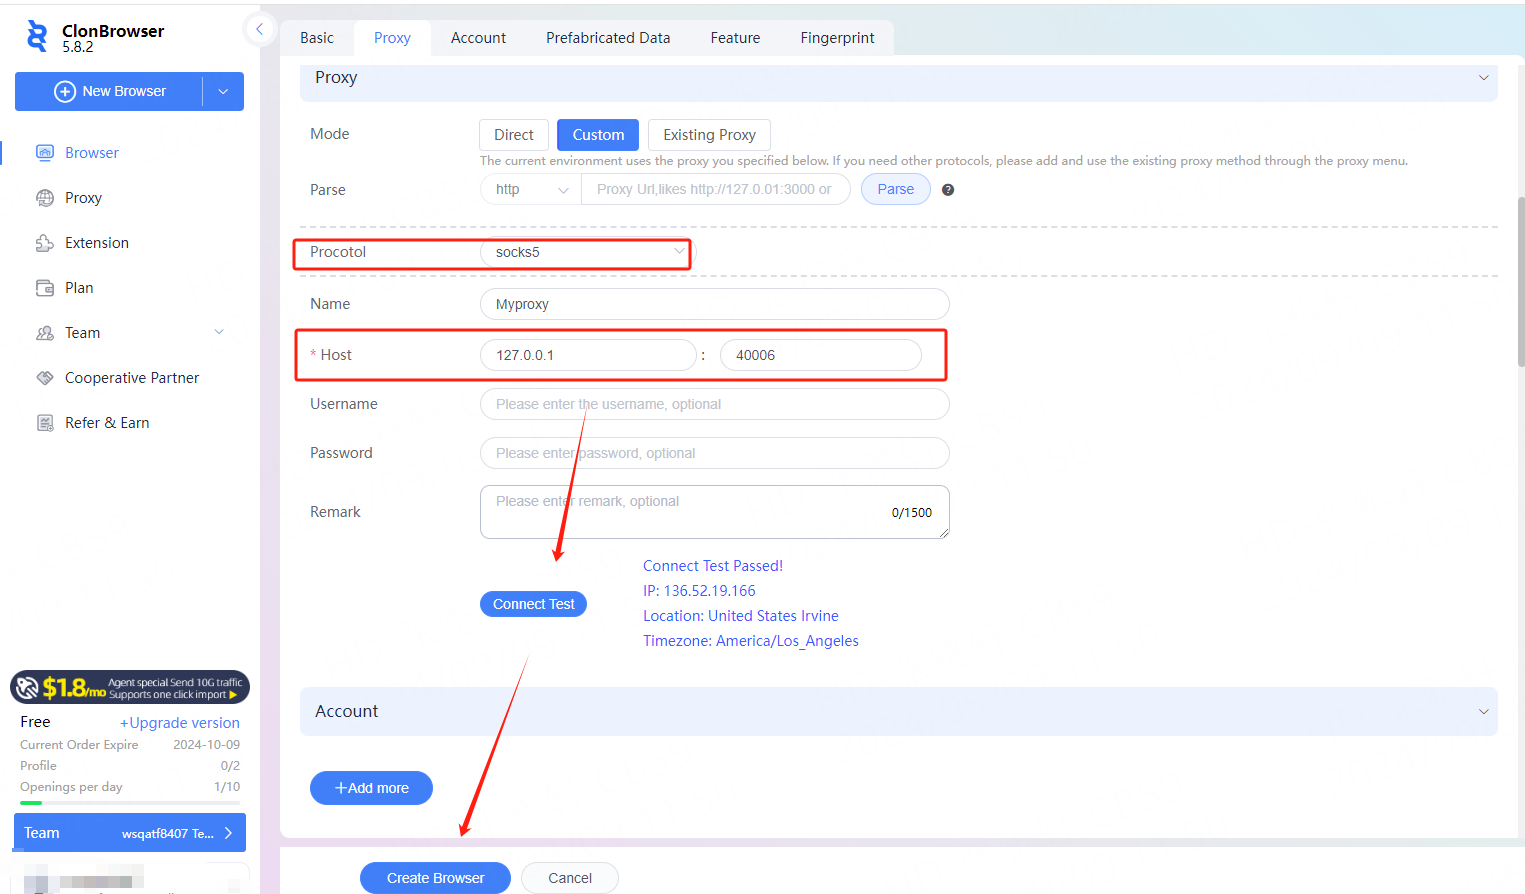
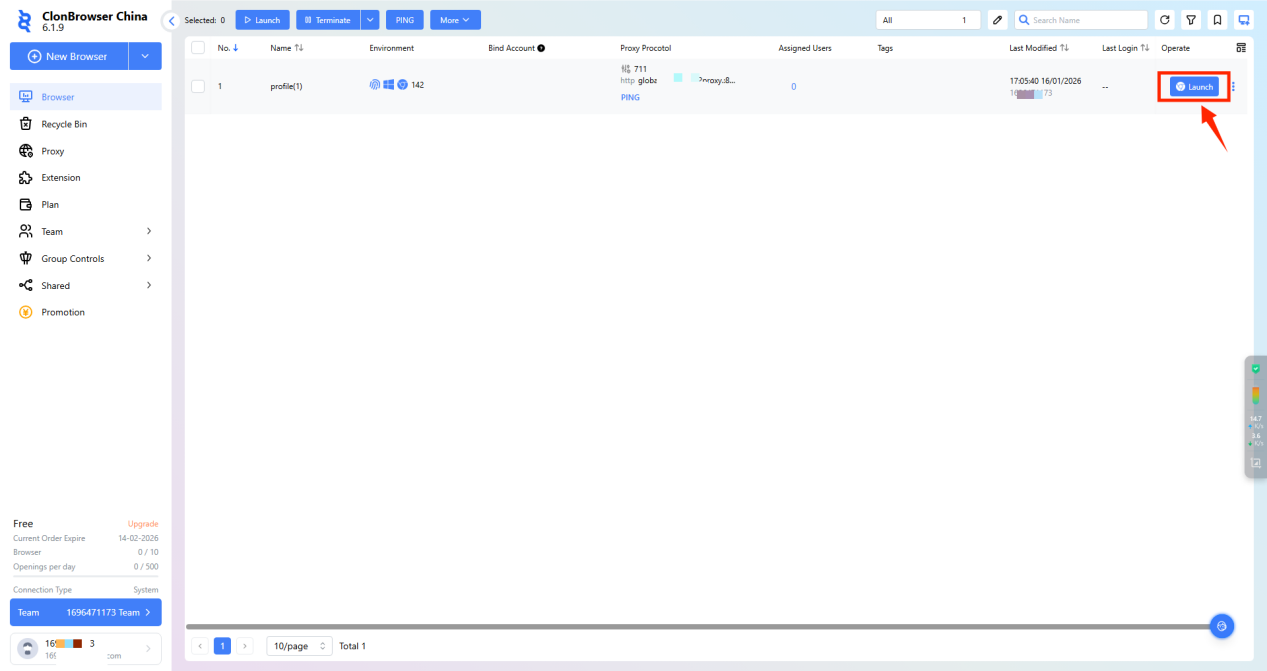
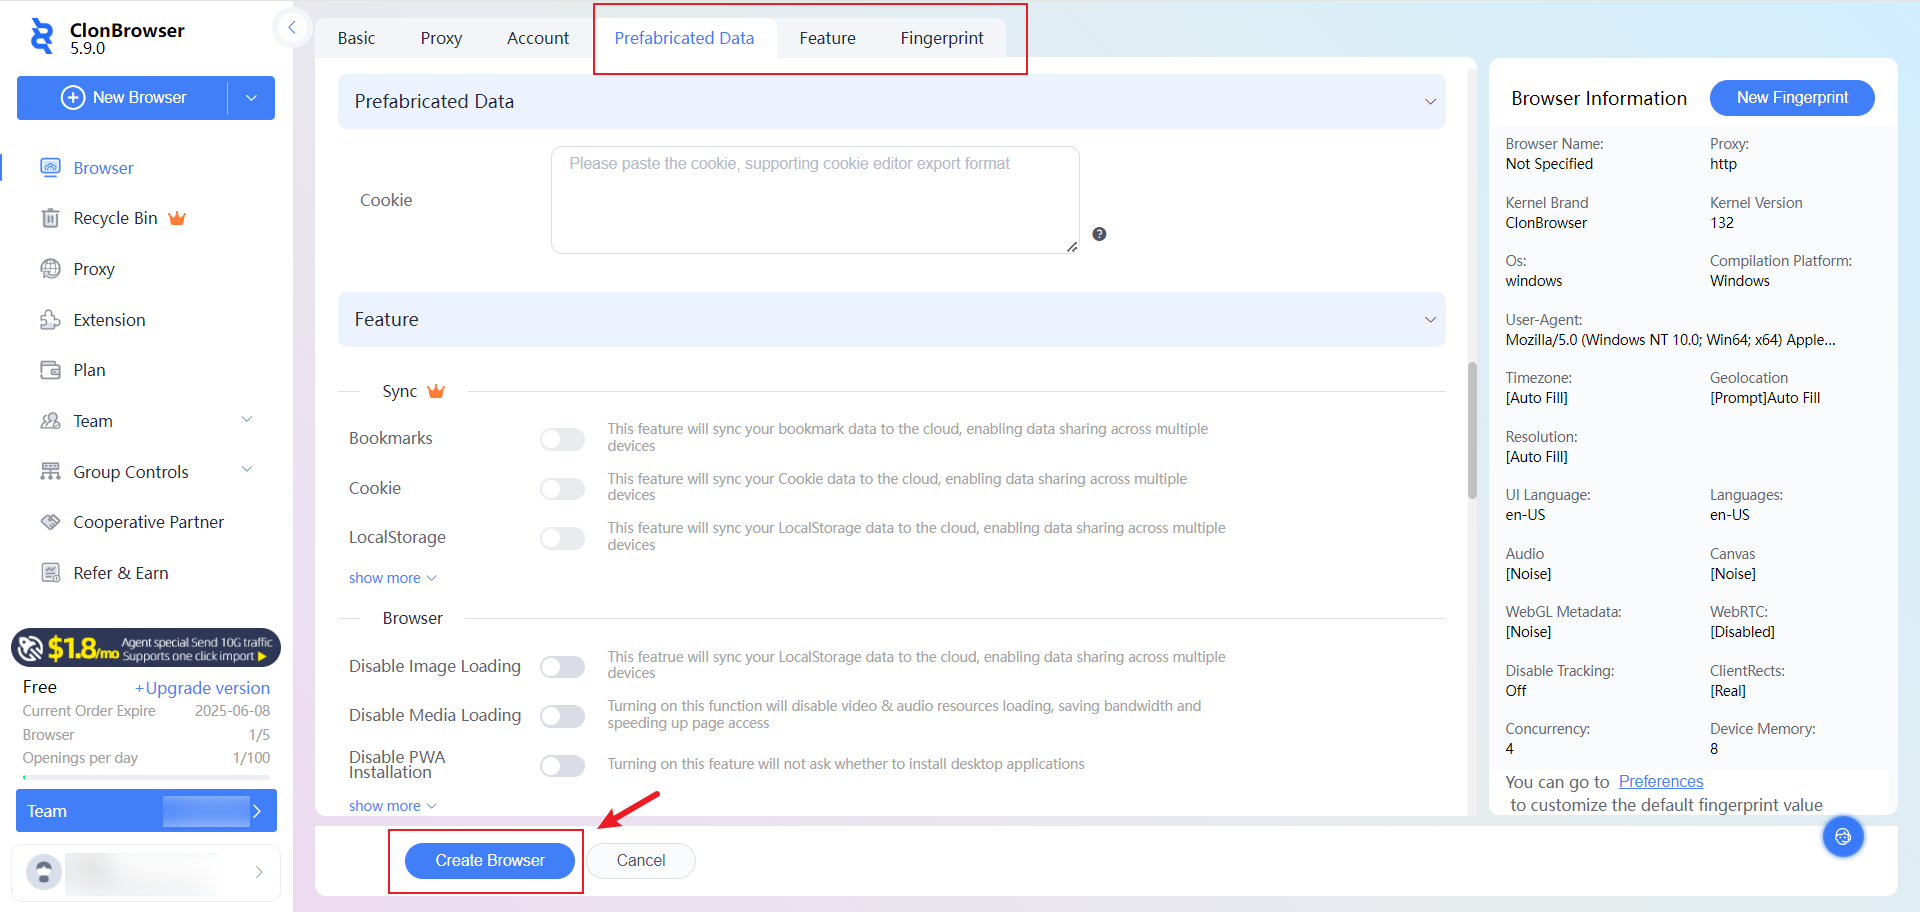
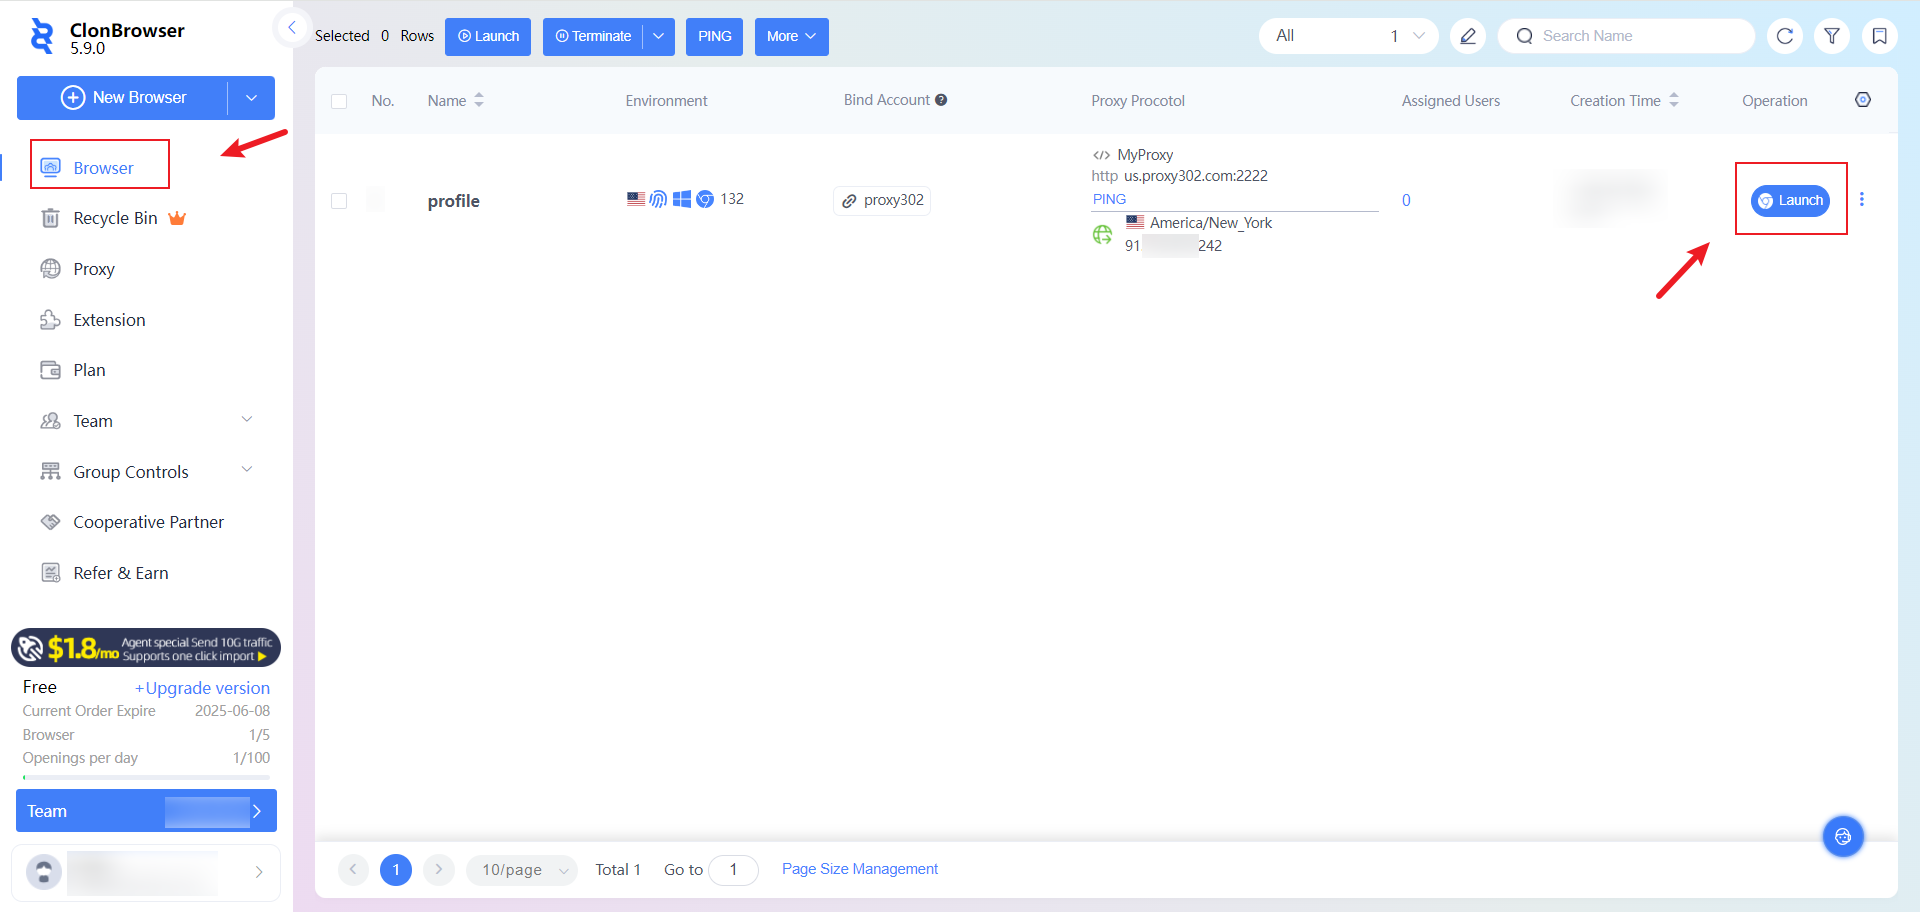
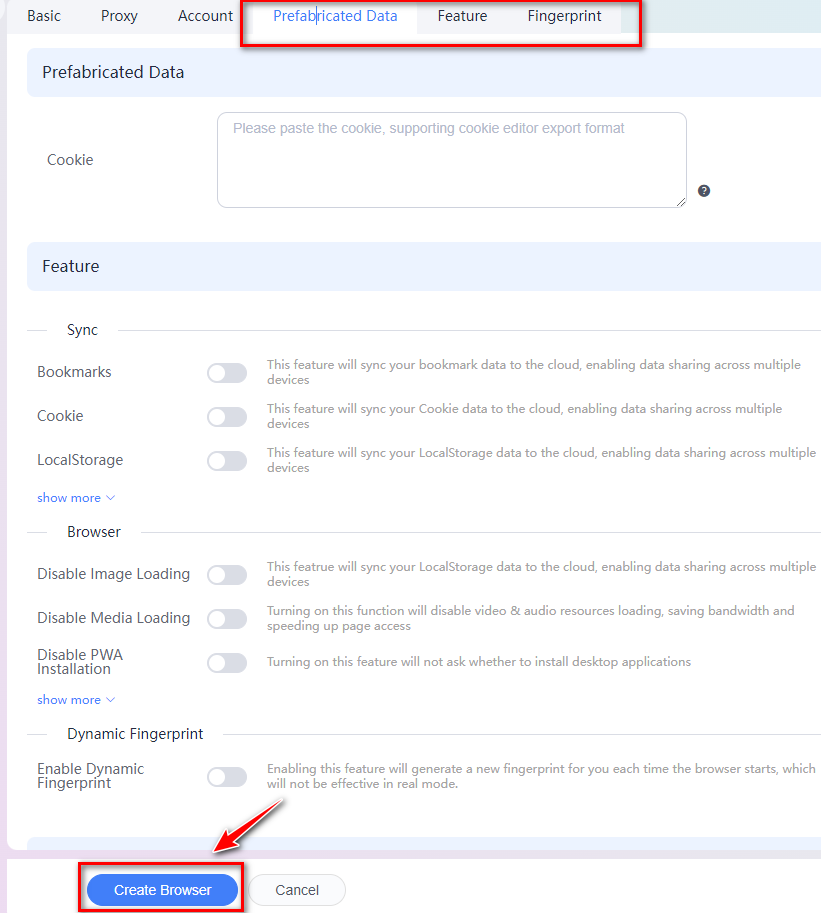
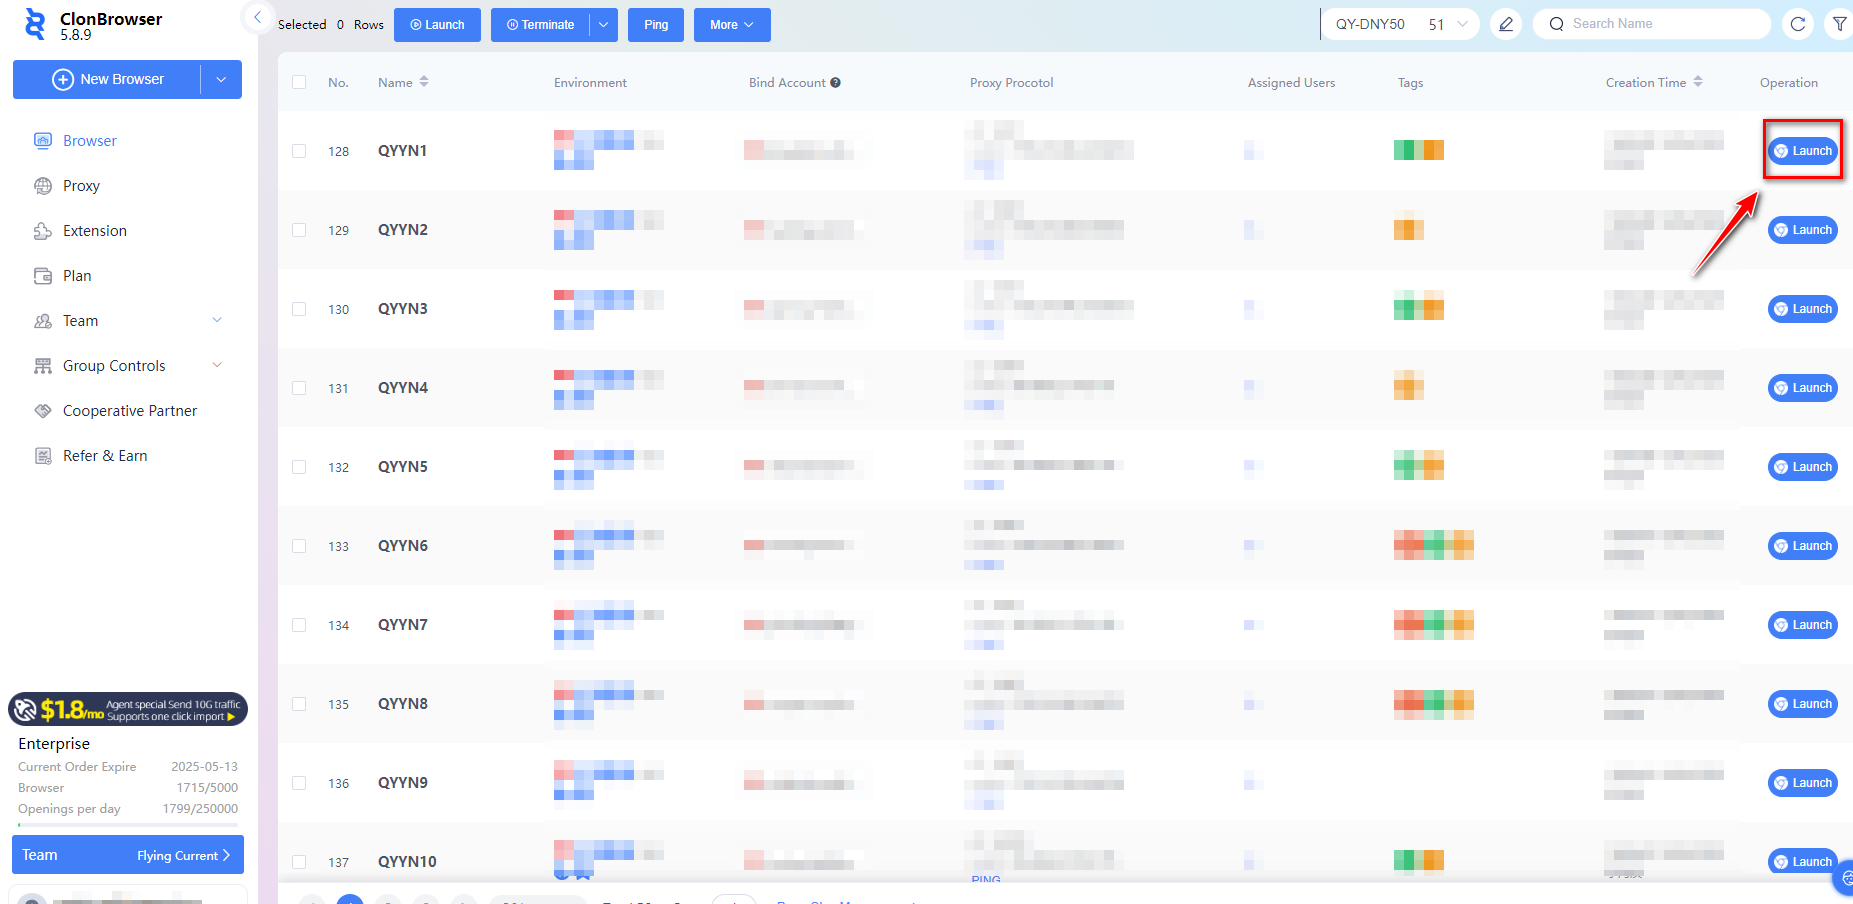
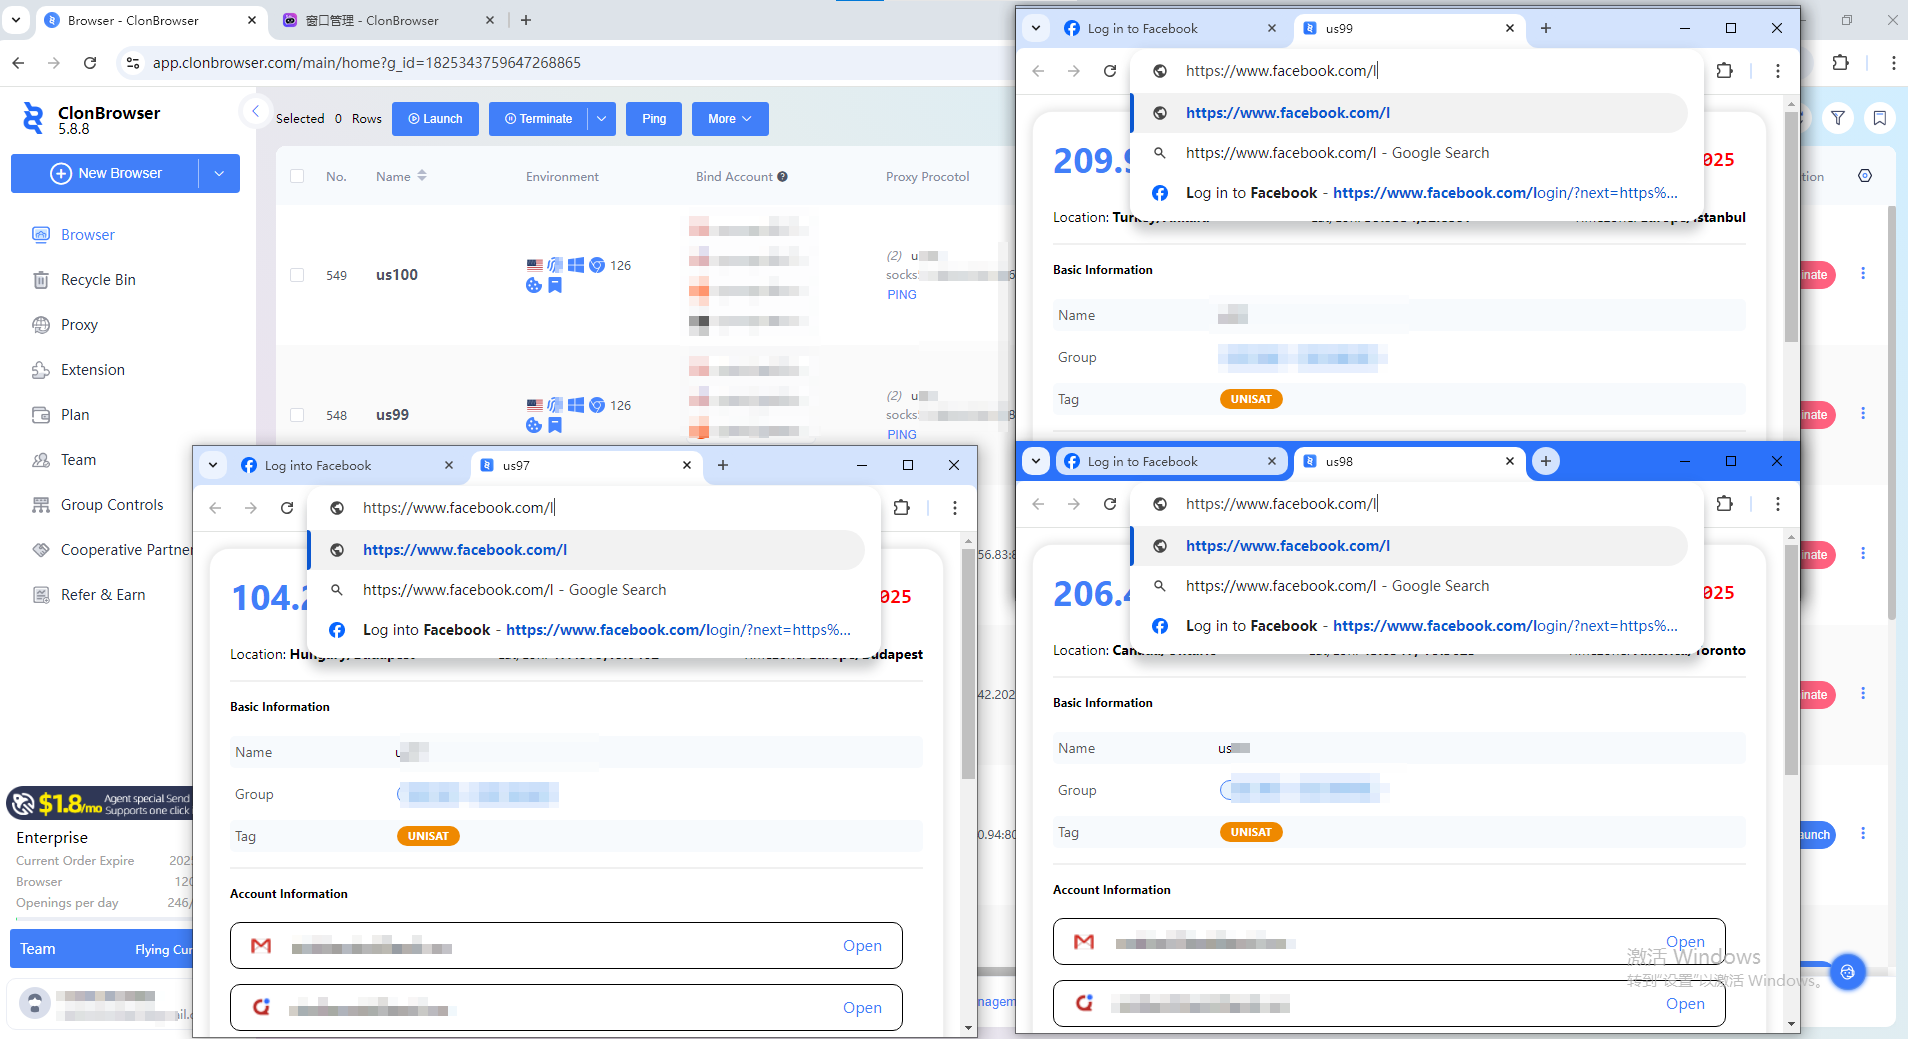
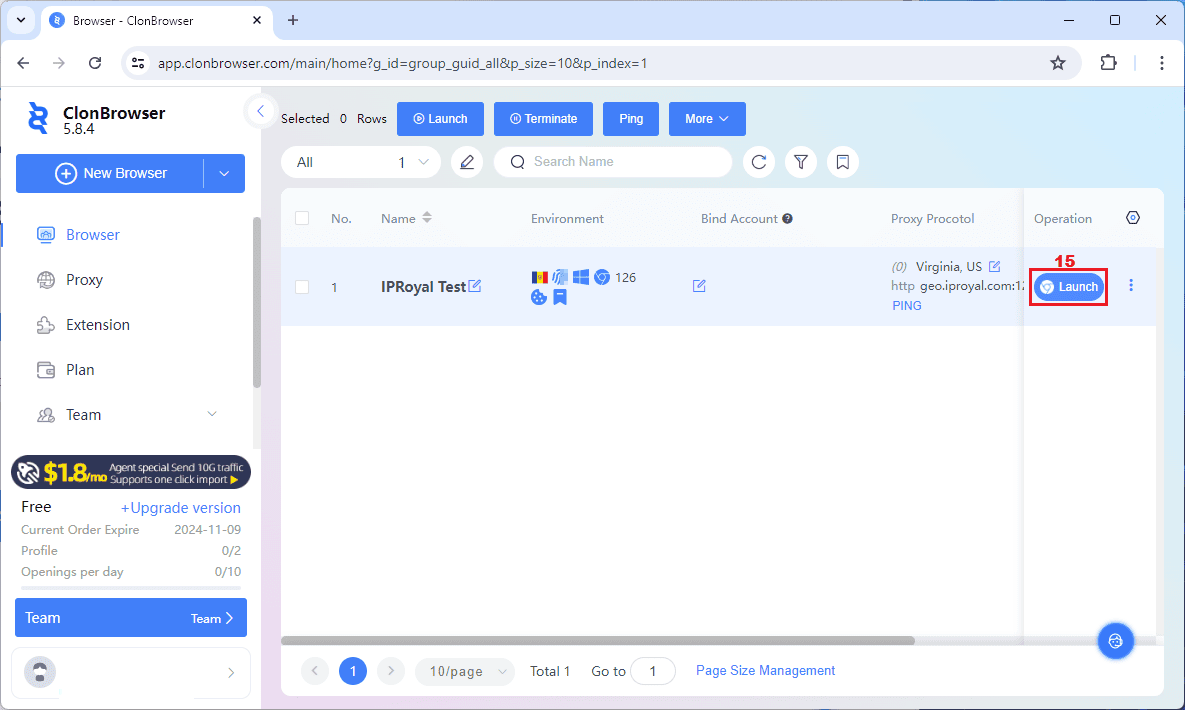
3.6 Save all settings and click “Start”.

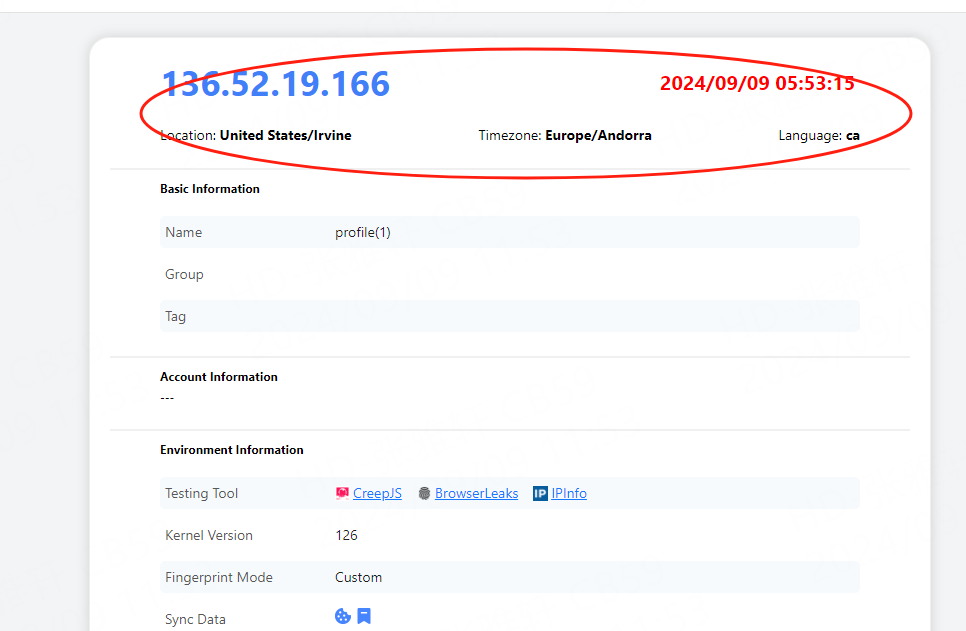
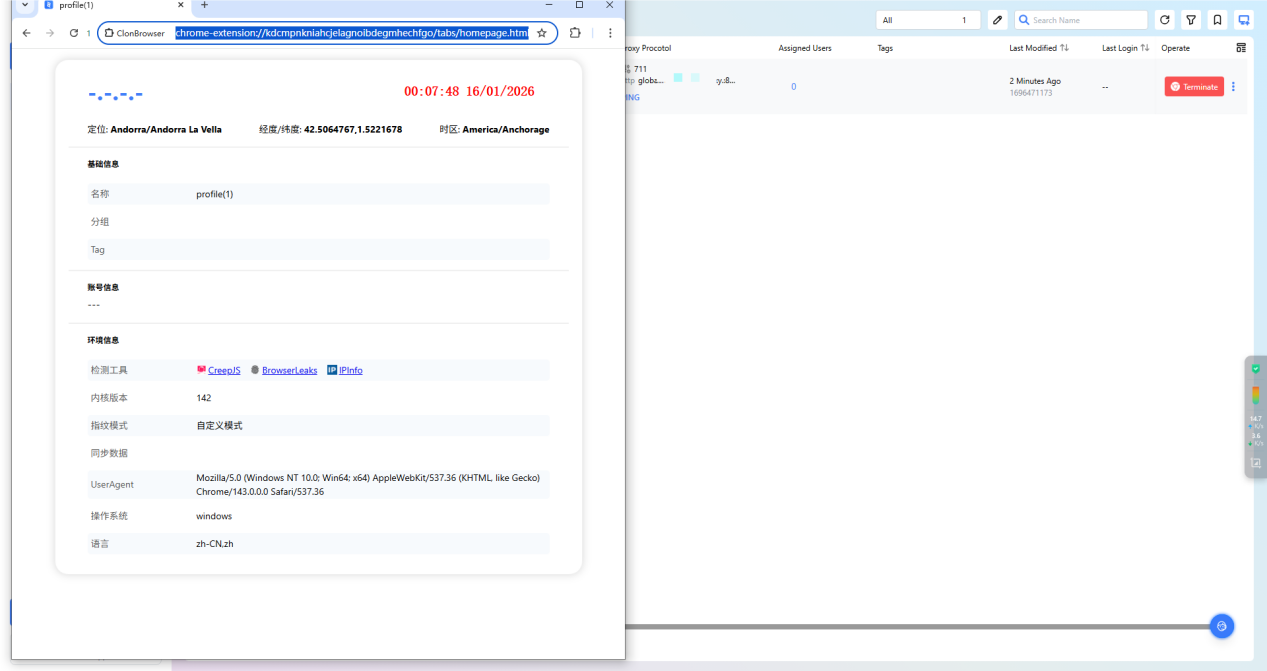
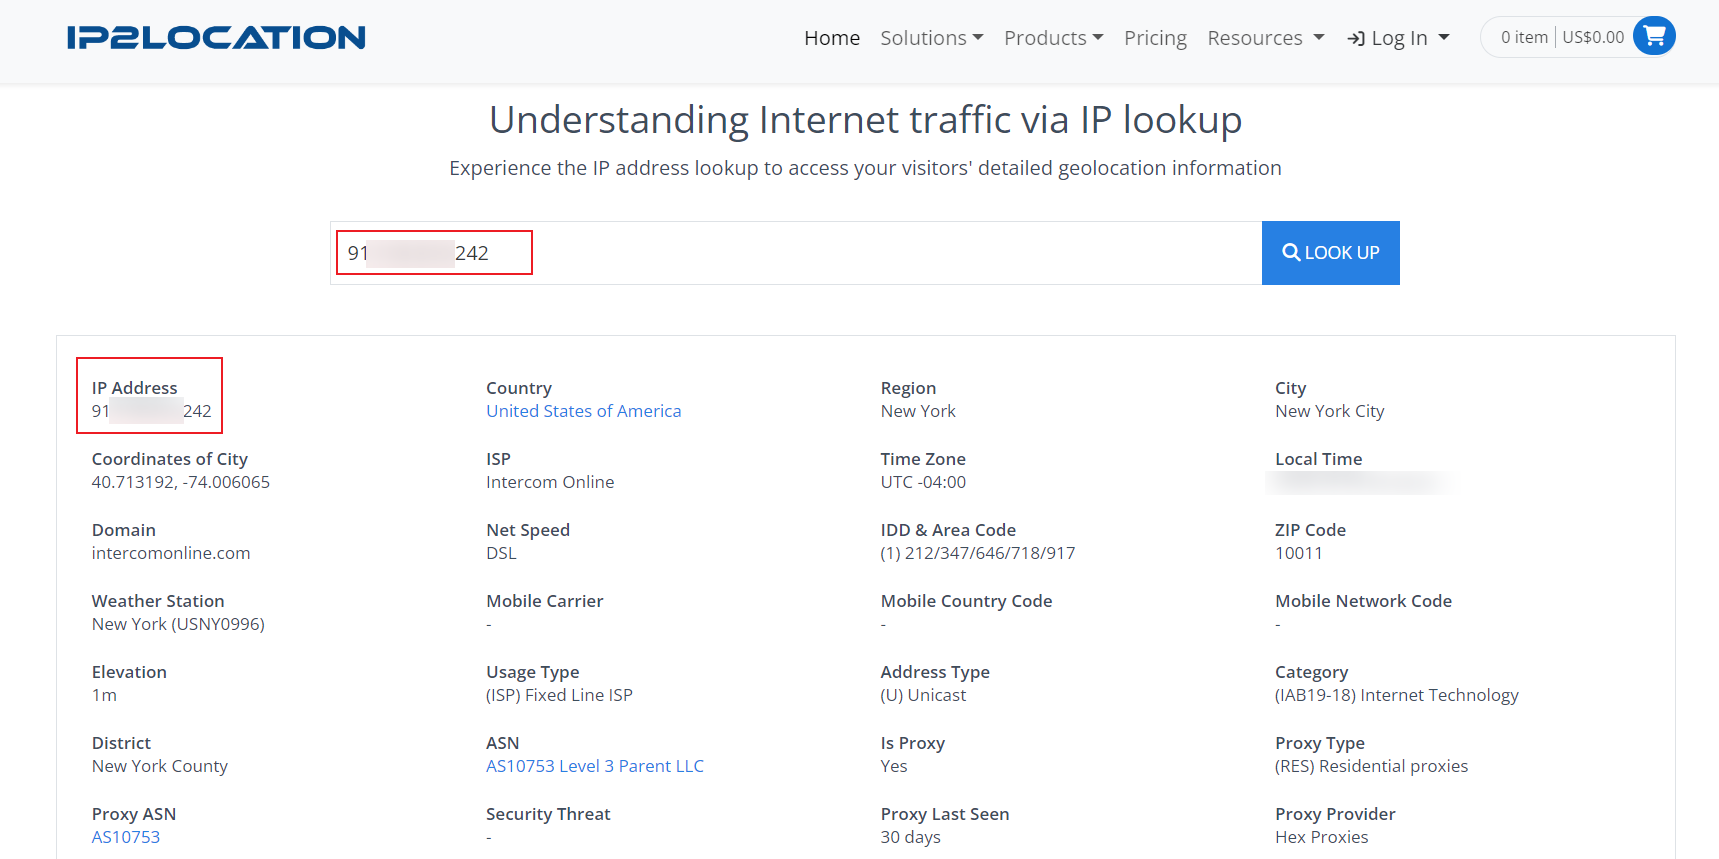
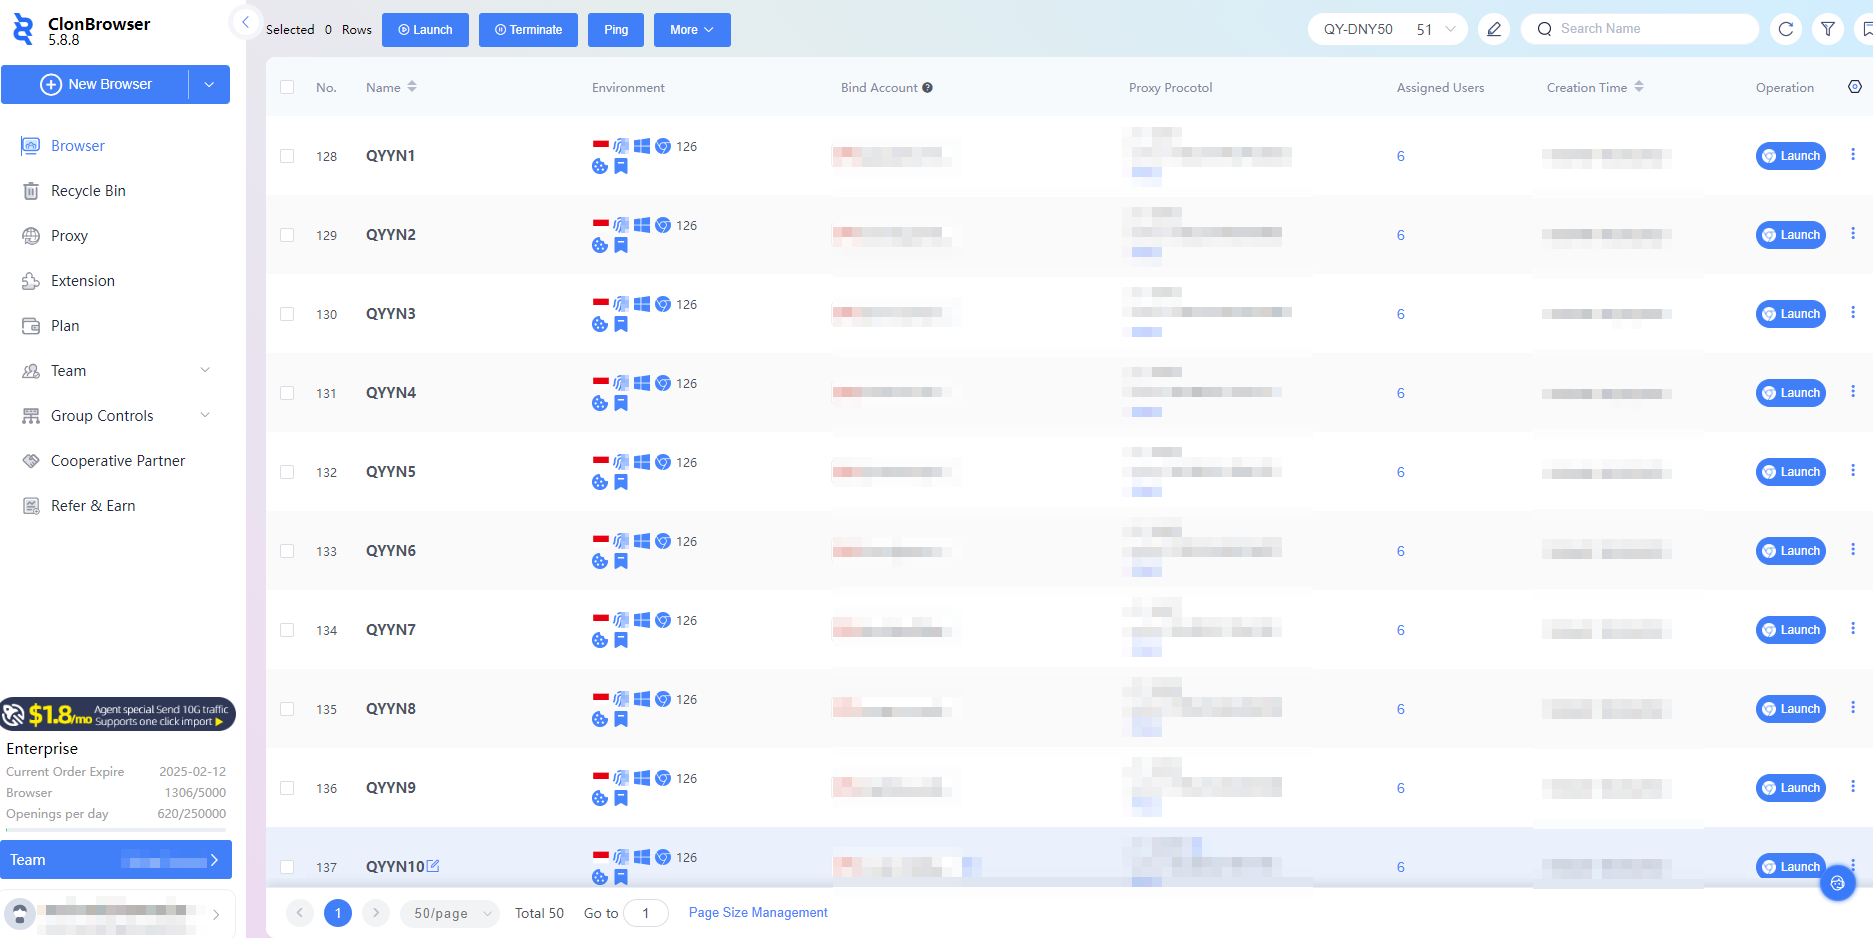
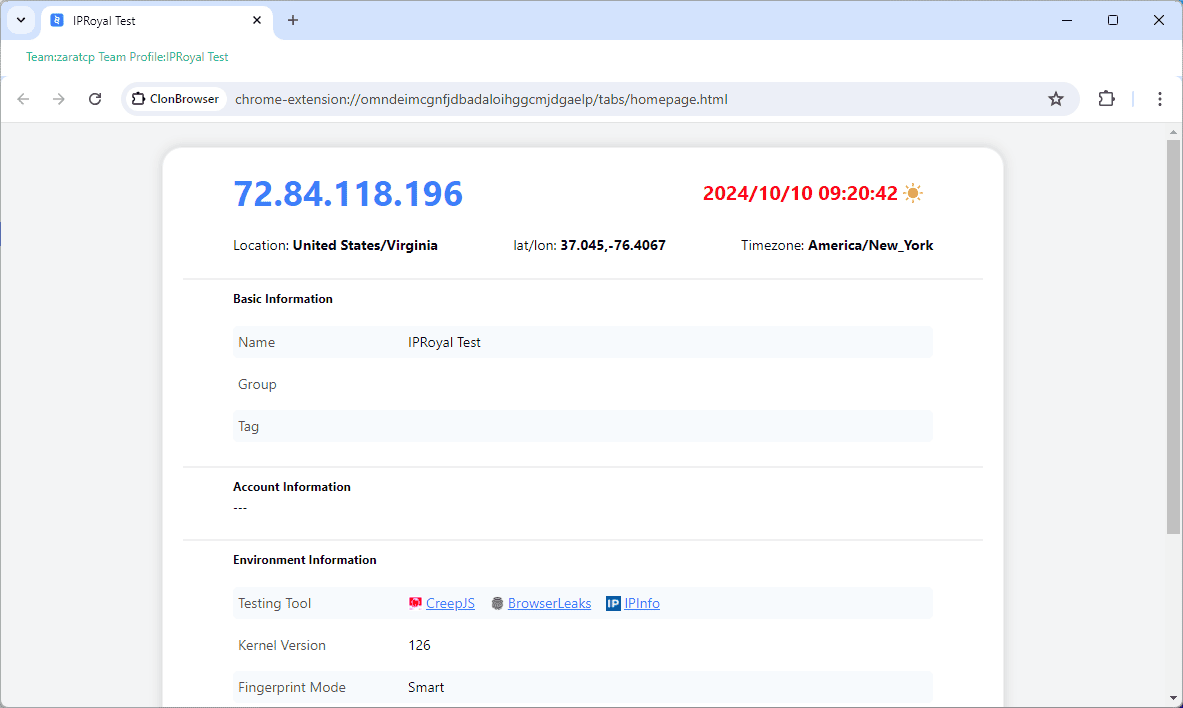
3.7 The proxy IP is now set successfully