ClonBrowser
  • Home
  • Solutions
    • Ad Verification
    • Affiliate Marketing
    • E-commerce
    • Social Media
  • Resources
    • Help Center
    • Blog
    • About Us
  • RPA Market
  • Price
  • Download
  • Get Started
  • EN
    • English
    • 中文(简)
  • Search
ZH
  • Getting started
    • Download Installation And Registration
    • How ClonBrowser buys packages
    • How to Renew ClonBrowser
    • How to Add Configuration
    • How to Increase the Sub-Account Limit
    • App Install for MAC OS
    • How to purchase platform IP
  • Set Browser Configuration Information
    • Add New Browser Configuration
    • Browser Overview
    • Proxy Protocol Settings
    • Time Zone Setting
    • Other Settings
    • Advanced Settings
    • Continuous Creation
    • Configuration Summary
    • Commit Configuration
    • Added Successfully
  • ClonBrowser Invitation For Discount
    • ClonBrowser Invitation For Discount
  • Team Settings
    • Switch To Your Own Team
    • My Team
    • Team Page
    • Send Invitation Email
    • Send Mail Successfully
    • Join The Team
    • Invitees Join The Team
    • View Configuration Information
    • Configuration Information
    • Configure Information Sharing
    • Share Success
    • Set Permissions
    • How ClonBrowser Assigns Configuration To Team Members
    • How ClonBrowser Operates On Creating Configurations
  • Operation skills
    • Share cookies
    • How ClonBrowser restricts web access
    • How to Create Regional Configuration
    • Cookie Import

How ClonBrowser restricts web access

1. In the ClonBrowser client, click the “…” button configured in the browser to display the drop-down box.
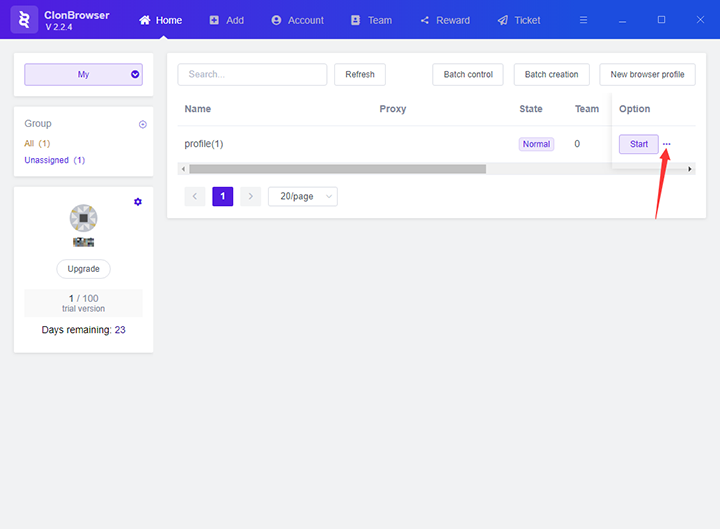
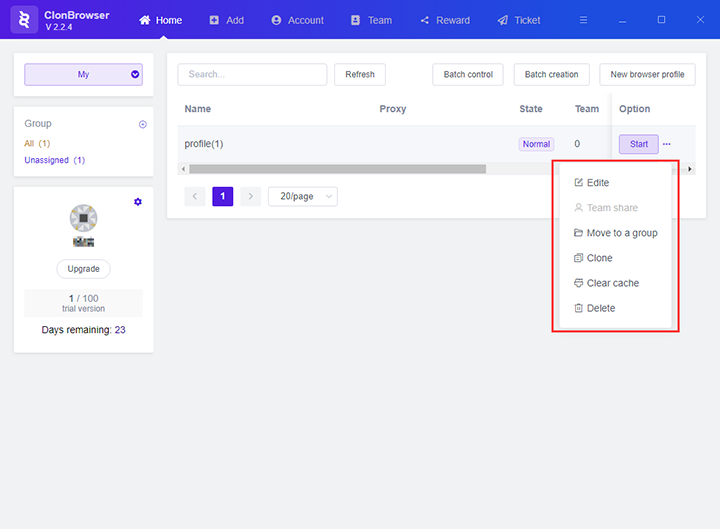
click the

drop-down box

2. Click the “Edite” button in the drop-down box to edit the configuration.
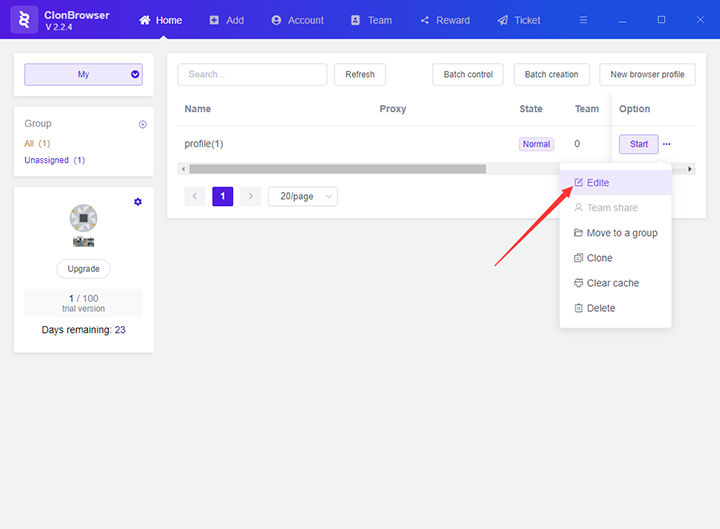
Click the Edite button

edit the configuration

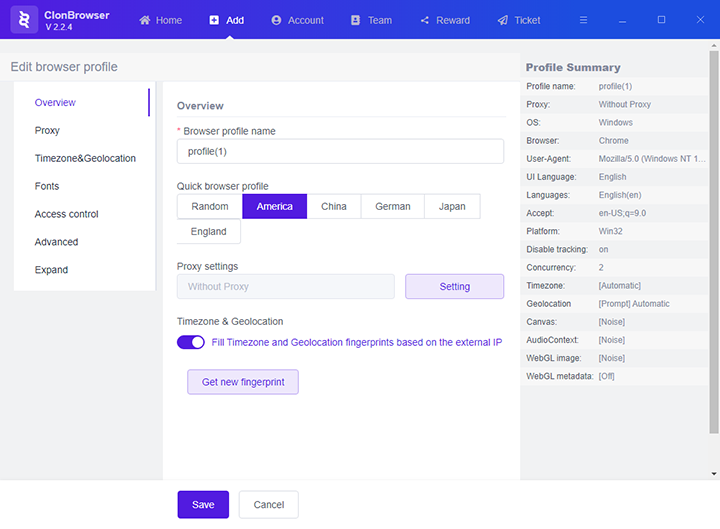
3. Click the “Access control” menu on the right side of the ClonBrowser client to enter the access control page.
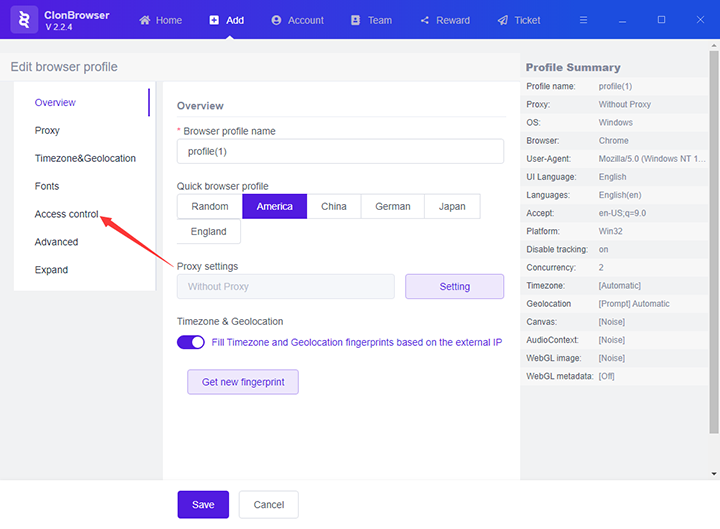
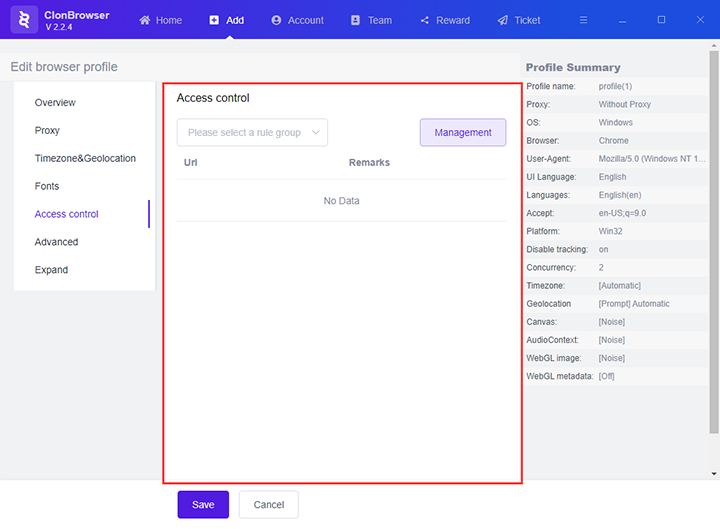
Click the Access control menu

access control page

4. Create a rule group

(1) Click the “Management” button
(2) Click the “New group” button in the pop-up window
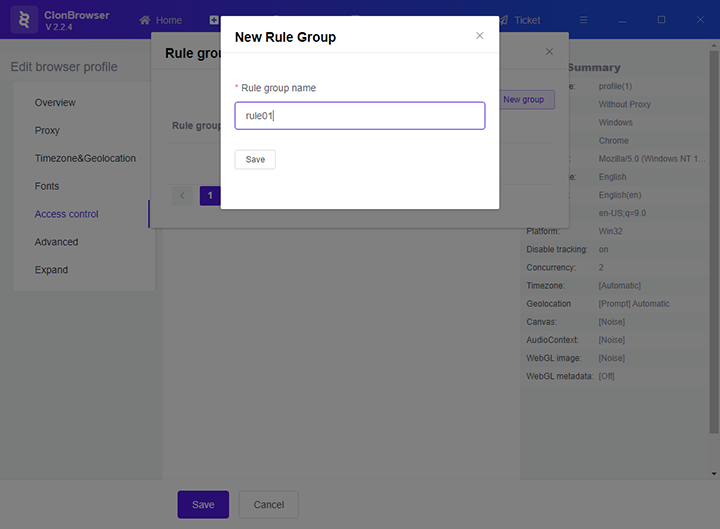
(3) Fill in the name of the rule group
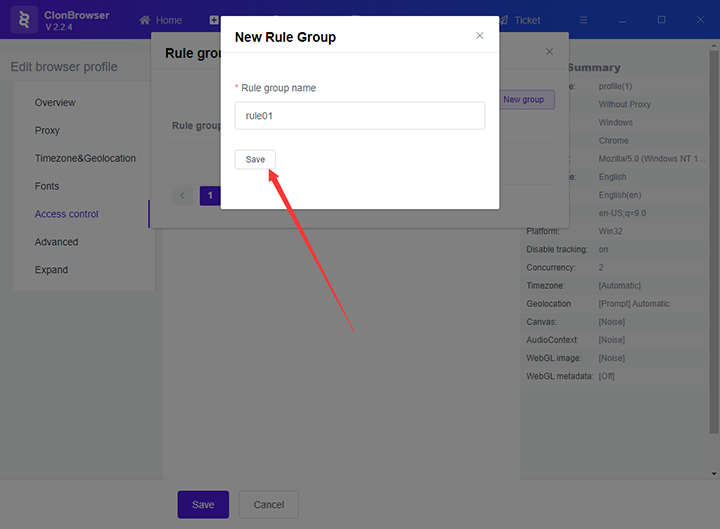
(4) Click the “save” button
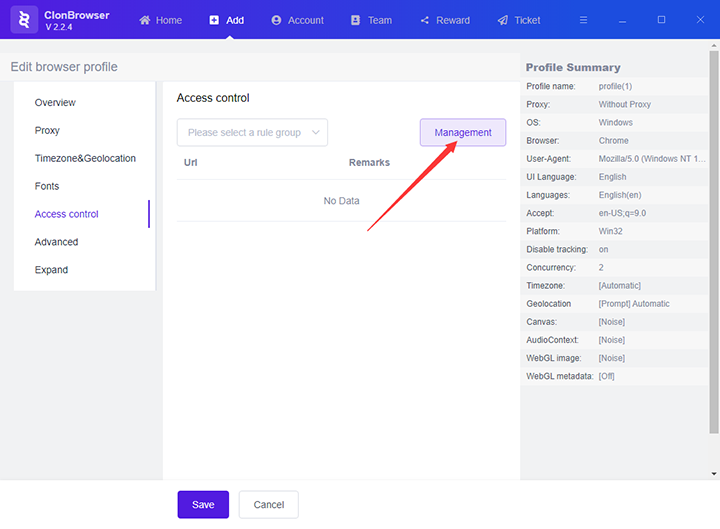
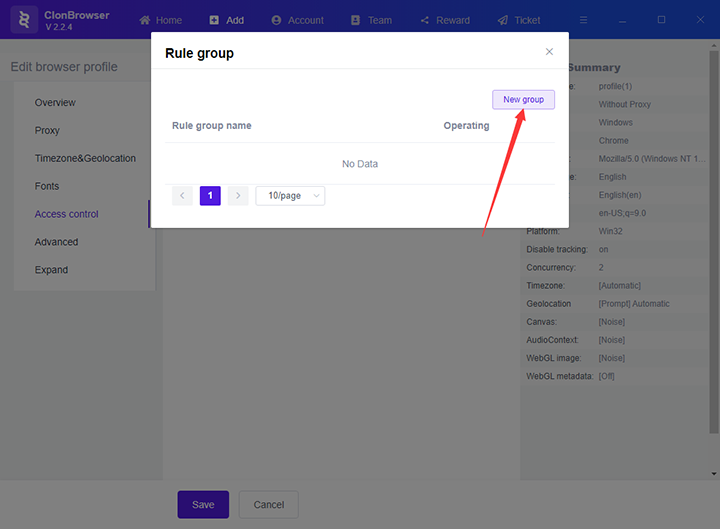
Click the Management button

Click the New group button

Fill in the name

Click the save button

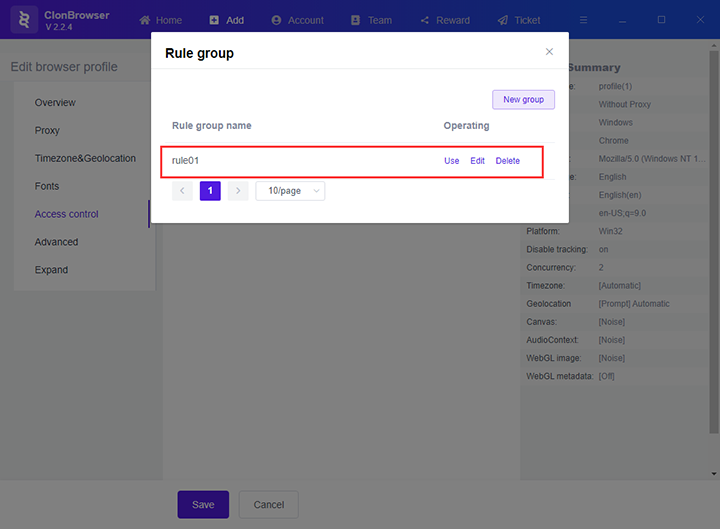
Create a rule group

5. Click the “Edit” button of the rule group to enter the edit rule page.
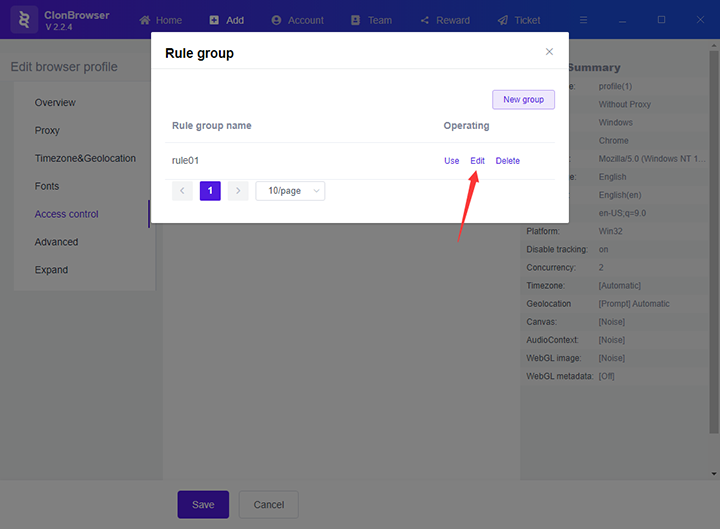
Click the Edit button

edit rule page

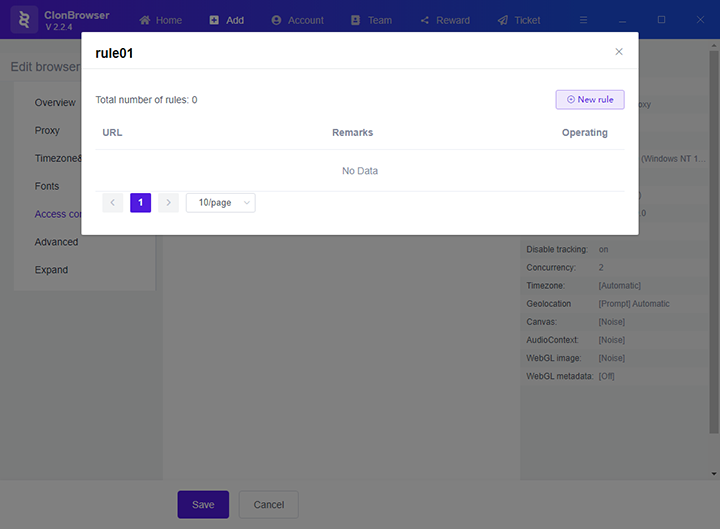
6. Click the “New rule” button, fill in the URL and remarks you want to restrict access in the pop-up window.
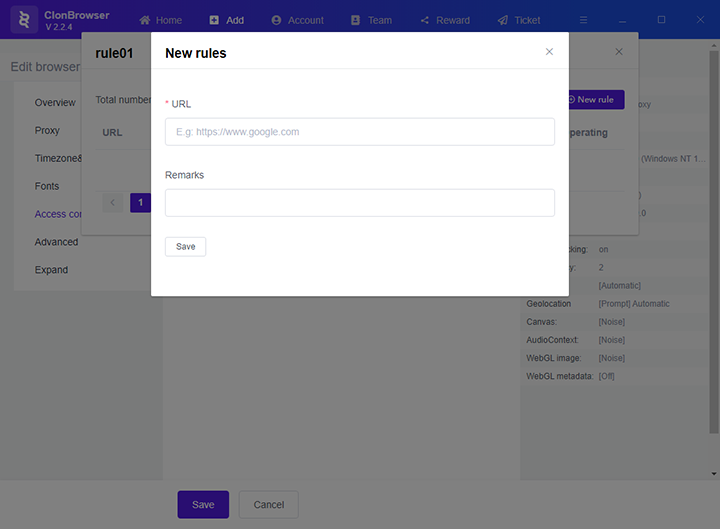
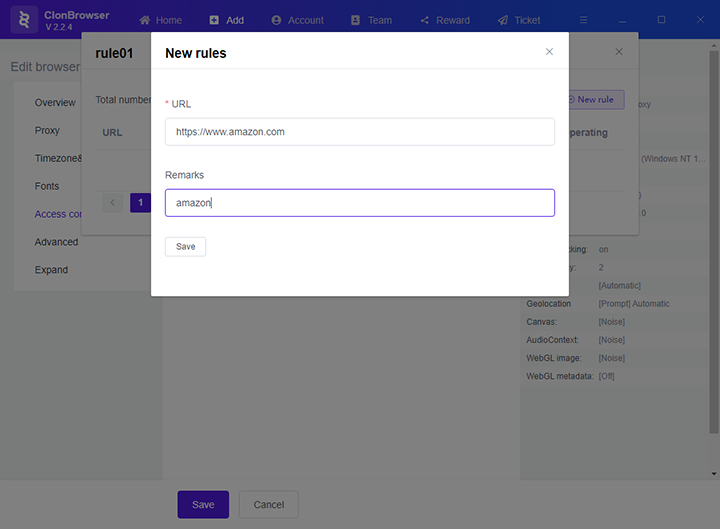
Click the New rule button

fill in the URL

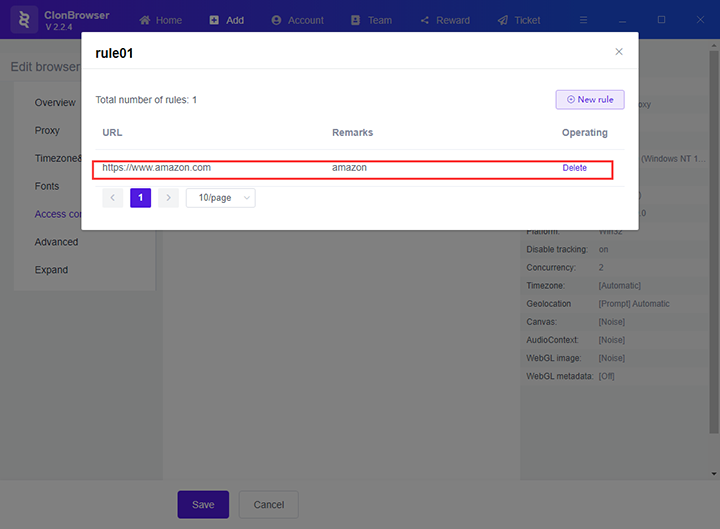
7. After filling in, click the “Save” button.
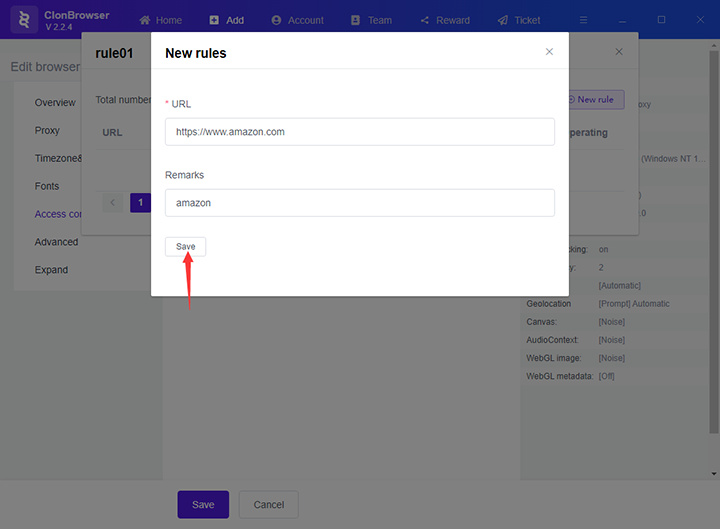
click the Save button

role page

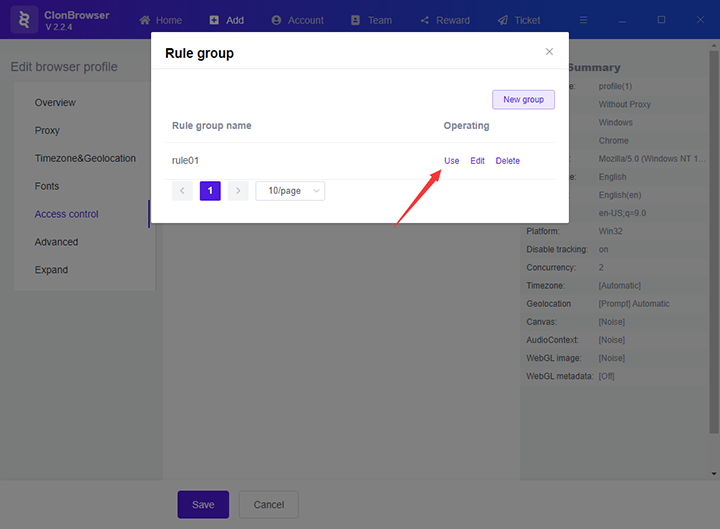
8. Close the pop-up window and click the “Use” button of the group to use the rule group.
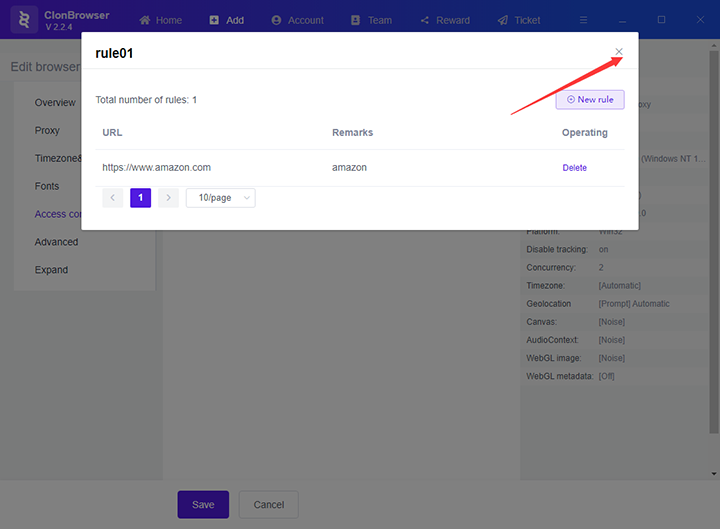
Close the pop-up window

click the Use button

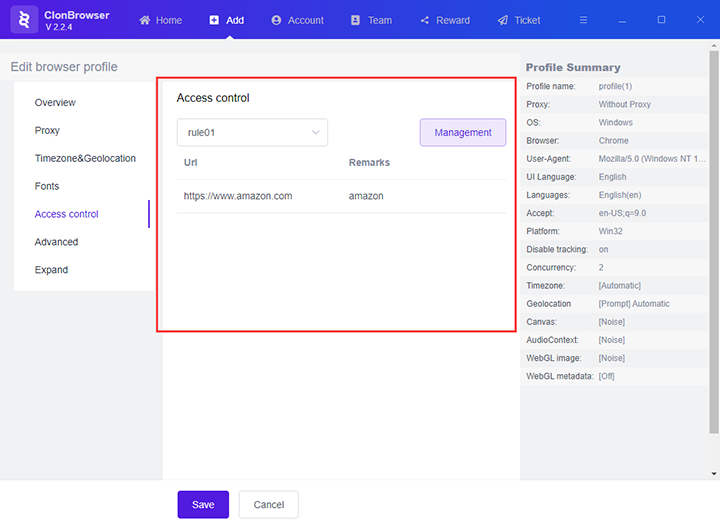
use the rule group

9. Click the “Save” button to save the configuration.
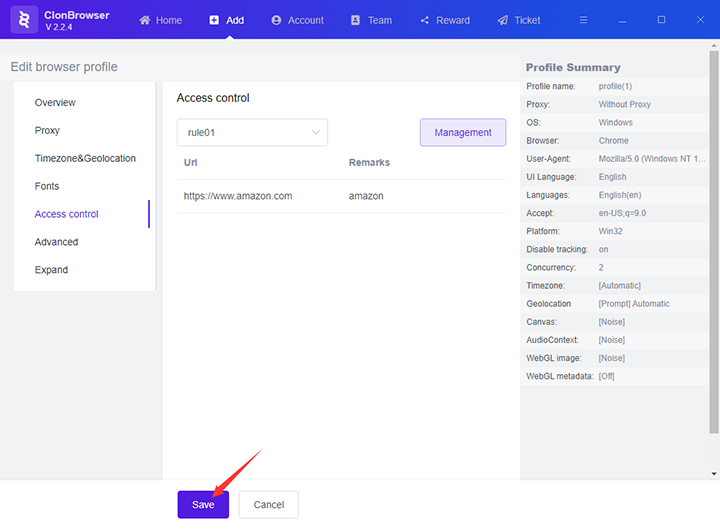
Click the Save button

10. After saving the configuration, this configuration restricts access to this website (www.amazon.com).
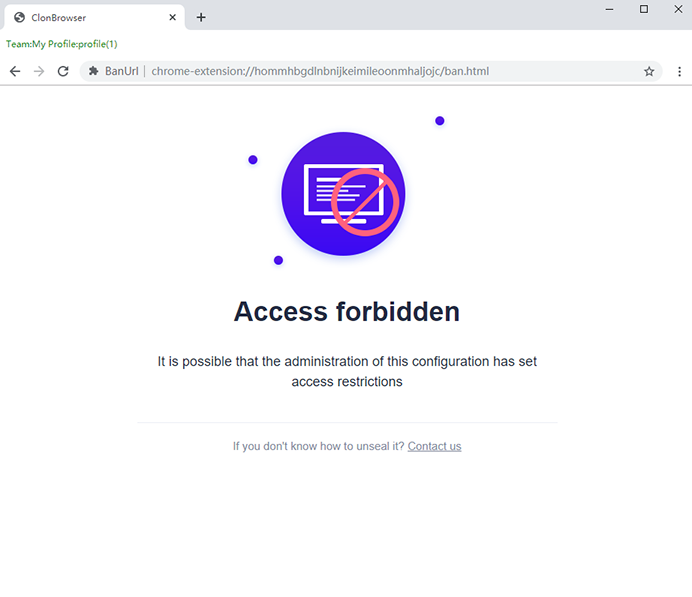
access to this website

英语

Let’s Talk

Services

  • Help Center
  • Official Blog
  • Pricing Strategy

Policies

  • Privacy Policy

Resources

  • Download Client
  • CN Ver.

Contact Us

Telegram:@clonbrowser
Wechat: clonbrowser2022
clonbrowser
© 2019-2024 ClonBrowser CLOUND NEXUS ECOM SERVICE CO., Limited
How to Renew ClonBrowser How ClonBrowser Assigns Configuration To Team Members
Scroll to top